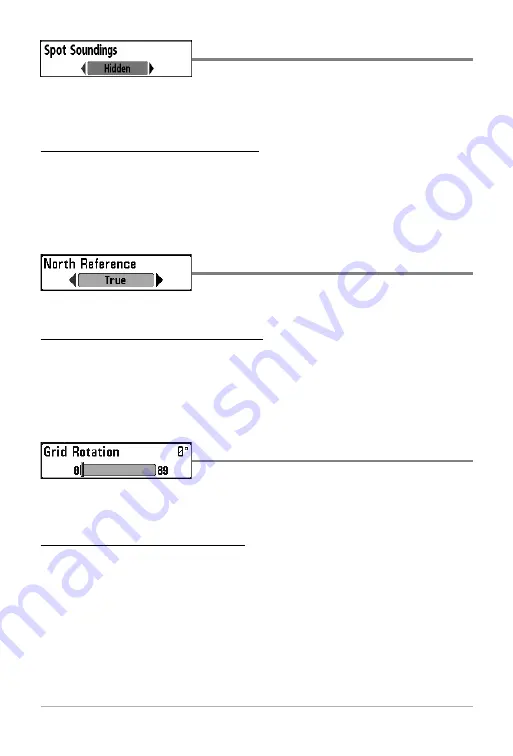
background image

70

Spot Soundings

Spot Soundings 

allows you to display or hide spot

soundings, which are depth measurements shown on the chart. 

NOTE: 

Spot Soundings are only available with optional-purchase MMC/SD cards. 

To change the Spot Soundings setting:

1.  Highlight Spot Soundings on the Chart main menu.

2. Use the LEFT or RIGHT 4-WAY Cursor Control keys to change the Spot

Soundings setting. (Hidden, Visible, Default = Hidden)

North Reference

North Reference

allows you to have bearings

displayed with one of two orientations: True North or Magnetic North.  

To change the North Reference setting:

1.  Highlight North Reference on the Navigation main menu.

2. Use the LEFT or RIGHT 4-WAY Cursor Control keys to change the North

Reference setting. (True, Magnetic, Default = True) 

Grid Rotation

Grid Rotation

allows you to set the orientation of

the trolling grid in degrees, where a setting of 0° displays a standard North, South,
East, West alignment. See 

Waypoints

for information on how to set a Grid. 

To change the Grid Rotation setting:

1.  Highlight Grid Rotation on the Navigation main menu.

2. Use the LEFT or RIGHT 4-WAY Cursor Control keys to change the Grid

Rotation setting. (0° to 89°, Default = 0°) 

Summary of Contents for 500 SERIES 580

Page 1: ...Chartplotter Operations Manual Fishfinder 580 Chartplotter Operations Manual 531517 1_D Guide d utilisation du Fishfinder 580 de traçage graphique Guide d utilisation du Fishfinder 580 de traçage graphique 531517 1_D ...

Page 2: ... 2008 Humminbird Eufaula AL USA All rights reserved i Merci Merci d avoir choisi Humminbird le chef de file dans le secteur des sondeurs de poissons aux États Unis Humminbird a bâti sa réputation en créant et en fabriquant des équipements marins de haute qualité et très fiables Votre appareil Humminbird a été conçu pour pouvoir être utilisé sans problèmes quelles que soient les conditions même dan...

Page 3: ...Sonar View 16 Big Digits View 17 Bird s Eye View 18 Chart View 19 Combo View 20 Chart Orientation 21 Viewing Cartography 21 Introduction to Navigation 23 Waypoints Routes and Tracks 23 Save Edit or Delete a Waypoint 24 Navigate to a Waypoint or Position 25 Add a Waypoint Target or Trolling Grid 26 Save Edit or Delete a Route 27 Save or Clear a Current Track 28 Edit Delete or Hide Saved Tracks 29 K...

Page 4: ... Chart Speed 45 Bottom View 46 Cancel Navigation only when navigating 47 Navigation X Press Menu Navigation views only 48 Waypoint Name only with an active cursor on a waypoint 49 Cursor To Waypoint Chart or Combo view only 50 Save Current Track 50 Clear Current Track 51 Save Current Route only when navigating 51 Skip Next Waypoint only when navigating 52 Cancel Navigation only when navigating 52 ...

Page 5: ...ion Menu Tab 64 Current Track 65 Saved Tracks 65 Waypoints 66 Routes 67 Chart Orientation 68 Chart Detail Level 68 Map Borders 69 Lat Lon Grid 69 Spot Soundings 70 North Reference 70 Grid Rotation 70 Trackpoint Interval 71 Track Min Distance Advanced 71 Map Datum Advanced 72 Set Simulation Position Advanced 72 Set Map Offset Advanced 73 Clear Map Offset Advanced 73 Course Projection Line 74 Export...

Page 6: ...de 84 Language International only 84 Triplog Reset 85 Restore Defaults 85 Select Readouts Advanced Sonar view only 86 Depth Offset Advanced 87 Temp Offset Advanced 88 Speed Calibration Advanced with Temp Speed only 88 Local Time Zone Advanced 89 Daylight Saving Time Advanced 89 Position Format Advanced 90 Time Format Advanced International only 90 Date Format Advanced International only 91 NMEA Ou...

Page 7: ...ational Distributors It is important to note that products sold in the U S are not intended for resale in the international market To obtain a list of authorized International Distributors please visit our web site at www humminbird com or contact our Customer Resource Center at 1 800 633 1468 to locate the distributor nearest you NOTE Entries in this Table of Contents which list with Temp Speed o...

Page 8: ... location size and composition of an object Sonar is very fast A sound wave can travel from the surface to a depth of 240 ft 70 m and back again in less than 1 4 of a second It is unlikely that your boat can outrun this sonar signal SONAR is an acronym for SOund and NAvigation Ranging Sonar utilizes precision sound pulses or pings which are emitted into the water in a teardrop shaped beam The soun...

Page 9: ...arious frequencies depending on the application Very high frequencies 455 kHz are used for greatest definition but the operating depth is limited High frequencies 200 kHz are commonly used on consumer sonar and provide a good balance between depth performance and resolution Low frequencies 83 kHz are typically used to achieve greater depth capability ...

Page 10: ...ar Your 500 Series Fishfinder uses a 200 83 kHz DualBeam PLUS sonar system with a wide 60 area of coverage DualBeam PLUS sonar has a narrowly focused 20 center beam surrounded by a second beam of 60 expanding your coverage to an area equal to your depth In 20 feet of water the wider beam covers an area 20 feet wide DualBeam PLUS sonar returns can be blended together viewed separately or compared s...

Page 11: ... Overlay Service and MSAS the MTSAT Satellite Augmentation System satellites if they are available in your area GPS uses a constellation of 24 satellites that continually send radio signals to the earth Your present position is determined by receiving signals from up to 16 satellites and measuring the distance from the satellites All satellites broadcast a uniquely coded signal once per second at ...

Page 12: ...otMaps Premium on MMC or SD card media NOTE Your Fishfinder does not support Navionics Classic Charts only Navionics Gold HotMaps and HotMaps Premium Your unit also comes with a built in UniMap with a more detailed map of North America Domestic models or a more detailed map of Europe and Southeast Asia including Australia and New Zealand International models Your Fishfinder uses the GPS Receiver t...

Page 13: ...the illustration to locate the position of the MMC SD slot cover and remove the MMC SD slot cover then insert the MMC SD into the slot The label on the MMC SD should face toward the back of the unit Press down on the card until it clicks into place then replace the slot cover making certain that the gasket is present and positioned correctly before re installing the cover then replace and tighten ...

Page 14: ...se the appearance of the second return to determine bottom hardness Hard bottoms will show a strong second return while soft bottoms will show a very weak one or none at all Cursor Dialog Box indicates cursor the Latitude and Longitude of the cursor A waypoint can be marked at the cursor Bait Ball Hard Bottom Rocky Bottom Distance distance traveled with Temp Speed Accessory or GPS Receiver NOTE En...

Page 15: ...across the display at the same depth Fish fish are displayed as arches and or fish icons and the unit can be set to alarm when a fish of a certain size is detected When a target is detected and Fish ID TM is on a Fish ID TM symbol with depth is displayed The size of the symbol shows the intensity of the sonar return The unit will clearly show schools of Bait Fish as clouds of different shapes and ...

Page 16: ...ings that affect the sonar the view will update immediately i e you don t have to exit the menu to apply the change to the screen Sonar View is the default view When the VIEW key is pressed the display cycles through the available views When the EXIT key is pressed the display cycles through the available views in reverse order Any view can be hidden or displayed as part of the view rotation using...

Page 17: ...range sufficient to show the bottom Depth Range is automatically selected to keep the bottom visible on the display although you can adjust it manually as well see Sonar X PressTM Menu Six additional Digital Readouts display information from optional purchase accessories These information boxes can be customized to show only the information desired see Setup Menu Tab Select Readouts NOTE If the De...

Page 18: ...pdates at the fastest rate possible for depth conditions and shows only the returns from the bottom structure and fish that are within the transducer beam The RTS Window plots the depth and intensity of a sonar return See Sonar Menu RTS Window The Narrow RTS Window indicates the sonar intensity through the use of grayscale The grayscale used matches the bottom view grayscale setting used in the so...

Page 19: ...s Bottom Presentation As the boat moves the unit charts the changes in depth on the display to create a profile of the Bottom Contour The type of bottom can be determined from the return charted on the display A Hard Bottom such as compacted sediment or flat rock appears as a thinner line across the display A Soft Bottom such as mud or sand appears as a thicker line across the display Rocky Bottom...

Page 20: ... with lighter pixels This has the benefit of ensuring that weak signals will be clearly visible on the display Structure ID represents weak returns as light pixels and strong returns as dark pixels This has the benefit of ensuring that strong returns will be clearly visible on the display ...

Page 21: ...ining the bottom on the display Bottom Black displays all pixels below the bottom contour as black regardless of signal strength This has the benefit of providing a high contrast between the bottom and other sonar returns on the display Any targets such as fish structure and thermoclines will be shown using the Structure ID method ...

Page 22: ...ly to display a magnified image of the bottom The Zoom Preview Box shows where the zoomed view is in relation to the full range view The Zoom Level or magnification is displayed in the lower left corner and can be changed to suit conditions see Sonar X PressTM Menu Zoom Level Upper and Lower Zoom Depth Range numbers indicate the depth of the water which is being viewed Digital depth is displayed i...

Page 23: ... left hand corner You can use the Split Sonar View to make side by side comparisons between the sonar returns from the 83 kHz wide beam and the 200 kHz narrow beam The digital readouts in the Split Sonar View cannot be customized therefore information such as water temperature and voltage are unavailable in the Split Sonar View 200 83 kHz Split Sonar View Depth 83 kHz Sonar History Window 200 kHz ...

Page 24: ...he Fishfinder The Triplog shows distance traveled average speed and time elapsed since the Triplog was last reset The digital readouts in the Big Digits View cannot be customized Big Digits View Depth Temperature Speed Timer shows the time elapsed since Triplog was last reset Distance is the distance traveled since the Triplog was last reset Voltage displays the battery voltage Average Speed shows...

Page 25: ...the eye point so that you can look off to the sides or even behind the boat Pressing the RIGHT or LEFT arrow keys on the 4 WAY Cursor key turns the eye point right or left while pressing the UP arrow key moves the eye point forward and pressing the DOWN arrow key moves the eye point backward Pressing the EXIT key moves the eye point back to its original position behind and above the boat Bird s Ey...

Page 26: ...cks waypoints and the current route when navigating are overlaid on the chart You can use the 4 WAY Cursor Control key to shift pan the chart to another area You can use the ZOOM keys to zoom in and out You can use the INFO key to get information on the chart objects near the cursor Chart View without Active Cursor shown with Optional Purchase Navionics Cartography Depth Cartography Speed Of Boat ...

Page 27: ...Combo View Depth Cartography Sonar Window Bearing of Boat with Respect to True North Water Surface Temperature Speed of Boat Map Scale Chart View with Active Cursor shown with Optional Purchase Navionics Cartography Depth Cartography Latitude and Longitude Position of Cursor Bearing of Boat with Respect to True North Distance to the Cursor and Bearing to Cursor Map Scale Active Cursor ...

Page 28: ...ombo Views there are several cartography related functions that you can access using various keys Panning Use the 4 WAY Cursor keys to move the chart around on the display in the direction of the key being pressed When you do this a bull s eye cursor is drawn at the center of the screen and is linked to the boat by a gray line even if the boat is off the screen At the same time the temperature and...

Page 29: ...the station and the times of the high and low tides for today s date A tide graph is also displayed showing the rise and fall of the tides for the 24 hour time period encompassing the date You can change the date to look at tide information before or after the date displayed by pressing the LEFT or RIGHT cursor key respectively Press the EXIT key to remove the information box and the cursor bull s...

Page 30: ...path for navigation and are used in trip planning You can link individual waypoints together by using the GOTO key A route represents your intended navigation and shows the shortest path from each waypoint to the next As you travel a route staying on the route line is the most efficient way to get to your destination although you should always look out for obstacles not shown on the chart Your Fis...

Page 31: ...use the Cursor key to point to a feature in the sonar history also called the Sonar Saver feature Press the MARK key to create a waypoint at the location where that sonar reading was taken The new waypoint will also record the depth at that location NOTE When you save a waypoint by any of these methods a numerical waypoint name is automatically assigned You can edit the waypoint information later ...

Page 32: ... make it easier to select a waypoint select Sort By and press the RIGHT or LEFT Cursor keys to select a sort order Name shows the waypoints alphabetically Time shows the most recently created waypoint first Distance shows the closest waypoint first Delete a waypoint From the Waypoints submenu select Delete and press the RIGHT Cursor key to display a list of waypoints Select the waypoint you want t...

Page 33: ... routes from memory You will be prompted to save the current route when you cancel navigation Add a Waypoint Target or Trolling Grid Add or Remove a Waypoint Target From the Waypoints submenu select Target and press the RIGHT Cursor key to display a list of waypoints Select the waypoint you want to target A target consisting of concentric circles centered on the selected waypoint will appear on al...

Page 34: ...t the original waypoint will lose its target or grid NOTE The spacing of the rings on the waypoint target and the spacing of the grid lines on the trolling grid is the same as the length of the scale bar on the left edge of the display Zooming in or out will decrease or increase the spacing respectively Save Edit or Delete a Route Save the current route While you are navigating the current route c...

Page 35: ... and press the RIGHT Cursor key to make this route the current route and begin navigation You may also travel the route in either forward or reverse order Route Info From the Routes submenu select Info and press the RIGHT Cursor key A list of saved routes will appear Select the route for which you want information and press the RIGHT Cursor key The list of waypoints in the route will be shown with...

Page 36: ...rsor key to save your changes Delete a saved track From the Tracks submenu select Delete and press the RIGHT Cursor key to display the list of saved tracks Select the track you want to delete and press the RIGHT Cursor key You will be asked to confirm deletion before the track is actually deleted Hide or display a saved track From the Tracks submenu select Visibility and press the RIGHT Cursor key...

Page 37: ...ure that shutdown occurs properly and any menu settings will be saved VIEW Key The VIEW key is used to cycle through all available views Press the VIEW key to advance to the next view Repeatedly pressing VIEW cycles through all views available Views can be hidden to optimize the system to your fishing requirements see Views Menu Tab INFO Key Press the INFO key while in Bird s Eye Chart or Combo Vi...

Page 38: ...ed headings to help you find a specific menu item quickly Alarms Sonar Navigation Setup and Views tabs are part of your tabbed Main Menu System Use the LEFT or RIGHT 4 WAY Cursor Control key to select a tab then use the DOWN or UP key to select the menu item and the LEFT or RIGHT key to alter a menu setting 4 WAY Cursor Control Key The 4 WAY Cursor Control Key has multiple functions depending on t...

Page 39: ...ich you want to navigate ZOOM Key Press the or ZOOM keys while in any of the Navigation Views or the Sonar Zoom View to change the scale of the view to appear closer or farther away EXIT Key The EXIT key has multiple functions depending on the situation If an alarm is sounding pressing EXIT will cancel the alarm If a menu tab is selected pressing EXIT will exit the menu mode and return to the view...

Page 40: ...shfinder by pressing the POWER LIGHT key The Title screen is displayed until the Fishfinder begins operation Your Fishfinder will begin Normal or Simulator operation depending on the presence or absence of a transducer 580 Title Screen 33 ...

Page 41: ... or Advanced User Mode Either the Sonar or Navigation X PressTM Menu will appear depending on the view you are in Main Menu Tabs Less frequently adjusted menus are grouped into the Main Menu System The Main Menu system is organized under the following tab headings to help you find a specific menu item quickly Alarms Sonar Navigation Setup and Views Press the MENU key twice for the Main Menu then u...

Page 42: ...nu choices will be displayed throughout the menu system when you navigate to specific menus while in Advanced Mode Any changes made while in Advanced Mode will remain in effect after you switch back to Normal Mode See Setup Menu Tab User Mode for specific instructions on changing to Advanced User Mode Total Screen Update when you change any menu settings that affect the Sonar View the view will up...

Page 43: ...Normal Simulator System Status See the following paragraphs for more information about each of these choices Normal Operation Use Normal operation for on the water operation with a transducer connected In addition your Fishfinder uses advanced transducer detection methods to determine if a transducer is connected If a functioning transducer is connected Normal operation will be selected automatica...

Page 44: ... the full benefit of the Simulator it is important to select Simulator manually from the Start Up Options menu as opposed to letting the Fishfinder enter Simulator automatically as it will if a transducer is not connected and you do nothing during power up Manually selecting Simulator from the Start Up Options menu allows you to pre configure your Fishfinder for on the water operation Any menu cha...

Page 45: ...VIEW button when using System Status Self Test Accessory Test GPS Diagnostic View Exit System Status by powering your Fishfinder off Self Test Self Test displays results from the internal diagnostic self test including unit serial number Printed Circuit Board PCB serial number software revision total hours of operation and the input voltage Self Test Screen ...

Page 46: ...ory Test Accessory Test lists the accessories connected to the system NOTE The speed accessory will be detected only if the paddlewheel has moved since your Fishfinder was powered up Accessory Test Screen 39 ...

Page 47: ...et being used This view also reports the current position local time and date and other numeric information The current GPS Fix Type is reported as No Fix 2D Fix 3D Fix or Enhanced An Enhanced fix has been augmented using information from WAAS EGNOS or MSAS A 3D or Enhanced Fix is required for navigation HDOP the Horizontal Dilution of Precision is a GPS system parameter which depends on the curre...

Page 48: ...ttings most frequently used Press the MENU key once while in any of the Sonar Views to access the Sonar X Press menu NOTE Menu choices will vary depending on system settings such as whether the unit is set for Advanced User mode or what transducer is currently selected Sonar X Press Menu ...

Page 49: ...that is sometimes present in murky or muddy water If Sensitivity is adjusted too low the display may not show many sonar returns that could be fish NOTE The Sensitivity setting is a global setting and will adjust the sensitivity of all sonar frequencies as compared to specific sensitivity adjustments such as 83 kHz Sensitivity that allow you to adjust the level of sensitivity for one specific beam...

Page 50: ...dless of the manual settings entered To adjust the Upper Range 1 Make sure you are in Advanced Mode then highlight Upper Range on the Sonar X Press menu 2 Use the LEFT or RIGHT 4 WAY Cursor Control keys to increase or decrease the Upper Range setting 0 to 790 feet or 0 to 257 meters International Models only Default 0 For example if you are only interested in the area between 20 and 50 feet deep y...

Page 51: ...are in Manual mode NOTE A minimum distance of 10 feet will be maintained between the Upper and Lower Range regardless of the manual settings entered To adjust the Lower Range 1 Highlight Lower Range on the Sonar X Press menu 2 Use the LEFT or RIGHT 4 WAY Cursor Control keys to increase or decrease the Lower Range setting AUTO 10 to 800 feet 3 to 260 meters International Models only Default AUTO Fo...

Page 52: ...eps the information on the display longer but the bottom and fish details become compressed and may be difficult to interpret Regardless of the Chart Speed setting the RTS Window will update at the maximum rate possible for the depth conditions Adjust Chart Speed to your personal preference To adjust the Chart Speed 1 Highlight Chart Speed on the Sonar X Press menu 2 Use the LEFT or RIGHT 4 WAY Cu...

Page 53: ...sonar returns in white resulting in a distinctive outline This has the benefit of clearly defining the bottom on the display Bottom Black displays all pixels below the bottom contour as black regardless of signal strength This has the benefit of providing a high contrast between the bottom and other sonar returns on the display Any targets such as fish structure and thermoclines will be shown usin...

Page 54: ...ly navigating a route This will not delete a previously saved route To Cancel Navigation 1 Highlight Cancel Navigation on the Sonar X Press menu 2 Use the RIGHT 4 WAY Cursor Control key to initiate canceling navigation 3 The Confirm dialog box will appear To cancel navigation press the RIGHT Cursor key once more To avoid canceling navigation press the LEFT Cursor key ...

Page 55: ...access to the settings most frequently used Press the MENU key once while in the Bird s Eye View the Chart or the Combo View to access the Navigation X Press menu NOTE Menu choices will vary depending on system settings such as whether you are currently navigating Navigation X Press Menu ...

Page 56: ... Use the RIGHT 4 Way Cursor Control key to view the Waypoints submenu which contains the following menu choices The Waypoint Submenu contains the following menu choices Edit allows you to edit the Name Position Latitude and Longitude and select the Icon that will be used to represent the waypoint in the Chart and Combo Views Delete allows you to delete a waypoint from the list of saved waypoints T...

Page 57: ...Cursor Control key to highlight the waypoint you wish to move the cursor to then use the RIGHT 4 WAY Cusor Control key to select the destination waypoint Save Current Track Save Current Track allows you to save the current track being displayed After the current track is saved a new current track is started To Save Current Track 1 Highlight Save Current Track on the Navigation X Press menu 2 Use t...

Page 58: ...rsor key once more To cancel clearing the current track press the LEFT Cursor key Save Current Route only when Navigating Save Current Route allows you to save the current route being displayed This menu choice will only appear when you are currently navigating a route To Save Current Route 1 Highlight Save Current Route on the Navigation X Press menu 2 Use the RIGHT 4 WAY Cursor Control key to in...

Page 59: ...IGHT Cursor key once more To cancel skipping the next waypoint press the LEFT Cursor key Cancel Navigation only when Navigating Cancel Navigation discards the current route and exits Navigation Mode This menu choice will only appear when you are currently navigating a route This will not delete a previously saved route To Cancel Navigation 1 Highlight Cancel Navigation on the Navigation X Press me...

Page 60: ...e display This menu choice will only appear when a grid has already been applied to a waypoint NOTE See Add a Waypoint Target or Trolling Grid for more information ion To Remove a Grid 1 Highlight Remove Grid on the Navigation X Press menu 2 Use the RIGHT 4 WAY Cursor Control key to remove the grid Sonar Window Combo view only Sonar Window sets the size of the Sonar Window in the Combo View Sonar ...

Page 61: ...y Cursor Control key to view the Waypoints submenu The Waypoint Submenu contains the following menu choices Edit allows you to edit the Name Position Latitude and Longitude and select the Icon that will be used to represent the waypoint in the Chart and Combo Views Delete allows you to delete a waypoint from the list of saved waypoints Go To allows you to select a waypoint and start navigation tow...

Page 62: ...U key twice to access the Main Menu System and then press the RIGHT Cursor key to select the Sonar tab NOTE Menu choices will vary depending on system settings such as whether the unit is set for Advanced User mode or not Sonar Menu ...

Page 63: ...beam When set to 200 kHz only the returns from the 200 kHz narrow beam will be displayed in the Sonar View the Sonar Zoom View and the Big Digits View The Split Sonar View will continue to display returns from both beams in their respective windows The RTS Window in the Sonar View will display the returns from the 200 kHz narrow beam When set to 83 kHz the returns from the 83 kHz wide beam will be...

Page 64: ...Fish ID is turned off the Fishfinder shows only the raw sonar returns on the display These returns will often result in arches forming on the display indicating potential targets Due to the transducer beam angle the distance to a fish decreases as the fish moves into the beam and then increases as it moves out again creating a Fish Arch when this distance change is shown on the display Boat speed ...

Page 65: ...hange the Fish ID Sensitivity setting 1 Highlight Fish ID Sensitivity on the Sonar main menu 2 Use the LEFT or RIGHT 4 WAY Cursor Control keys to change the Fish ID Sensitivity setting Low 1 High 10 Default 5 Real Time Sonar RTS Window RTS Window sets the RTS Window to either Wide or Narrow or turns it off in the Sonar View The RTS Window always updates at the fastest rate possible and only displa...

Page 66: ... kHz Sensitivity will display fewer weak returns The 83 kHz Sensitivity menu choice is only available when User Mode is set to Advanced see Setup Menu Tab User Mode NOTE 83 kHz Sensitivity is particularly useful for adjusting the sensitivity of the 83 kHz sonar returns in the 200 83 kHz Split Sonar View The 83 kHz sensitivity can be adjusted without affecting the sensitivity of the 200 kHz returns...

Page 67: ... either turn Depth Lines On or Off The Depth Lines menu choice is available when User Mode is set to Advanced see Setup Menu Tab User Mode To change the Depth Lines setting 1 Make sure you are in Advanced User Mode then highlight Depth Lines on the Sonar main menu 2 Use the LEFT or RIGHT 4 WAY Cursor Control keys to turn the Depth Lines setting On or Off Off On Default On Depth Lines Depth Lines ...

Page 68: ... displayed The Surface Clutter menu choice is available when User Mode is set to Advanced see Setup Menu Tab User Mode To change the Surface Clutter setting 1 Make sure you are in Advanced User Mode then highlight Surface Clutter on the Sonar main menu 2 Use the LEFT or RIGHT 4 WAY Cursor Control keys to change the Surface Clutter setting Low 1 to High 10 Default 5 Surface Clutter ...

Page 69: ...ow Max Depth Advanced Max Depth adjusts the maximum depth of operation The performance of your Fishfinder can be tuned to the maximum depth you will be fishing in by setting the Max Depth When a maximum depth is set your Fishfinder will not attempt to acquire sonar data below that depth thus increasing overall performance When Max Depth is set to Auto the Fishfinder will acquire bottom readings as...

Page 70: ...ater depending on the type of fish you are seeking The salt water setting allows for a greater range in fish size adjustment to account for this Also make sure that the Water Type is set accurately especially in salt water as this affects the accuracy of deep water depth readings To change the Water Type setting 1 Make sure you are in Advanced User Mode then highlight Water Type on the Sonar main ...

Page 71: ...gation Menu Tab Press the MENU key twice to access the Main Menu System then press the RIGHT cursor key to select the Navigation tab NOTE Menu choices will vary depending on system settings Navigation Menu Tab ...

Page 72: ...ave the current track Clear Current Track allows you to clear the current track Appearance allows you to change the style and color of the current track Breadcrumb Trail Dashed Line or Solid Line and if a line the color of the line from light to dark gray to black Saved Tracks Saved Tracks allows you to view the Saved Tracks submenu To view the Saved Tracks Submenu 1 Highlight Saved Tracks on the ...

Page 73: ...nts submenu The Waypoints Submenu contains the following menu choices Create allows you to create a new waypoint and edit it immediately The current boat position will be used as the default but you can set the coordinates to any valid position The Icon used to represent the waypoint in the Chart and Combo Views can also be changed Edit allows you to choose from a list of previously saved waypoint...

Page 74: ...Control keys to view the Routes submenu The Routes Submenu contains the following menu choices Create allows you to create a new empty route and add waypoints to it immediately Edit allows you to select a previously saved route and edit its name and the waypoints on it Delete allows you to delete a route from a list of previously saved routes Travel allows you to select a previously saved route to...

Page 75: ...gation Views Basic shows land areas ports obstructions and restricted areas Navigation shows navaids landmarks ferryways and navigation routes in addition to the Basic information Underwater shows depth contours fishing areas underwater wrecks tides and currents in addition to the Basic and Navigation information All shows roads buildings railways and other notations in addition to the Basic Navig...

Page 76: ...HT 4 WAY Cursor Control keys to change the Map Borders setting Hidden MMC SD Only All Visible Default MMC SD Only Lat Lon Grid Lat Lon Grid allows you to display or hide a grid showing latitude and longitude lines To change the Lat Lon Grid setting 1 Highlight Lat Lon Grid on the Chart main menu 2 Use the LEFT or RIGHT 4 WAY Cursor Control keys to change the Lat Lon Grid setting Hidden Visible Def...

Page 77: ...ith one of two orientations True North or Magnetic North To change the North Reference setting 1 Highlight North Reference on the Navigation main menu 2 Use the LEFT or RIGHT 4 WAY Cursor Control keys to change the North Reference setting True Magnetic Default True Grid Rotation Grid Rotation allows you to set the orientation of the trolling grid in degrees where a setting of 0 displays a standard...

Page 78: ... Track Min Distance to small values will allow you to increase the track resolution Track Min Distance Advanced Track Min Distance allows you to set a minimum distance of travel before a trackpoint is added to the track The Track Min Distance menu choice is only available when User Mode is set to Advanced see Setup Menu Tab User Mode NOTE Track Min Distance works in conjunction with Trackpoint Int...

Page 79: ...oat used in the Simulator The Set Simulation Position menu choice is only available when User Mode is set to Advanced see Setup Menu Tab User Mode To set the Simulation Position 1 Activate the cursor and move it to the coordinates from where you want the simulation to start NOTE The cursor must be active in order for this procedure to work 2 Make sure you are in Advanced User Mode then highlight S...

Page 80: ...re in Advanced User Mode then highlight Set Map Offset on the Chart main menu 3 Use the RIGHT 4 WAY Cursor Control key to set the Map Offset A confirmation dialog box will appear to allow you to change your mind or to confirm your choice If the cursor was not active before you began this procedure you will see an error message Exit the menu set the cursor then try again Clear Map Offset Advanced C...

Page 81: ...d Export All Nav Data allows you to export all saved Tracks Waypoints and Routes to an MMC SD card The Export All Nav Data menu choice is only available when User Mode is set to Advanced see Setup Menu Tab User Mode To Export All Navigation Data 1 Make sure you are in Advanced User Mode and that an optional purchase MMC SD card is installed in the slot then highlight Export All Nav Data on the Nav...

Page 82: ...used with caution The Delete All Nav Data menu choice is only available when User Mode is set to Advanced see Setup Menu Tab User Mode To Delete All Navigation Data 1 Make sure you are in Advanced User Mode then highlight Delete All Nav Data on the Navigation main menu 2 Use the RIGHT 4 WAY Cursor Control key to delete all navigation data ...

Page 83: ...ss the Main Menu System The Alarms tab will be the default selection NOTE When an alarm is triggered you can silence it by pressing any key The alarm will be silenced and will not be triggered again until a new instance of the alarm condition is detected Alarms Menu ...

Page 84: ... OFF Fish ID Alarm Fish ID Alarm sounds when the Fishfinder detects fish that correspond to the alarm setting Fish ID Alarm will only sound if Fish ID TM is on To change the Fish ID Alarm setting 1 Highlight Fish ID Alarm on the Alarms main menu 2 Use the LEFT or RIGHT 4 WAY Cursor Control keys to change the Fish ID Alarm setting Off All Large Medium Large Default Off Large Large Medium All Off Fo...

Page 85: ... Battery Alarm on the Alarms main menu 2 Use the LEFT or RIGHT 4 WAY Cursor Control keys to change the Low Battery Alarm setting Off 8 5V 13 5V Default Off Temp Alarm Temp Alarm sounds when the water temperature detected by the Fishfinder reaches the Temp Alarm setting which is either set in degrees Fahrenheit or Celsius International Models only For example if the Temp Alarm is set to 58 degrees ...

Page 86: ...boat is allowed to move off course before the Off Course Alarm will sound To change the Off Course Alarm setting 1 Highlight Off Course Alarm on the Alarms main menu 2 Use the LEFT or RIGHT 4 WAY Cursor Control keys to change the Off Course Alarm setting Off 25 to 3000 feet 10 to 1000 meters International Models only Default 300 ft 100 m Arrival Alarm Circle Off Course Limits ...

Page 87: ...ighlight Arrival Alarm on the Alarms main menu 2 Use the LEFT or RIGHT 4 WAY Cursor Control keys to change the Arrival Alarm setting Off 25 to 3000 feet 10 to 1000 meters International Models only Default 150 ft 50 m Drift Alarm Drift Alarm sounds when the boat has exceeded the distance from the boat s anchored position based on the menu setting Drift Alarm allows you to set the size of a perimete...

Page 88: ...s International Models only Default Off Alarm Tone Alarm Tone selects the pitch of the alarm sound A brief tone will be produced as you adjust the Alarm Tone so that you can select the tone that you can hear best To change the Alarm Tone setting 1 Highlight Alarm Tone on the Alarms main menu 2 Use the LEFT or RIGHT 4 WAY Cursor Control keys to change the Alarm Tone setting High Medium Low Default ...

Page 89: ...s the tabbed Main Menu System then press the RIGHT cursor key until the Setup tab is selected NOTE Menu choices will vary depending on system settings such as whether the unit is set for Advanced User mode and what accessories are attached to the unit Setup Menu Tab ...

Page 90: ...its Temp on the Setup menu 2 Use the LEFT or RIGHT 4 WAY Cursor Control keys to change the Units Temp setting Celsius Fahrenheit Default Celsius Units Distance Units Distance selects the units of measure for all distance related readouts and will appear in the menu if a Temp Speed Accessory is connected and the paddlewheel has moved at least once or if the GPS Receiver is connected To change the U...

Page 91: ...for Domestic models User Mode User Mode sets the menu system to either Normal or Advanced When set to Normal default setting only the basic menu options are shown When set to Advanced additional menu choices are available To change the User Mode setting 1 Highlight User Mode on the Setup menu 2 Use the LEFT or RIGHT 4 WAY Cursor Control keys to change the User Mode setting Normal Advanced Default ...

Page 92: ...ighlight Reset Triplog on the Setup menu 2 Use the RIGHT 4 WAY Cursor Control key to initiate Triplog Reset 3 The Confirm dialog box will appear To reset the Triplog press the RIGHT Cursor key once more To cancel Reset Triplog press the LEFT Cursor key Restore Defaults Restore Defaults resets ALL menu settings to their factory defaults Use this menu choice with caution To Restore Defaults 1 Highli...

Page 93: ...e Sonar View screen or whether a particular window will be turned off displaying nothing in that area you can access this menu choice only when in Advanced User Mode see Setup Menu Tab User Mode Data windows can display readouts from supported accessories such as Temp Speed Each data window can either be empty or contain one of the following Course Temperature Navigation Time Date Position Triplog...

Page 94: ...h Offset Advanced Depth Offset will adjust the digital depth readout to indicate depth from the waterline or boat s keel Enter a positive vertical measurement from the transducer to the waterline to read the depth from the waterline Enter a negative vertical measurement from the transducer to keel to read the depth from the keel This menu choice is available only when in Advanced User Mode see Set...

Page 95: ... setting 10 0 to 10 0 degrees Default 0 Speed Calibration Advanced with Temp Speed only Speed Calibration will adjust the speed readout by the percentage entered and will appear in the menu if a Temp Speed Accessory is connected and the paddlewheel has moved at least once when the unit is in Advanced User Mode see Setup Menu Tab User Mode To change the Speed Calibration setting 1 Make sure you are...

Page 96: ...Eastern Standard Time Daylight Saving Time Advanced Daylight Saving Time adjusts the time display to account for local Daylight Saving Time when Time Date is selected as a Digital Readout on the Sonar View see Select Readouts Selecting On adds one hour to the time display adjusted for your local time zone Selecting Off leaves the time display as adjusted for your local time zone This menu choice i...

Page 97: ...mm or dd mm ss Default dd mm mmm Time Format Advanced International only Time Format changes the time format used by the unit This menu choice is available only when in Advanced User Mode see Setup Menu Tab User Mode International Models only Time Format selects a 12 hour or 24 hour format for the time of day displayed when Time Date is selected as a Digital Readout on the Sonar View see Select Re...

Page 98: ...keys to change the Date Format mm dd yy dd mm yy or yy mm dd Default mm dd yy NMEA Output Advanced NMEA Output turns the NMEA output on or off This menu choice is available only when in Advanced User Mode see Setup Menu Tab User Mode NMEA Output should be turned On if you connect the NMEA Output wires of the GPS Receiver cable to another NMEA compatible device such as an autopilot NMEA 0183 is a N...

Page 99: ...ou are in Advanced User Mode then highlight NMEA Output on the Setup menu 2 Use the LEFT or RIGHT 4 WAY Cursor Control keys to change the NMEA Output to On or Off Off On Default Off Sonar Sonar deactivates Sonar and removes the Sonar Views from the view rotation Off On Default On To turn Sonar on or off 1 Highlight Sonar on the Setup menu 2 Use the LEFT or RIGHT 4 WAY Cursor Control keys to change...

Page 100: ...t is set to Hidden and will be displayed in the view rotation if it is set to Visible The following views are available Bird s Eye View Chart View Combo View Sonar View Sonar Zoom View 200 83 kHz Split Sonar View Big Digits View Self Test Accessory Test GPS Diagnostic View To Change the View Status of Any View 1 Highlight the View main menu tab 2 Use the UP or DOWN 4 WAY Cursor Control keys to sel...

Page 101: ...ng corrosion from the battery terminals or wiring or actually replacing the battery if necessary Fishfinder Defaults to Simulator with a Transducer Attached A connected and functioning transducer will cause the newly started Fishfinder to go into Normal operating mode automatically If when you power up the Fishfinder it goes into Simulator mode automatically even though a transducer is already con...

Page 102: ...A mix of air and water flowing around the transducer cavitation may be interfering with the interpretation of sonar data See your Installation Guide for suggestions on adjusting the transducer position Electrical noise from the boat s engine may be interfering with sonar reception See Finding the Cause of Noise for more information Sonar readings may be affected if the transducer is not positioned...

Page 103: ... appears To determine whether the boat s engine is the source of the noise increase the RPMs while the boat is in neutral and stationary to see if the noise increases proportionately if noise appears when you rev the engine the problem could be the spark plugs alternator or tachometer wiring Replace the spark plugs with resistor plugs install an alternator filter or route the control head power an...

Page 104: ... Connection Cable purchase the GPS Connection Cable in order to connect a handheld or other NMEA GPS compatible device that you may already own to your Fishfinder NMEA 0183 is a National Marine Electronics Association standard for data communication Be sure to check out our website www humminbird com for additional new and exciting accessories to grow your Fishfinder NOTE Each accessory requires a...

Page 105: ...on 2 Inches 63 5 mm Power Requirement 10 20 VDC LCD 640 V x 320 H Transducer XHS 9 20 T or XNT 9 20 T Transducer Cable Length 20 ft 6 m Current Draw 475 mA NOTE Humminbird verifies maximum stated depth in saltwater conditions but actual depth performance may vary due to transducer installation water type thermal layers bottom composition and slope NOTE Product specifications and features are subje...

Page 106: ...icles are considered outside of the scope of the Directive and EEE for those applications can be considered excluded from the WEEE Directive requirement This symbol WEEE wheelie bin on product indicates the product must not be disposed of with other household refuse It must be disposed of and collected for recycling and recovery of waste EEE Humminbird will mark all EEE products in accordance with...

Page 107: ...ce When speed input is available the Big Digits View also shows the TripLog See TripLog Bottom Black Bottom Black is a Humminbird feature that fills in the area of the display below the bottom contour Bottom Black is preferred by some anglers because of its high contrast and easy readability even though it can obscure bottom hardness information Bottom Contour Bottom Contour is the profile of the ...

Page 108: ...jects close to the bottom that fall within the dead zone will probably not be visible in the sonar beam Precision sonar beams such as the Humminbird 20 beam have a smaller dead zone than wider sonar beams Decibel A Decibel is the measurement for sound pressure level or intensity of the sonar return See dB Down Point dB Down Point The dB Down Point is the standard decibel level at which the sonar c...

Page 109: ...sh detected in the wider beam are shown as hollow symbols Fish Symbol A Fish Symbol is the graphic that is displayed on the screen when Fish ID determines that a sonar return is likely to be a fish See Fish ID Freeze Frame Freeze Frame is a Humminbird feature that pauses the sonar scrolling so that the image on screen can be studied with greater detail See Instant Image Update Frequency Frequency ...

Page 110: ...he Maximum Depth Menu is a Humminbird feature that optimizes performance based on the maximum operational depth set by the user Many Humminbird units can operate across a very broad depth range up to 2500 feet which causes the unit to look up to that full depth under some circumstances Due to the speed of sound in water this can result in less responsiveness because the unit has to wait for a long...

Page 111: ...on boat speed and the Chart Speed setting A greater number of horizontal pixels show more sonar history that the boat has passed through On many models Humminbird provides the most vertical pixels to provide a better display resolution See Chart Speed and Pixels Power Output Power output is the amount of sound energy emitted into the water by the sonar transmitter Power output is measured using ei...

Page 112: ...sults in a more detailed instantaneous view of what is under the boat The Real Time Sonar window is a vertical band at the right side of the display that shows the instantaneous sonar return from the transducer at a particular instant The RTS Window menu option permits the user to adjust the window to show the full sonar signal return or just a narrower band that indicates intensity using grayscal...

Page 113: ...st to the angler including bait fish game fish thermoclines weed beds subtle structure and more Sonar Update Rate Sonar Update Rate is the number of times per second that the transmitter receiver sends and receives sonar signals A very fast sonar update rate collects more information and provides a more detailed image of the bottom fish and structure Many Humminbird units operate at up to 40 times...

Page 114: ...cognize two very close objects as two distinct targets i e two fish hanging very close or a fish hanging very close to structure Humminbird fishfinders provide a very good 2 1 2 inches of target separation in shallower than 100 feet of depth Target separation decreases as depth increases due to the need for longer Pulse Width to achieve greater depth See Pulse Width Thermoclines Thermoclines are w...

Page 115: ...sonar signals and work in conjunction with the transducer Humminbird transmitters have an extremely fast cycling design that can send signals up to 60 times per second as well as produce the varying levels of power output needed for different depths and conditions Additionally the transmitter has the capability to create very precise sonar pulses needed for a high degree of target separation Hummi...

Page 116: ... the MENU key Items that appear on the X Press Menu are related to the current view and present the most logical choices for that view Sonar View X Press menus will differ from Chart View X Press menus etc X Press menus are one of the principal reasons that Humminbird products are easier to use Zoom Zoom is a feature that focuses in on a smaller area of the bottom to provide enhanced resolution Wi...

Page 117: ...t can be provided by GPS Bearing BRG Bearing is the direction to a destination waypoint measured in degrees from North i e 321 where 000 is North 090 East 180 is South 270 is West Chartplotter Chartplotter describes a navigation device that shows Present Position on a Map along with Tracks Waypoints and Routes All Chartplotters are also considered Trackplotters All Humminbird GPS Combo units are C...

Page 118: ...f GPS factors which include satellite position in the sky signal strength and others factors Fix Type Fix Type indicates whether the GPS receiver is providing 2D fix or 3D fix A 2D fix requires only three satellites and provides only latitude and longitude A 3D fix requires four or more satellites and provides latitude longitude and altitude GPS GPS is an acronym for Global Positioning System GPS ...

Page 119: ...ith an appropriate card reader MMC is the same format that many digital cameras use See SD North Magnetic North is the principle reference point of the compass i e North is 000 Magnetic North relies on the earth s magnetic field to align a metal pointer generally towards True North However due to local variations in the earth s magnetic field around the globe the difference between True North and ...

Page 120: ...active the GPS is accurate to within 45 meters 95 of the time Currently SA is inactive and the consumer can enjoy the greater precision GPS provides however the DoD reserves the right to activate SA at any time Speed Over Ground SOG Speed Over Ground is the measurement of the boat s progress across a given distance and is the speed measurement provided by GPS An alternate Speed Through Water is pr...

Page 121: ...und a specific area to assure a more efficient and complete coverage of that area Trolling Grid resolution be changed by zooming in or out on the chart The Trolling Grid can also be rotated on the display to orient it for optimal boat course for wave and wind conditions UTC UTC is an acronym for Universal Time Constant UTC is the standard time used in navigation and is the local time in Greenwich ...

Page 122: ...me and assign a symbol to the saved location Depth Date and Time of Day when the waypoint was created is also saved Waypoint Target Waypoint Target is a Humminbird feature that displays a precise bull s eye around a selected waypoint This bull s eye is used to easily monitor boat position relative to a waypoint and is useful for fishing over submerged structure With Waypoint Targets a quick look a...

Page 123: ...116 Notes ...

Page 124: ...117 Notes ...

Page 125: ...118 Notes ...

Page 126: ...119 Notes ...

Page 127: ...120 Notes ...

Page 128: ...121 Notes ...

Page 129: ...122 Notes ...

Page 130: ...123 Notes ...

Page 131: ...124 Notes ...

Page 132: ...125 Notes ...

Page 133: ...126 Notes ...

Page 134: ... By Telephone Monday Friday 8 00 a m to 4 30 p m Central Standard Time 1 800 633 1468 By e mail typically we respond to your e mail within three business days cservice johnsonoutdoors com For direct shipping our address is Humminbird Service Department 678 Humminbird Lane Eufaula AL 36027 USA 127 ...

Reviews: