


18
Fig. 14
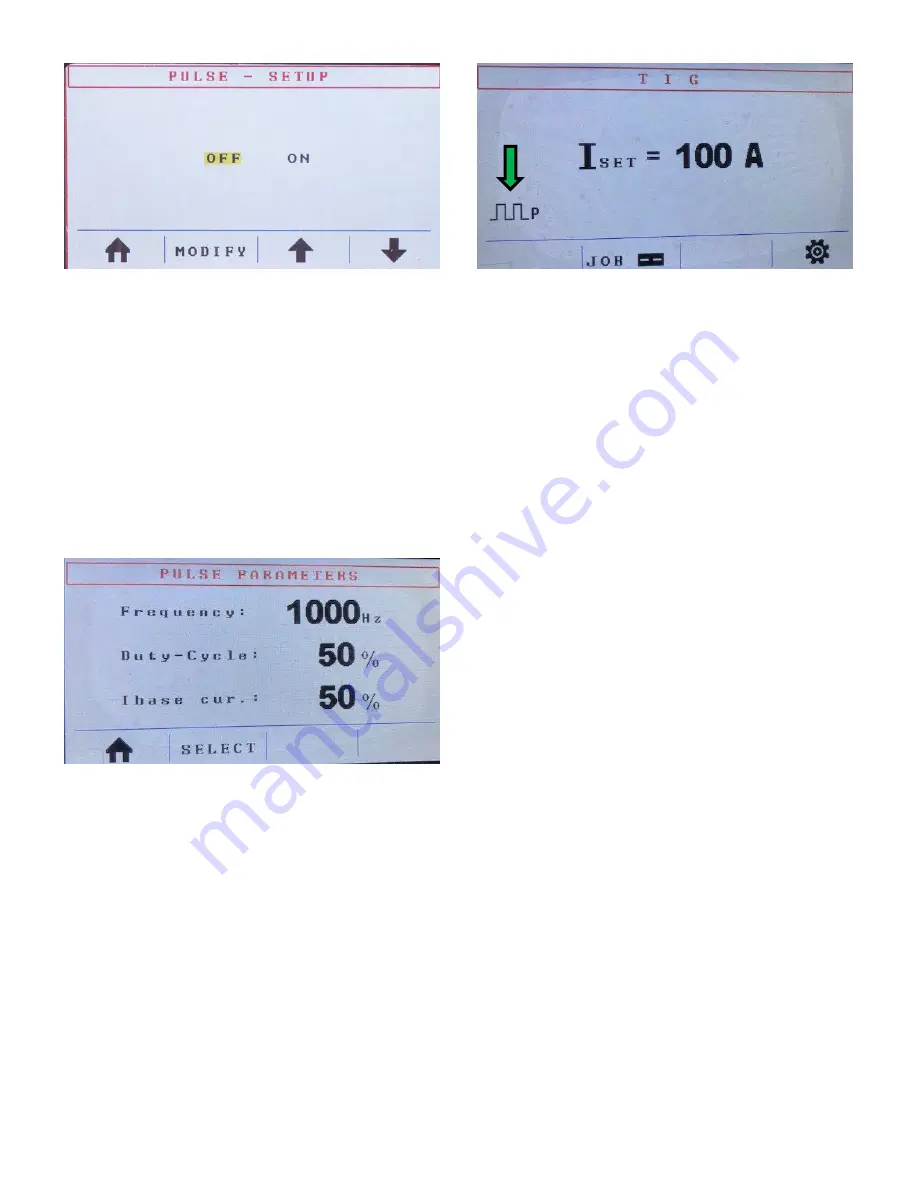
Press button
E
(
Fig. 4
) again to return to the scr een
where you can turn pulse on or off.
To turn on the pulse function, press button
C
(
Fig. 4;
MODIFY
) and then press button
E
(
the green check
mark
) to confir m.
If you choose to turn pulse on, you will consequently
enter the TIG pulse parameters menu (
Fig. 15
). In the
TIG pulse parameters menu, you can set your frequency
between, as well as set your pulse on time (Duty-Cycle)
and your background current (Ibase Cur.).
Fig. 15
Turning right encoder
G
(
Fig. 4
) will now change the
pulse frequency; you can adjust the pulse frequency
from 0.4Hz to 1000Hz. Adjust your pulse frequency
according to your application needs.
Press button
C
(
Fig. 4; SELECT
) to change the Duty-
Cycle setting, and then press
C
again to change the Ibase
current. Duty-Cycle refers to pulse-on time or the
percentage of time that you weld at peak current (the
previously adjusted welding current) over the
background current. Ibase current, a percentage of the
peak/welding current, refers to the background current.
Fig. 16
The Pulse symbol in
Fig. 16
indicates that the Pro Pulse
300 is now in GTAW-P (pulsed TIG) mode. To turn the
pulse feature off, go back into the advanced pulse
settings menu, and turn the Pulse option OFF.
To weld, attach the ground clamp to the work piece, and
also set the torch on the work piece—allowing the
tungsten to contact the work surface. Next, press and
hold the torch switch or depress the foot pedal
(whichever you are using) and lift the tungsten off the
work piece by about 1/8”. The machine senses that the
tungsten lifted and initiates the arc. Now, the weld can
be made. If a foot pedal or hand control (rotary or slider)
is used, the amperage can be varied while you weld.
When you finish welding, gently lift your finger off the
torch switch or your foot off the pedal to extinguish the
arc.
MIG Welding—General Information
MIG welding with the Pro Pulse 300 can be done three
different ways: manual, synergic, and pulse. In any case,
the following things are critical to making good welds:
Use the correct wire for the material being welded.
Use contact tips that match the diameter of the wire
selected. For example, use .030” contact tips
with .030” wire, use .035” contact tips with .035”
wire, and so on. Follow these instructions for all
wire types, no matter the metal or alloy. However,
on aluminum wire, especially when welding with an
air-cooled MIG welding gun, we strongly
recommend the use of CuCrZr contact tips. If
CuCrZr tips are not available, or a water-cooled
MIG welding gun or push-pull gun is used, standard
tips can be used. The tip size, however, must
be .005” larger than the wire size. For example,
.035” aluminum wire would require a .040” contact
tip, and 3/64” aluminum wire would require a .052”
contact tip. (Note: Using standard contact tips when
welding aluminum results in shorter contact tip life
and limited performance.)
Use the correct gas, at the correct flow rate, for the
wire.
Summary of Contents for Pro Pulse 300
Page 6: ...6 Fig 1...
Page 8: ...8...
Page 31: ...31 Pro Pulse 300 Wiring Diagram...
Page 32: ...32 Pro Pulse 300 Parts Diagram...


