


15
4) Release the trigger; the base current arc extinguishes, the post-flow gas timer runs out, gas flow stops, and the weld is
completed.
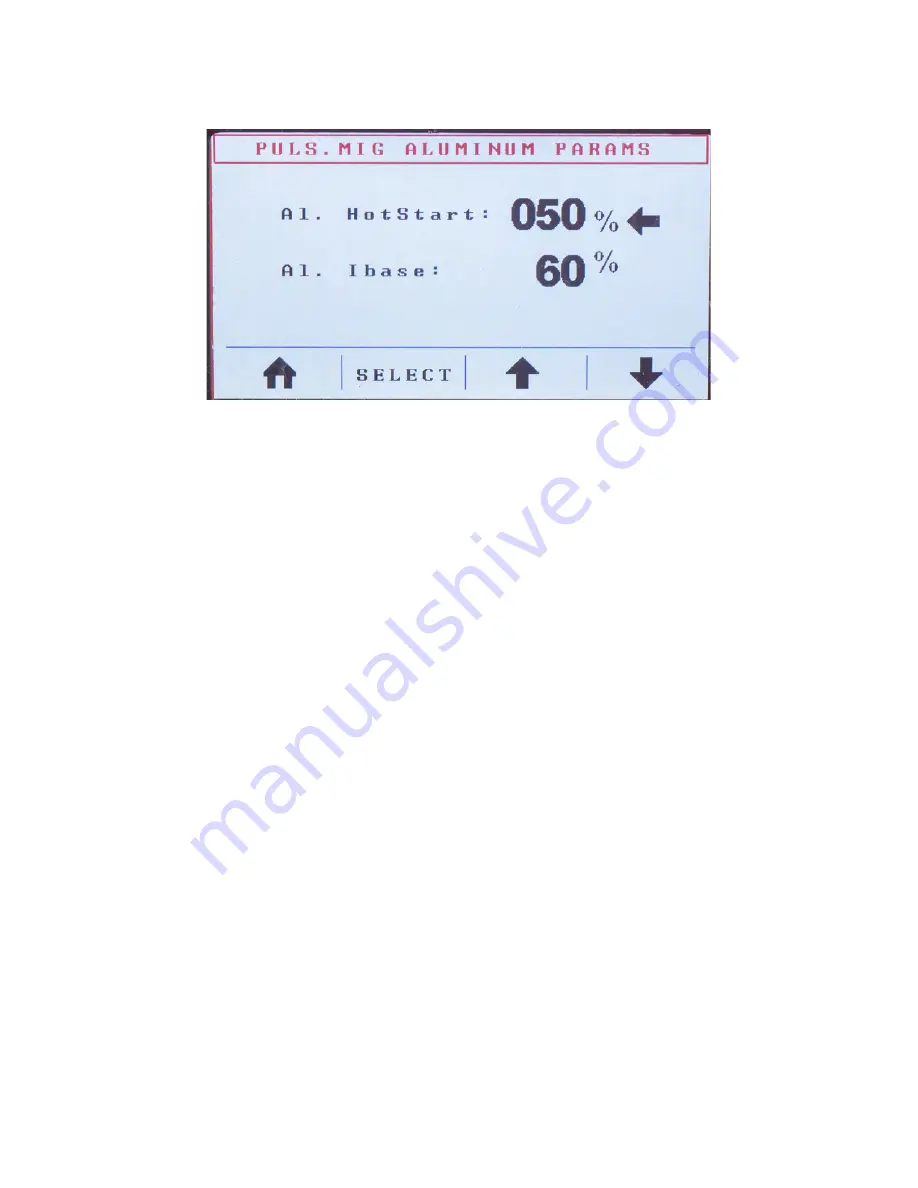
Fig. 5
The menu shown in
Fig. 5
is only available in MIG 4T mode and in pulsed MIG welding aluminum programs. You can
enter the menu by pressing button
E (Fig. 4
).
Note: The 4T trigger is reprogrammed in the aluminum pulse programs.
The material thickness settings in the display are approximate, especially when welding aluminum. When welding
aluminum, the values change with the temperature or with the material being welded. If the material is cold, the chosen
material thickness in the display may have to be a little higher than the actual material thickness. When the material is
preheated properly or has been welded on for a while, then the thickness in the display needs to be lower or a lot lower
than the actual material thickness. Therefore, you have the ability to adjust the material thickness (which will adjust the
wire speed and the voltage at the same time), while welding, by turning left encoder
F
(
Fig. 4
) counter clockwise. Our
push-pull and spool guns come standard with remote control options, but we offer remote control options with our MIG
welding guns as well.
Pro Tip: Because this is not always practical while welding, or you purchased a MIG gun without remote control,
there is a second way to control heat input. For instance, if the machine is in MIG 2T and the slope down time is set,
for example, anywhere between 3 and 6 seconds, you have the option, if you notice that the weld is getting too hot, to
let go of the trigger. Laying off the trigger lets the machine go into slope down, causing the welding current to taper
gradually. Just before the machine turns off, depress the trigger again allowing the process to repeat. Doing this
allows you to fill in gaps and/or manually compensate for a too hot setting or the material heating up.
HTP recommends using a MIG remote control for maximum control when welding aluminum. If a MIG remote
control is not available, MIG 4T is the next best option for performance and control.
How to Weld—Step by Step
Stick Welding
Use the Select Mode button (
Fig. 4, A
) to toggle through the menu until the LED next to Stick illuminates.
The display will show the welding amperage. If necessary, unplug the male Dinse plug (
Fig. 2, Pos. W
) that supplies the
welding current to the MIG welding gun, and then plug the electrode holder (stinger) into the desired outlet. Most stick
electrodes use DCEP; for DCEP, plug the electrode holder into the positive female Dinse receptacle (
Fig. 2, Pos. Y
) and
the ground cable and clamp assembly into the negative female Dinse receptacle (
Fig. 2, Pos. Z
). Use the left encoder
(
Fig. 4, F
) to set your welding amper age.
Summary of Contents for Pro Pulse 300
Page 6: ...6 Fig 1...
Page 8: ...8...
Page 31: ...31 Pro Pulse 300 Wiring Diagram...
Page 32: ...32 Pro Pulse 300 Parts Diagram...


