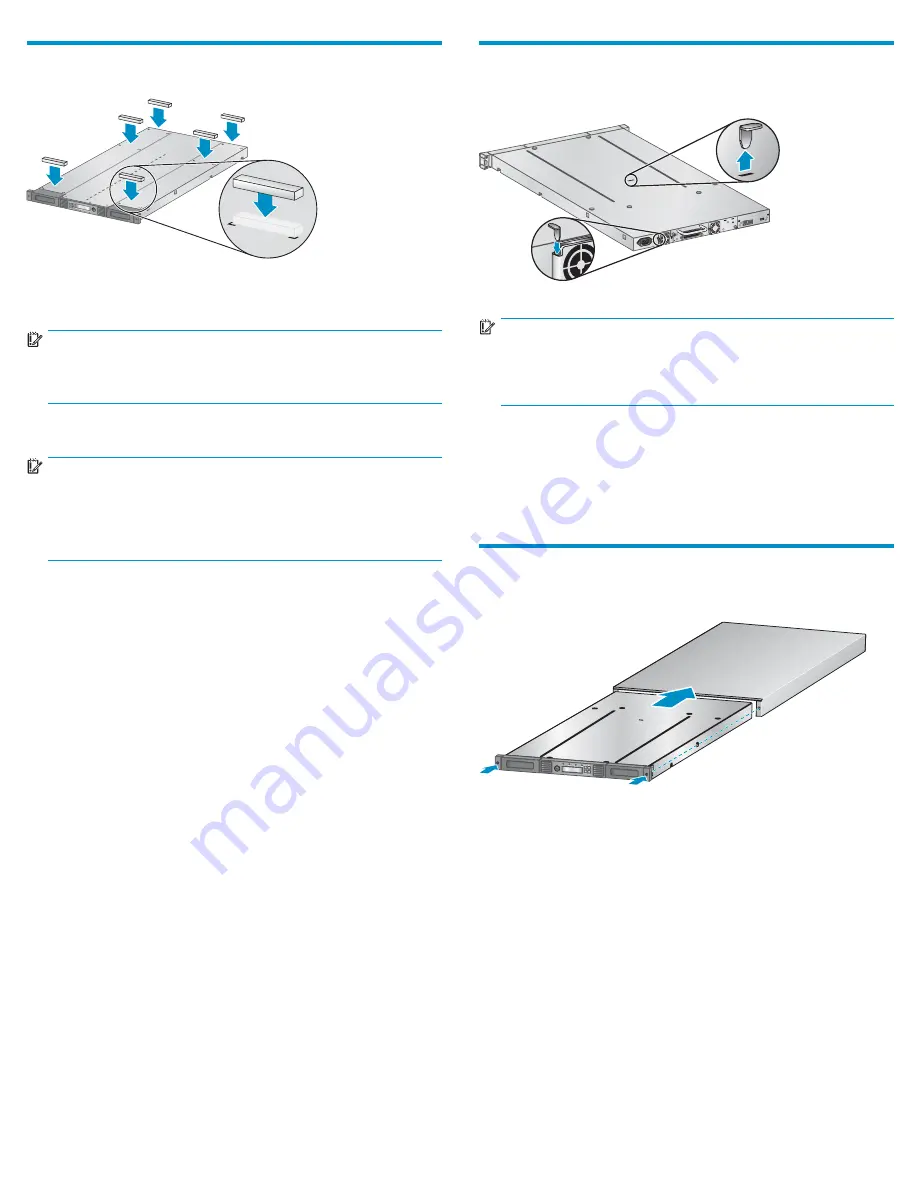
4 Attaching the support feet
11164
Skip this step if you are mounting the Autoloader in a rack or installing
the optional tabletop conversion cover.
IMPORTANT:
The Autoloader must be supported under both side edges to
work properly.
Verify that there are no tape cartridges in the Autoloader.
IMPORTANT:
The Autoloader may be damaged if it is turned over with tape
cartridges in the magazines or robot. If the Autoloader has been
used before, use the magazine release holes shown on Page 9 to
remove the tape cartridges from the magazines.
Gently turn the Autoloader over and set it on its back. Locate the six
inscribed foot location lines.
Peel the backing paper off each foot and apply it within a set of foot
location lines.
Turn the Autoloader right side up.
5 Removing and storing the shipping
lock
11133
IMPORTANT:
Shipping lock:
The shipping lock must be removed for the
robotics to work properly.
A robot move error is displayed if the
shipping lock is not removed.
The shipping lock prevents the robotic transport mechanism from moving
during shipment and must be removed and stored before powering
on the Autoloader.
Locate the adhesive tape holding the shipping lock at the top of the
Autoloader. Remove the adhesive tape, then remove the shipping lock
and store it as shown.
6 Installing the optional tabletop
conversion cover
11823
Skip this step if you do not have the optional tabletop conversion kit.
Place the cover on the work surface behind the Autoloader. Slide
the Autoloader into the cover until the front panel of the Autoloader
is aligned with the cover.
Tighten the two captive screws on the front bezel to secure the
Autoloader in the cover.
Continue with Step 10.
Page 5


