Removal and Replacement Procedures 48
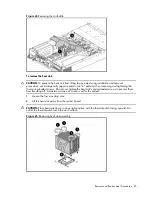
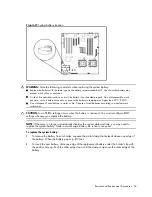
Figure 27
Installing the processor
CAUTION:
To prevent overheating or a possible system crash, use only a heat sink model specified
for the HP ProLiant DL180 server.
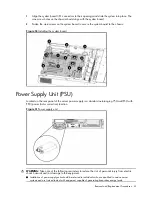
To install the heat sink:
1.
Properly align the heat sink mounting pins to the system board mounting holes.
2.
Tighten the mounting pins clockwise to secure the heat sink connection to the system board.
CAUTION:
To prevent the heat sink from tilting to one side during installation and removal
procedures, use a diagonally opposite pattern (an “X” pattern) when loosening and tightening the
four spring-loaded screws. Do not over tighten the heat sink’s spring-loaded screws to prevent them
from breaking off. A maximum torque of 4 in-Ib is set for the system.
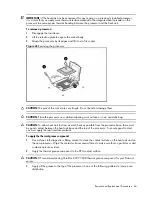
Figure 28
Installing the heat sink
Summary of Contents for ProLiant DL180 G
Page 12: ...Customer self repair 12 ...
Page 13: ...Customer self repair 13 ...
Page 14: ...Customer self repair 14 ...
Page 15: ...Customer self repair 15 ...
Page 19: ...Illustrated parts catalog 19 ...
Page 82: ...Diagnostic tools and Setup Utilities 82 ...
Page 84: ...Diagnostic tools and Setup Utilities 84 Figure 72 Security menu of the BIOS Setup Utility 2 ...


