background image

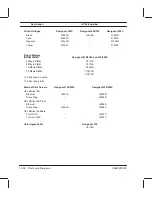
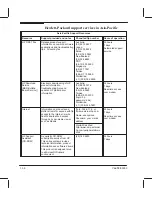
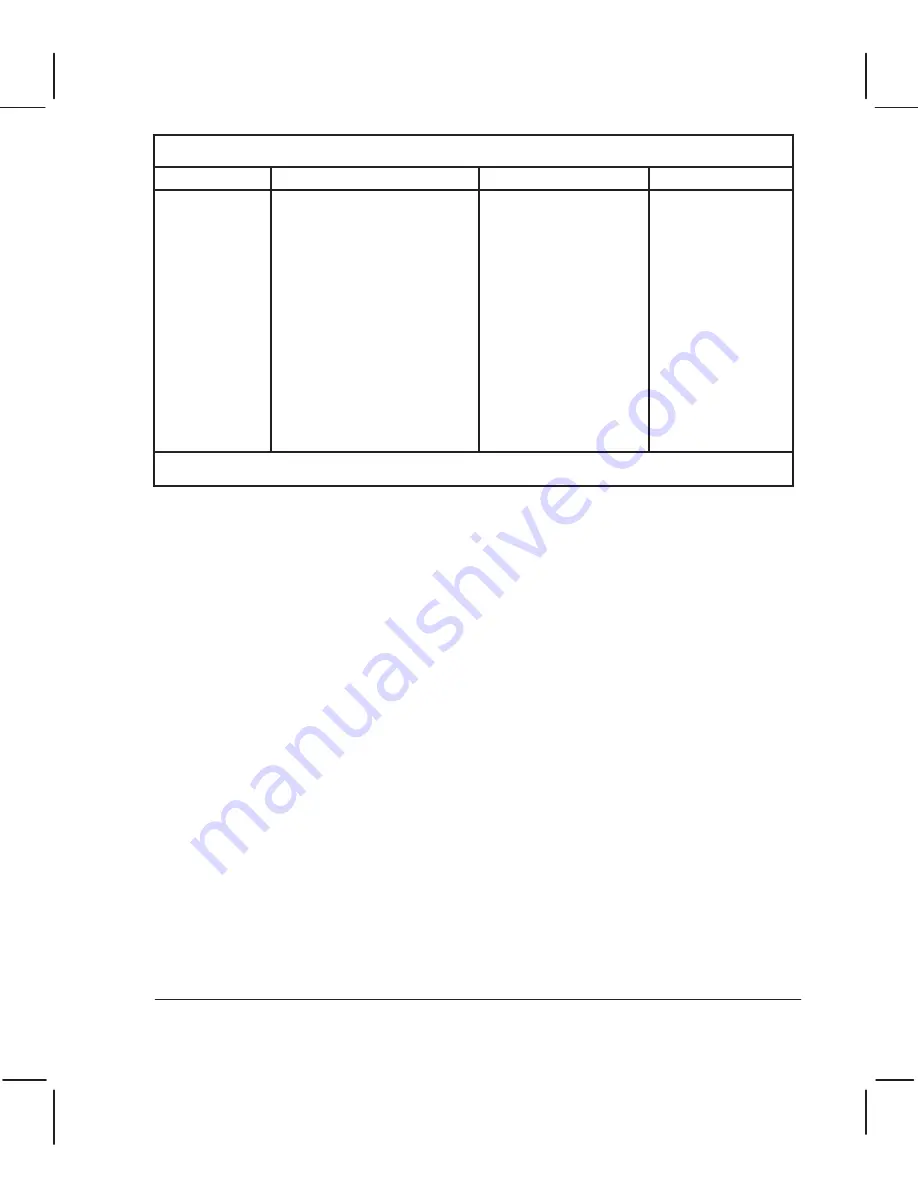
Asia-Pacific Support Resources (continued)

Resource

Support provided and notes

Phone/fax/ftp number

Hours of operation

HP Fulfilment
Service

Latest drivers.

Australia:
Tel: (612) 565 6099
Fax: (612) 519 5631

Japan
Tel: (03) 5346 1891

Korea
Tel: (82-2) 3452 7677

New Zealand
Tel: (02) 565 6099
Fax: (02) 519 5631

Singapore:
Tel: (65) 740 4477
Fax: (65) 740 4499

For telephone support in the Asia-Pacific region other than for those services listed above, contact your local HP
dealer.

Summary of Contents for Designjet 230

Page 1: ... ...

Page 2: ... procedures described in this manual are to be performed by HPĆqualified service personnel only Serious shock hazard leading to death or injury may result if you do not take the following precautions Ensure that the ac power outlet mains has a protective earth ground terminal Disconnect the plotter from the power source prior to performing any maintenance Prevent water or other liquids from runnin...

Page 3: ... ...

Page 4: ...mbers for plotter options accessories and service parts are located in chapter 10 This manual contains information for the monochrome HP DesignJet 230 and 330 plotters and the color HP DesignJet 250C and 350C plotters To highlight the differences between the various plotters the following symbols will be used in the left margin This symbol indicates the information specific only to the HP DesignJe...

Page 5: ...s 1Ć2 Interfaces 1Ć3 Network Connections 1Ć3 Memory 1Ć3 Accuracy 1Ć3 Resolution 1Ć4 Legs 1Ć4 RollĆfeed 1Ć4 Upgrading a DesignJet 330 1Ć4 Media 1Ć4 Power Requirements 2Ć2 Choosing an Interface Cable more User s Guide 2Ć2 Choosing a Suitable Plotter Environment more User s Guide 2Ć3 Environmental Specifications 2Ć3 Plotter Dimensions and Weight 2Ć3 ...

Page 6: ...l 3Ć12 DesignJet 330 Front Panel 3Ć13 DesignJet 350C Front Panel 3Ć13 ThirdĆParty Inks and OffĆAxis Ink Systems 3Ć14 Configuring the Plotter 3Ć14 Verifying Plotter Operation 3Ć14 PowerĆOn SelfĆTests 3Ć14 Demonstration Plot 3Ć14 Example of Setup Sheet DesignJet 250C 3Ć15 Example of Setup Sheet DesignJet 350C 3Ć16 Moisture on Plotter 4Ć2 Level of Plotter Usage 4Ć2 Friction on Slider Rod 4Ć2 Noisy Ca...

Page 7: ...idance 5Ć6 Positional Feedback 5Ć6 Detecting the Lines and Media Edges 5Ć7 Line Sensor 5Ć7 Providing Ink 5Ć7 Print Cartridges 5Ć7 Distance between Carriage and Media 5Ć7 Producing an Image 5Ć8 PrintĆMode Characteristics 5Ć8 Servicing the Cartridges 5Ć11 Service Station 5Ć11 Spittoon 5Ć11 Primer 5Ć11 Plotter Architecture 5Ć12 Electronics Module 5Ć13 MainĆPCA Connections 5Ć13 Sensors 5Ć13 ROM 5Ć14 R...

Page 8: ...oving the Spittoon 6Ć24 Removing the PinchĆArm Sensor 6Ć25 Removing the DriveĆRoller Gear 6Ć25 Removing the Media Motor 6Ć26 Removing the PinchĆArmĆLever Linkage 6Ć27 Removing the Primer 6Ć27 Removing the Service Station 6Ć28 Removing the BailĆLift Mechanism 6Ć29 Removing the EngagingĆLever Support 6Ć31 Removing the Overdrive Roller 6Ć32 Removing the Back Cover 6Ć33 Removing the Trailing Cable 6Ć3...

Page 9: ...PowerĆOn 8Ć2 Self Test and Initialization 8Ć2 What You Should See and Hear 8Ć3 FrontĆPanel LEDs 8Ć5 Error Codes for the DesignJet 230 and 250C Plotters 8Ć6 No LEDs On 8Ć6 LEDs On Error Off 8Ć6 LEDs Flashing 8Ć7 Error LED On 8Ć9 Error Codes for the DesignJet 330 and 350C Plotters 8Ć13 No LEDs On 8Ć13 LEDs On Error Off 8Ć13 LEDs On or Flashing 8Ć13 LEDs Flashing 8Ć14 Error LED On 8Ć15 System Errors ...

Page 10: ...uration Plot for the DesignJet 230 and 250C 8Ć49 Service Configuration Plot for the DesignJet 330 and 350C 8Ć50 Printing the Service Configuration Plot 8Ć51 Service Monitor Data Display 8Ć52 Servo Encoder Test 8Ć53 Clearing the EEROM for the DesignJet 230 and 250C 8Ć54 Clearing the EEROM for the DesignJet 330 and 350C 8Ć55 PrintĆQuality Troubleshooting 8Ć56 PrintĆQuality Plot 8Ć56 Banding 8Ć57 Une...

Page 11: ...w Diagrams 10Ć4 Legs 10Ć4 Top and Back Covers Electronics Trailing Cable 10Ć6 End Covers 10Ć8 CarriageĆAxis Left End 10Ć10 CarriageĆAxis Right End 10Ć12 Service Station Primer Spittoon 10Ć14 Media Entry Path 10Ć16 Bail and Overdrive 10Ć18 PinchĆArm Assembly 10Ć22 RollĆFeed Assembly 10Ć24 Accessories 10Ć26 Interface Cables 10Ć29 HewlettĆPackard support services in the United States 11Ć2 HewlettĆPac...

Page 12: ...on against electrical shock in case of a fault A terminal marked with this symbol must be connected to ground in the manner described in the installation operating manual and before operating the equipment Frame or chassis terminal A connection to the frame chassis of the equipment which normally includes all exposed metal Alternating current Direct current Alternating or direct current The WARNIN...

Page 13: ... ...

Page 14: ...lowing applications are supplied with the plotters D AutoCAD for DOS D AutoCAD for Windows D MicroSoft Windows Applications Other application software User s Guide chapter 1 The plotters accept drawing data in the following graphic languages D HewlettĆPackard Graphics Language HPĆGL a vector language D HPĆGL 2 an enhanced version of HPĆGL D HewlettĆPackard Raster Transfer Language HPĆRTL a raster ...

Page 15: ...Ethernet Novell Netware DOS Windows LAN Manager DOS Windows TCP IP HP UX Sun OS Solaris TCP IP IBM AIX EtherTalk Macintosh Apple Products Token Ring Novell Netware DOS Windows LAN Manager DOS Windows TCP IP HP UX Sun OS Solaris IBM AIX The print server includes a network autoswitching feature and can detect from which network it is receiving data This enables you to send data through different net...

Page 16: ...verter The rollĆfeed assembly and legs are optional The E A0Ćsize legs include a media diverter to prevent large media sizes from hitting the ground The D A1Ćsize legs have no media diverter For additional information on the rollĆfeed assembly chapter 5 Users can order an upgrade kit to upgrade a DesignJet 330 to a Designjet 350C The kit can be installed by the user For additional information User...

Page 17: ... Sheet media must not exceed the maxima and minima shown here The media margins define the real available plotting area on the media 210 625 mm 8 3 24 6 in 210 1625 mm 8 3 64 in 210 917 mm 8 3 36 1 in D A1 size 210 1625 mm 8 3 64 in plotters E A0 size plotters portrait 17 mm 17 mm 5 mm 17 mm 17 mm 5 mm landscape 17 mm 0 67 in 5 mm 0 2 in 5 mm 5 mm All measurements 2mm 0 08 in ...

Page 18: ... ...

Page 19: ... ...

Page 20: ...64 V ac 47 63 Hz Consumption 140 watts maximum W A R N I N G Choosing an Interface Cable Instructions User s Guide chapter 1 w Connect the plotter to your computer A short cable less than 15 meters or 50 feet is recommended for the RSĆ232ĆC interface A longer cable is permissible provided the load capacitance does not exceed 2500 picofarads Use a short cable less than 2 meters or 6 6 feet for the ...

Page 21: ...dges Temperature Relative Humidity 40 to 70_C 40 to 158_F 5 95 40 to 40_C 40 to 104_F Acoustics Operating D A1 size plotters E A0 size plotters Idle Sound Pressure Sound Power 43 dB Acoustic 6 0 bels A 45 dB A 20 dB A 3 6 bels A These specifications are typical sound pressures at a oneĆmeter bystander position Idle specification assumes fan is off Plotter Dimensions and Weight Plotter Model D A1 s...

Page 22: ... ...

Page 23: ... ...

Page 24: ...at the user site Inspect the shipping container for damage If the shipping container shows signs of damage retain it until you have checked the contents of the shipment and verified the performance of the plotter Unpack and assemble the plotter following the series of illustrations below 32Kg 71 lb 32Kg 71 lb ...

Page 25: ... ...

Page 26: ...in transit notify the carrier and the nearest HP Sales and Support Office Retain the shipping container and insulation material for the carrier s inspection The Sales and Support Office will arrange for the repair or replacement of the plotter You can order a repacking kit if you need to repack the plotter and don t have the shipping container and insulation material Part numbers chapter 10 ...

Page 27: ...allation and Configuration C4699Ć90000 Assembling the Legs Optional If the user has purchased the optional legs for the plotter assemble them following the series of illustrations below E A0Ćsize plotters only ...

Page 28: ... ...

Page 29: ...3Ć7 Installation and Configuration C4699Ć90000 E A0Ćsize plotters only 32Kg 71 lb ...

Page 30: ...allation and Configuration C4699Ć90000 Assembling the RollĆFeed Assembly Optional If the user has purchased the optional rollĆfeed assembly for the plotter assemble it following the series of illustrations below ...

Page 31: ... 2 1 ...

Page 32: ... ...

Page 33: ... ...

Page 34: ...ncel Both ON Best or vellum or translucent Special paper for color Fast Normal Paper Film or vellum or translucent Both ON Best Error Load Media Ready Read Settings Media Type Print Quality Fast Normal 3Ć12 Installation and Configuration C4699Ć90000 Installing the Plotter Instructions User s Guide chapter 1 Setting up the plotter Using the Plotter Instructions Quick Reference Guide ...

Page 35: ...CONTINUE PLOTTING Load Media CONTINUE PLOTTING Load Media FORM FEED REPLOT SETUP FORM FEED REPLOT SETUP ...

Page 36: ...dth and density Examples of the setup sheets are given on the following pages You can change between pattern scatter and cluster halfĆtoning by means of a software driver Verifying Plotter Operation The plotters contain several types of internal operational checks and tests to ensure that the plotter is properly functioning and to help identify problems if any are detected Whenever you switch the ...

Page 37: ...bles below Grayscale Color 0 13 0 70 0 35 0 50 0 25 0 18 1 00 100 80 20 10 5 60 40 1 2 3 4 5 6 7 8 5 Plot 3 Graphics Language Appearance Rotate off Rotate 90_ Mirror on Mirror off Merge off Merge on 2 Serial Interface Ready Read Settings Mono 6 Color Print color as color Print color as grayscale Pen Number If you want these pen settings to take effect don t forget to mark the oval above Black Red ...

Page 38: ... 3Ć16 Installation and Configuration C4699Ć90000 The following is a scaled version of a DesignJet 350C setup sheet setup sheet for Designjet 330 is very similar Software 350C ...

Page 39: ... ...

Page 40: ...CAD plots 20 E A0 CAD plots The service configuration plot gives an indication of how much the plotter has been used number of plots number of cartridges number of times the plotter has been turned on Details page 8Ć49 8Ć50 Friction on Slider Rod The carriage bushings are made of a porous composite material Oil stays inside them by means of capillary action Never place the bushings on an absorbant...

Page 41: ...odule the factory spittoon value is reset to 0 used Keep in mind that the value printed on the service configuration plot may greatly underestimate the amount of ink in the spittoon Future PCĆbased plotter diagnostics will enable you to download information from the old EEROM and upload it to the new EEROM Belt Swelling To prevent new belts from swelling incorrectly keep them in their bags with di...

Page 42: ...essary Do not use abrasive cleaners 3 Wipe the plotter dry with a soft lintĆfree cloth Cleaning the Drive Roller Due to the ink s reflectance ink spilled on the roller can disrupt the plotter s edgeĆsensing function To remove any ink from the roller perform the following procedure 1 Connect the plotter to the ac power source 2 Switch the plotter ON and wait for it to finish initialization 3 Open t...

Page 43: ... ...

Page 44: ...d DesignJet 330 and 350C Before reading it read the functional overview of the DesignJet 220 HP DesignJet 220 and HP DesignJet 200 Plotters Service Manual part number C3187Ć90000 Information on the DesignJet 650C HP C2858B C2859B DesignJet 650C Service Manual part number C2858Ć90000 Rev B Loading Sheet Media The actions performed by the plotters in loading sheet media are similar to those of the D...

Page 45: ...o sense the right and left edges and to check dimensions Advances the media six inches Checks the right edge of the media for skew misalignment The loading process fails if the skew is greater than the allowed limits If the media is slightly misaligned the plotter gives you the opportunity to realign it After realigning the right edge of the media is checked again for skew misalignment The loading...

Page 46: ...ence The loading process fails if the media sensor detects no media Actuates the bail so that the media can advance under it Again moves the media forwards and backwards to check for its presence The loading process fails if the media sensor detects no media Advances the media several inches and rechecks media presence The loading process fails if the media sensor detects no media The plotter stop...

Page 47: ...s the infeed path to the plotter Once a plot is completed the builtĆin cutter is manually slid across the paper to cut the plot from the roll For further information User s Guide chapter 2 Removing Static Charge from the Media An antiĆstatic brush located under the entry platen prevents static charge from building up on the media A charge can cause the media to stick to itself and jam the plotter ...

Page 48: ...ive consists of a DC motor directly driving a single belt and the carriage This replaces the dualĆbelt system of the DesignJet 220 D The motor assembly itself provides the tension needed on the belt eliminating the need for a separate pulley tensioner D The belt clamps itself to the carriage there are no separate belt clamps D The interface between the motor shaft and belt is friction based D You ...

Page 49: ...et 350C uses the same three color print cartridges as does the DesignJet 750C and 755CM plotters and the same black cartridge as the DesignJet 650C The DesignJet 230 and 330 plotters use only the black cartridge which is used in the DesignJet 650C The distance between the carriage and the writing surface can determine image sharpness As the distance increases the drop shape and directionality degr...

Page 50: ...um or translucent 300x300 600x600 addressable 600x600 addressable 1 2 2 26 67 26 67 26 67 No Yes Yes No Yes Yes 1 0 5 0 5 Yes Yes No 0 5 0 75 0 75 The characteristics for monochrome plots on film are the same as for monochrome plots on paper except for the minimum pass time 7 6 3 8 3 8 300x300 600x600 addressable 600x600 addressable 1 2 2 26 67 26 67 26 67 No Yes Yes No Yes Yes 1 0 5 0 5 Yes Yes N...

Page 51: ... 67 No No No No No No 1 1 0 5 Yes No No 0 0 0 300x300 600x600 addressable 300x300 addressable 600x600 addressable 300x300 addressable 1 2 2 2 1 26 67 26 67 26 67 26 67 26 67 No Yes Yes Yes Yes No Yes Yes Yes Yes 1 0 5 0 5 0 5 0 5 Yes Yes Yes No No 0 5 7 6 75 3 8 75 3 8 75 3 8 75 3 8 ...

Page 52: ...6 67 26 67 26 67 26 67 No Yes No Yes No No Yes No Yes No 1 0 5 1 0 5 1 Yes Yes No No No 0 0 0 0 0 300x300 300x300 300x300 1 1 2 16 67 16 67 16 67 No No No No No No 1 1 0 5 Yes No No 0 0 0 The characteristics for color plots on film are the same as for color plots on paper except for the passes per swath and pass advance swaths 1 2 4 1 0 5 0 25 ...

Page 53: ... holes which were located on the serviceĆstation sled on the DesignJet 650C are now located on the ink separator to prevent them from becoming clogged A single redesigned spittoon is located on the right side of the plotter The plotters feature a manual primer based on that of the DeskJet 1200 instead of the automatic one of the DesignJet 650C See User s Guide w Cleaning the cartridge nozzles D A ...

Page 54: ...gives an overview of the architecture Main Processor 80960CA Internal Memory ROM RAM Expansion Memory SIMM DRAM Upgrade Memory SIMM ROM Servo Processor 8052 Encoders Motor Drivers EEPROM 512 Byte Sensors Front Panel Swath RAM 1 Mbyte Nozzle Timing ASIC Cartridge Drivers Carriage s Line Detector Support Shuffler ASIC IEEE 1284 ASIC Bi tronics 80960 BUS Host RS 232 C ...

Page 55: ...riage Motor J13 Pinch arm Sensor There is no bail sensor for the DesignJet 230 and 250C and DesignJet 330 and 350C There is no pinchĆarm sensor on the DesignJet 230 and 250C but there is one on the DesignJet 330 and 350C The following sensors connect to the main PCA The is a mechanical switch that detects if the plotter cover has been raised If you open the cover while the plotter is plotting the ...

Page 56: ...ou clear the EEROM or replace the electronics module perform all calibrations Also note that the factory spittoon value on the cleared or new EEROM is 0 Keep in mind that the value printed on the service configuration plot may greatly underestimate the amount of ink in the spittoon Future PCĆbased plotter diagnostics will enable you to download information from the old EEROM and upload it to the n...

Page 57: ...ines with one of vertical lines Lines plotted parallel to the carriage axis take up considerably less memory than those plotted perpendicular to it The plotter builds graphic display objects on a swathĆbyĆswath basis A horizontal line can be contained in one swath A vertical line spans many swaths and therefore requires more entries in the plotter s internal display list The raster transfer langua...

Page 58: ...sensor Thermistor circuit Linear encoder Cartridge nozzle firing circuit Some electronic components on the DesignJet 250C and 350C carriage PCA are not present on the DesignJet 230 and 330 carriage PCA At powerĆon the plotter firmware identifies whether the carriage is for a color or a monochrome model and behaves accordingly Front Panel PCA The plotters use the same frontĆpanel PCA as the DeskJet...

Page 59: ... ...

Page 60: ...remove an IC or a printed circuit assembly PCA from its conductive foam pad or conductive packaging until you are ready to install it Ground your body while disassembling and working on the plotter After removing a cover from the plotter attach a clip lead between the PCA common and earth ground Touch all tools to earth ground to remove static charges before using them on the plotter After removin...

Page 61: ... and repair the plotters T8 T9 T10 T20 T15 T25 3 16 inch 5 5 mm and Long Torx screwdriver with the indicated attachments Pozidrive PZ1 screwdriver Small flatĆblade screwdriver Nut driver with the indicated attachments NeedleĆnose pliers Spring hook 10X Magnifier Loopback connector HP Part Number 07440Ć60302 ...

Page 62: ...a SIMM either put on a grounding wrist strap and attach the end to the metal chassis of the plotter or touch the outer metal surface of the plotter with your hand Otherwise static electricity from your body could damage the SIMM Take the SIMM out of its bag holding the SIMM only by the edges With the SIMM s small notch on the left and the metallic edge away from you load the SIMM into the slot nea...

Page 63: ... ...

Page 64: ... Ensure that the cartridge caps are clean the wipers straight and the openings clear ...

Page 65: ...Cover Open the top cover Push the rightĆhand side of the cover slightly back so that the rightmost hinge uncouples Slide the cover to the left so that the other hinges uncouple Close the cover and click each hinge into place Remove the cover from the plotter ...

Page 66: ... 2 1 ...

Page 67: ...the front and back clips These may be stiff Pull the endĆcover up and remove it from the plotter It s not easy to reinstall the endĆcovers on the plotter With some practice you should learn the knack As a guide before you replace an endĆcover take a look at the various clips on its inside and identify where they fit on the plotter Make sure that the primer plunger is installed properly when reinst...

Page 68: ...e top cover page 6Ć7 Remove the rollĆfeed assembly page 6Ć8 Remove the pinchĆwheel lever and screw Torx 10 Pull the plotter on off switch out of the endĆcover Release the three clips at the bottom of the endĆcover first the side clip then the front and back clips These may be stiff ...

Page 69: ... ...

Page 70: ... b The lever nut is positioned inside the slot on the black plastic piece Nut Black plastic piece Disconnecting the FrontĆPanel Assembly Remove the right endĆcover page 6Ć10 On the main PCA gently pull the frontĆpanel connector clamp FP to the right to release the flat white cable Pull the cable easily out of the clamp and release it from the clip on the side of the electronics module FP COVER Rea...

Page 71: ...el assembly from the main PCA page 6Ć12 Unscrew the cover plate at the back of the plotter and remove it Torx 10 or Flat Remove the indicated two screws from the back cover Torx 20 Remove the indicated screw from the floor of the electronics module Torx 20 At the back of the plotter ensure that the two small wire clamps of the parallel port are positioned flush against the electronics module Push ...

Page 72: ...l not to damage the parallelĆport clamps If you are changing the electronics module for a new one remove the DRAM SIMM if installed from the old module and install it into the new one Refer to Chapter 9 before installing the ROM SIMM from the old module into the new module Calibrations After having installed a new electronics module perform the following calibrations Details chapter 7 1 Black Cart...

Page 73: ... Clip ...

Page 74: ...t the bellĆshaped flag rotate to its correct position Insert the long arm of the mediaĆsensor assembly into the slot at the back of the entry platen as shown Ensure that the two flags have not been mispositioned Press the mediaĆsensor assembly up onto the post on the underside of the entry platen until it clicks into place Refasten the mediaĆsensor cable in its clip making sure that it does not ob...

Page 75: ...tation Remove the right endĆcover page 6Ć10 Remove the left endĆcover page 6Ć9 Disconnect the trailing cable from the main PCA The cable connects to the connector marked P1 on the main PCA Disconnect the trailing cable from the guides on the right bracket Fold the trailing cable upwards and store it on the trailingĆcable guide ...

Page 76: ... 5 5 mm Torx 15 ...

Page 77: ...age to the left over the service station Ensure that the encoder strip is oriented with the transparent area up and with two holes on the left side and one hole on the right side Feed the encoder strip through the cartridge carriage from right to left Temporarily rest the loose strip safely on the drive roller Slip the left end of the strip over the plastic pin on the left bracket and press it rig...

Page 78: ... Torx 15 Leave loose 5 5 mm Tighten slightly Torx 15 Tighten slightly ...

Page 79: ... the rightĆbracket tab into the slot on the right of the trailingĆcable guide Removing the Carriage Motor Remove the right bracket page 6Ć21 Disconnect the carriageĆmotor cable from the main PCA connector MOT Y and from the clip at the back of the plotter In the following step take care not to break the black plastic tab on top of the motor Press the carriage motor towards the left and remove the ...

Page 80: ...assembly One fits onto the protruding plastic part on top of the motor Position this part inside the chassis beam The other is a flat metal spring attached underneath the motor Position it underneath the chassis beam Also make sure the belt is correctly positioned on the grooves of the shaft ...

Page 81: ... Torx 20 ...

Page 82: ...Ćarm lever linkage upwards so you can access the screw that attaches the spittoon to the right sideĆplate Remove the screw that attaches the spittoon to the right sideĆplate Torx 20 Disconnect the pinchĆarm sensor cable from the main PCA connector PINCH Slide the spittoon to the right and remove it from the plotter ...

Page 83: ...roller gear to the driveĆroller shaft Torx 10 Remove the driveĆroller gear from the driveĆroller shaft The gear may be stiff Reassembling The worm pinion and driveĆroller gear mesh slightly during use Don t install a new motor and an old gear or vice versa install the gear that comes with the motor Apply the grease that comes with the new motor to the worm pinion and driveĆroller gear Reassembling...

Page 84: ...e two screws that secure the media motor to the mediaĆmotor mount Torx 15 Pull the media motor out through the back of the plotter Reassembling The worm pinion and driveĆroller gear mesh slightly during use Don t install a new motor and an old gear or vice versa install the gear that comes with the motor Apply the grease that comes with the new motor to the worm pinion and driveĆroller gear Calibr...

Page 85: ...e to the right out from the hole in the right sideĆplate Remove the linkage from the cam journal on the right sideĆplate Removing the Primer Remove the left endĆcover page 6Ć9 Disconnect the four tubes from the ink separator Remove the screw that attaches the primer to the left sideĆplate Torx 20 Slide the primer to the left and remove it from the plotter ...

Page 86: ... Torx 20 The service station is one orderable assembly Do not open it Ensure that the cartridge caps are clean the wipers straight and the openings clear ...

Page 87: ...ing the top of the bailĆgear assembly towards the front of the plotter the following On the engaging lever move the cable ball slightly towards the back of the plotter Allow the engaging lever to move towards the left of the plotter so that the cable comes free of the lever Release the cable from the engagingĆlever support Release the cable from the bailĆgear assembly ...

Page 88: ...Torx 8 You may need to hold the bail cam steady inside the sideĆplate at the same time You can access the cam through the hole underneath the sideĆplate Torx 15 The cam falls to the floor of the plotter ...

Page 89: ...e the service station page 6Ć28 Release the cable from the engaging lever support page 6Ć29 Remove the engaging lever Remove the spring from the engagingĆ lever support Remove the three screws that attach the support to the left sideĆplate Torx 10 Torx 20 Pull the support upwards and remove it from the plotter ...

Page 90: ...hile flexing the media separator upwards slide the overdrive roller horizontally to the right until the overdrive clutch can drop free of the roller Move the overdrive roller to the right until it has completely cleared the left sideplate but not entered the hole in the right sideplate Release the overdrive roller from the small black clips underneath the media separator and remove the overdrive r...

Page 91: ...tter D A1Ćsize plotters have 2 screws E A0Ćsize plotters have 3 screws Torx 20 Before replacing the screws ensure that the electronics module is flush against the inside back of the plotter In the following steps take care not to damage the parallelĆport clips Pull the bottom of the cover slightly back and out from the plotter Lift the cover up and remove it from the plotter ...

Page 92: ...from the connector marked P1 on the main PCA and from the guides on the right bracket Move the carriage out of the service station Release the two indicated clips on the top of the cartridge carriage by pulling them slightly outwards For DesignJet 230 only it is also necessary to release two clips at the bottom of the cartridge carriage ...

Page 93: ... Trailing cable under tabs ...

Page 94: ...page 6Ć21 Remove the back cover page 6Ć33 Remove the trailing cable page 6Ć34 Slide the trailingĆcable guide to the right releasing it from the leftĆbracket tab Rotate the trailingĆcable guide back on its hinge until it clicks off from the chassis beam Remove the trailingĆcable guide from the plotter ...

Page 95: ...rds the left and remove the belt from the motor shaft If you need greater maneuverability of the motor press the black plastic tab on top very slightly downwards Reassembling Make sure the belt is correctly positioned on the grooves of the shaft Rotate the motor on its hinge out towards the back of the plotter Release the belt from the pulley on the left of the plotter Reassembling Make sure the b...

Page 96: ... ...

Page 97: ...heck the carriageĆtoĆmedia distance page 7Ć11 Calibration After having reassembled the plotter perform the black cartridgeĆalignment Details User s Guide Reassembling Clip the belt to the carriage using the same part of the belt as was originally used Also match the vertical lines on the belt with the vertical grooves on the carriage The horizontal lines on the belt face outwards ...

Page 98: ...eed greater maneuverability of the motor press the black plastic tab on top very slightly downwards Reassembling Make sure the belt is correctly positioned on the shaft grooves On the left of the plotter remove the belt from the pulley Reassembling Make sure the belt is correctly positioned on the pulley grooves Underneath the left side of the chassis beam release the black plastic clip and push t...

Page 99: ...Ćlever support page 6Ć31 Remove the large black plastic gear from the left sideĆplate Torx 20 Remove the overdrive roller page 6Ć32 Remove the three screws that attach the mediaĆmotor mount to the right sideplate Torx 20 Remove the mediaĆmotor mount Snap the overdrive clips to the right and remove them from under the media separator D A1Ćsize plotters have two clips E A0Ćsize plotters have three c...

Page 100: ...lowing procedure D Take care not to damage the media separator Don t let it slip under the drive roller D Take care that the edge of the media separator does not damage the rubber surface of the drive roller Flex the media separator upwards and position the roller behind it and on top of the pinch wheels Make sure that the gear on the left side of the roller is positioned immediately to the left o...

Page 101: ... you replace the three screws This is to ensure correct spacing between the drive roller and the cartridge nozzles MediaĆmotor mount Torx 20 Calibration Perform the accuracy calibration after reassembling the plotter Details chapter 7 ...

Page 102: ... journal out of the bar cam Grasp the cam journal on the left side of the plotter Reach around to the front of the plotter and push the top of the bar cam slightly towards the rear of the plotter simultaneously pulling the cam journal to the left so that the cam can begin to slide out of the left sideplate Slide the bar cam to the left until it clears the pinchĆarm assembly you want to replace Rem...

Page 103: ... the left and right sideĆplates or the lift mechanism will not work ...

Page 104: ...wo screws from the right sideĆplate Torx 15 This illustration shows the configuration for the DesignJet 230 250C The removal procedure for DesignJet 330 350C is exactly the same except that the spittoon has been removed to access the indicated screws Remove the indicated three screws from the left sideĆplate Torx 15 Lift the overdrive enclosure out from the plotter Reassembling See following proce...

Page 105: ...ge the mediaĆsensor flags The overdrive enclosure should not touch them Replace the two indicated screws dogĆpoint screws Torx 15 Torx 15 Insert the two indicated screws but do not tighten them dogĆpoint screws Torx 15 Torx 15 Replace the indicated screw and tighten it thus aligning the overdrive enclosure with the left sideĆplate Torx 15 Tighten the screws you inserted in step 2 ...

Page 106: ... main PCA connector labeled MEDIA Remove the indicated screw from the right sideĆplate Torx 15 Remove the indicated two screws from the left sideĆplate Torx 15 Torx 20 Release the indicated entryĆplaten clips by pushing the bottom front corners of the entry platen up Pull the entry platen horizontally out from the plotter See the following procedure ...

Page 107: ... The order in which you replace the screws on the entry platen is important On each sideĆplate the two pins should touch the entry platen above it ...

Page 108: ...w Tighten this screw making sure that the entry platen is aligned tight against the left sideĆplate Torx 15 Replace the indicated screw on the rightĆhand side dogĆpoint screw Torx 15 Replace the indicated clamping screw on the leftĆhand side Torx 20 Reconnect the mediaĆsensor cable to the main PCA connector labeled MEDIA Before reinstalling the overdrive enclosure ensure that both flags on the med...

Page 109: ... ...

Page 110: ...ications Accuracy Calibration You cleared the EEROM or replaced the electronics module or cartridge carriage or optical sensor 1 Black Cartridge Alignment 2 Color Cartridge Test 3 Accuracy Calibration Plot Quality More chapter 8 Jagged vertical black or gray lines on plots Black Cartridge Alignment Jagged color lines on plots Color Cartridge Test Shadows appear beside colors Color Cartridge Test B...

Page 111: ...ing key down switch the plotter on Align Cartridges Form Feed Once the the LEDs begin to light up one by one as shown below release the key or or The plotter performs the electrical powerĆon tests but does not initialize the mechanics The fan turns on and remains on All LEDs remain off for a few seconds Then all LEDs begin to flash waiting for you to perform a test or calibration Place the frontĆp...

Page 112: ...Print Quality key or or The plotter performs the electrical powerĆon tests and initializes the mechanics as in normal user mode Details chapter 8 Place the frontĆpanel overlay over the keys on the plotter The overlay is supplied with this manual The frontĆpanel keys in service mode are described on page 7Ć5 Some of the service tests are continuously repeated until you stop them To stop a test pres...

Page 113: ...e you can place either over the actual keys on the plotter The designation of keys for service mode 2 is also shown on the service configuration plot When you have to press two keys together first keep the SHIFT or ALT key pressed and then press the second key PCĆbased diagnostics for the plotters have been developed and are now available on the HP Barcelona server The diagnostics will enable you ...

Page 114: ... Media Axis Test Sensors Test Bail Cycle Test Align Cartridges Service Configuration Bail Cycle Test Accuracy Calib Read Input Output Test Stop the Test SHIFT with SHIFT with SHIFT with ALT with ALT Electrical Test Servo Encoder Test Print Quality Plot Accuracy Calib Print Print Quality Service Monitor ...

Page 115: ... Panel Test Carriage Test Media Axis Test Sensors Test Bail Cycle Test Form Feed 330 350C Color Configuration Mono Configuration Deconfig Mode Bail Cycle Test Media Type Stop the Test SHIFT Electrical Test Servo Encoder Test Accuracy Calibration Print Quality Service Monitor 330 350C Print Quality ...

Page 116: ...d D Mark encoder is removed or replaced D Optical sensor is removed or replaced The endĆpoint accuracy specifies how accurately a plotter can draw a given length of line The endĆpoint accuracy specification for the plotters is 0 38 mm 0 015 in or 0 2 of the specified vector length whichever is greater at 23dC 73dF at 50Ć60 relative humidity on HP special polyester film Use the following formula to...

Page 117: ...kjet polyester film over the top of the plotter for 10 minutes to let the sheet stabilize to the environmental conditions Use a sheet of approximate size A1 or D You must use polyester film Otherwise the optical sensor on the carriage will be calibrated incorrectly and the plotter will have problems loading some types of media In set the Media Type on the front panel to Film Load the film with the...

Page 118: ... a sheet of approximate size A1 or D You must use polyester film Otherwise the optical sensor on the carriage will be calibrated incorrectly and the plotter will have problems loading some types of media In set the Media Type on the front panel to Film Load the film with the matte dull side down in portrait orientation into the plotter When the Ready LED lights up press Accuracy Calibration The Re...

Page 119: ...e bail lever Whenever you remove the Drive Roller or the Cartridge Carriage take care to reinstall them correctly Incorrect installation may result in the carriage being too close or too far from the media For the correct installation procedure Chapter 6 A Gauge included with the carriage assembly has been produced to check the carriageĆtoĆmedia distance to make sure it is within the tolerances al...

Page 120: ...he ledge indicated below should easily pass over the GO side of the gauge If the ledge go over the GO side of the gauge adjust the carriageĆtoĆmedia distance page 7Ć13 Remove the gauge and replace it on the drive roller with the NO GO side facing the carriage With the gauge held in place manually try to pass the carriage over the NO GO side of the gauge The ledge indicated above should not pass ov...

Page 121: ... GO NO GO ...

Page 122: ...sing the carriageĆtoĆmedia distance ÎÎ ÎÎ Gap Increases Rotating Clockwise Î Î Torx 8 Check the carriageĆtoĆmedia distance page 7Ć11 Reinstall the top of the carriage Check the trailing cable to make sure that it is positioned under the plastic tabs at the back of the carriage cover and not above them Trailing cable under tabs Otherwise the plotter will not be able to load media ...

Page 123: ...en Align Cartridges Patronen ausrichten Service Mode 1 ON Setup Einstellung Read Settings Einstellungen einlesen Replot Neuplotten S E R V I C E M O D E 2 S E R V I C E M O D E 2 S E R V I C E M O D E 1 S E R V I C E M O D E 1 Bail Cycle Test Bench Run ALT Front Panel Test Modular Test ALT Carriage Axis Test SHIFT Stop the Test Sensors Test ALT Print Quality Plot Service Configuration SHIFT Servic...

Page 124: ...n Fortsetzen S E R V I C E M O D E 2 S E R V I C E M O D E 2 S E R V I C E M O D E 1 S E R V I C E M O D E 1 Bail Cycle Test Bench Run ALT Front Panel Test Modular Test ALT Carriage Axis Test SHIFT Stop the Test Sensors Test Deconfig Mode Alt ALT Servo Encoder Test U S E R M O D E U S E R M O D E Carriage Test Media Axis Test Deutsch HP DesignJet 330 350C Medium Laden Bail Cycle Test Accuracy Cali...

Page 125: ...Sensors Test ALT Electrical Test SHIFT Bail Cycle Test ALT Accuracy Cal Print Shift SHIFT Stop the Test Accuracy Calib Read SHIFT Servo Encoder Test ALT Input Output Test SHIFT ALT U S E R M O D E U S E R M O D E Cartridges Special paper Paper Film or vellum or translucent Error Load Media Ready Fast Normal Form Feed Media Type Print Quality Service Mode 2 ON Cancel Both ON Best for color Align Ca...

Page 126: ... S E R V I C E M O D E 1 S E R V I C E M O D E 1 Bail Cycle Test Bench Run ALT Front Panel Test Modular Test ALT Carriage Axis Test SHIFT Stop the Test ALT Servo Encoder Test U S E R M O D E U S E R M O D E Carriage Test Media Axis Test English HP DesignJet 330 350C Bail Cycle Test Accuracy Calibration SHIFT Stop the Test Roll Both ON Glossy Roll Sheet Pinch arm Sensor for color Electrical Test Se...

Page 127: ...T U S E R M O D E U S E R M O D E Align Cartridges Alinear Cartuchos Service Mode 1 ON Cartridges Special paper Paper Film or vellum or translucent Error Load Media Ready Fast Rápido Normal Normal Setup Configurar Read Settings Leer Configuración Replot Reimprimir Form Feed Avanzar Hoja Media Type Tipo Hoja Print Quality Calidad de Impresión Service Mode 2 ON Cancel Cancelar Both ON Best Papel o v...

Page 128: ...Modular Test ALT Carriage Axis Test SHIFT Stop the Test ALT Servo Encoder Test U S E R M O D E U S E R M O D E Carriage Test Media Axis Test Español HP DesignJet 330 350C Bail Cycle Test Accuracy Calibration SHIFT Stop the Test Roll Both ON Glossy Roll Sheet Rollo Hoja Pinch arm Sensor Electrical Test Service Monitor Color Configuration ALT Mono Configuration SHIFT Normal Película Normal Recub Amb...

Page 129: ...IFT ALT U S E R M O D E U S E R M O D E Align Cartridges Allinea Cartucce Service Mode 1 ON Cartridges Special paper Paper Film or vellum or translucent Error Load Media Ready Fast Veloce Normal Normale Setup Configura Read Settings Leggi Configurazione Replot Ridisegna Form Feed Avanzamento Carta Media Type Tipo Supporto Print Quality Qualitá Stampa Service Mode 2 ON Both ON Best Carta o lucido F...

Page 130: ... R M O D E U S E R M O D E Carriage Test Media Axis Test Italiano HP DesignJet 330 350C Bail Cycle Test Accuracy Calibration SHIFT Stop the Test Roll Both ON Glossy Roll Sheet Rotolo Foglio Pinch arm Sensor Electrical Test Service Monitor Color Configuration ALT Mono Configuration SHIFT Fast Normal Non pat Pellicola Patinata Veloce Normale Entrambi ON Migliore Entrambi ON Lucido Carica supporto Er...

Page 131: ... U S E R M O D E U S E R M O D E Papier traceur Align Cartridges Aligner Cartouches Service Mode 1 ON Cartridges Special paper Paper Film or vellum or translucent Error Load Media Ready Fast Rapide Normal Normale Setup Configurer Read Settings Lire Paramètres Replot Retracer Form Feed Avancer Media Type Type de Support Print Quality Qualité d impression Service Mode 2 ON Cancel Annuler Both ON Bes...

Page 132: ... ALT Servo Encoder Test U S E R M O D E U S E R M O D E Carriage Test Media Axis Test Français HP DesignJet 330 350C Bail Cycle Test Accuracy Calibration SHIFT Stop the Test Roll Both ON Glossy Roll Sheet Rouleau Feuille Pinch arm Sensor Electrical Test Service Monitor Color Configuration ALT Mono Configuration SHIFT Fast Rapide Normal Normale Setup Configurer Replot Retracer Cancel Annuler Media ...

Page 133: ... U S E R M O D E U S E R M O D E Align Cartridges Alinhar Cartuchos Service Mode 1 ON Cartridges Special paper Paper Film or vellum or translucent Error Load Media Ready Fast Rápido Normal Normal Setup Config Read Settings Ajustes Leitura Replot Replotar Form Feed Alimentação de página Media Type Tipo de Mídia Print Quality Qualidade Impressão Service Mode 2 ON Cancel Cancelar Both ON Best Papel o...

Page 134: ...op the Test ALT Servo Encoder Test U S E R M O D E U S E R M O D E Carriage Test Media Axis Test Português HP DesignJet 330 350C Bail Cycle Test Accuracy Calibration SHIFT Stop the Test Roll Both ON Glossy Roll Sheet Rolo Mídia Pinch arm Sensor Electrical Test Service Monitor Color Configuration ALT Mono Configuration SHIFT Setup Config Replot Replotar Cancel Cancelar Media Type Tipo de Mídia Prin...

Page 135: ... ...

Page 136: ...wing Initializes the servo processor Initializes the main processor Tests communication between the main processor and the servo processor Tests the EEROM checksum Tests the servoĆprocessor transfer buffer and interrupt tracking Tests the ROM checksum Causes the main processor to initialize certain firmware modules Performs a subset of the electrical service test Checks the cover sensor If the cov...

Page 137: ... Flashing Can be On or Off Off On ...

Page 138: ...ions for Media Type and Print Quality The cartridge carriage moves across the plotter and knocks three times against the rightĆhand side The carriage returns to the leftĆhand side and enters the service station The bail jerks slightly as the carriage parks in the service station The top of the drive roller rotates slightly forward and then slightly backward The carriage moves out of and back into ...

Page 139: ...te the current selections for Media Type and Print Quality FrontĆPanel LEDs 5 Flashing Can be On or Off Off On Steady LED Symbols LED Numbers LEDĆCode Examples LEDs 2 and 9 are flashing LEDs 1 2 3 and 6 are on DesignJet 230 plotters have no LED number 7 The following pages contain the possible error codes and the instructions necessary to solve the problem Turn to page 8Ć6 for the relevant error c...

Page 140: ... Troubleshooting User s Guide chapter 4 Error Cartridges One or more of the cartridges is missing or badly positioned Load or reseat the cartridges Instructions Quick Reference Guide Load Media No sheet is loaded Ready Ready to plot Send your plot from your computer or for a special internal plot press the appropriate key combination Keys Quick Reference Guide ...

Page 141: ... The current plot is too large and does not fit in memory D If the plot is a raster plot try sending it with a no negative motion RTL command D If it is a vector plot try using a driver that performs all the rasterization of the plot in the host computer before sending it to the plotter See also chapter 5 w Memory Usage D Otherwise add more memory by installing a DRAM SIMM Cartridges Ready The plo...

Page 142: ...r PC is badly configured D Check for an error in the host computer D Replace the electronics module Error Load Media MediaĆload error Try one or more of the following D Check that the media is aligned and that the correct media size is loaded Try to load it again Tips User s Guide chapter 4 and mediaĆloading guide C3190Ć90162 When you begin to load media and push it into the plotter with too much ...

Page 143: ...figuration plot in report Paper Error Fast Error detected in the EEROM Paper Error Load Media Servo error in the XĆaxis media axis Try one or more of the following D Clear any binding due to a media jam Do not pull media along the carriage axis you could break the mediaĆsensor flags D Perform the mediaĆaxis test and the servo encoder test to check for problems with the media motor and encoder and ...

Page 144: ...nserting the ROM SIMM does not solve the problem try replacing the electronics module Error Film Load Media Servo error in the YĆaxis carriage axis Try one or more of the following D Clear any binding due to a media jam D Turn the plotter off Manually move the carriage along the carriage axis Check for any areas where the carriage may be binding D Ensure that the belt and belt pulley are in correc...

Page 145: ...ty D Faulty fan or fan is disconnected D Faulty carriage PCA D Faulty electronics module For more precise troubleshooting page 8Ć19 w System Errors Paper Error Film Fast Not enough memory for the sensor data structure D Turn the plotter off and then on again to see if the problem disappears D If the problem remains consult recent service notes for a possible solution D If no service note deals wit...

Page 146: ...in bailĆlift mechanism The bailĆlift system is unable to raise or lower the bail It is the carriage that tests to see whether the bail is in the correct position by trying to knock against it D Check the bailĆlift system to see if it is working correctly D Use the bail cycle test to help troubleshoot For more precise troubleshooting page 8Ć19 w System Errors Error Film Fast Load Media Error in enc...

Page 147: ...y Possible causes are D Cover is open D Plotter is waiting for you to cut the plot Instructions User s Guide chapter 2 Error Load Media No sheet is loaded Ready Ready to plot Send your plot from your computer or for a special internal plot press the appropriate key combination Keys Quick Reference Guide Load Media Ready The plotter has a file in memory which it is waiting to plot but no sheet is l...

Page 148: ...f the following D Remove each cartridge Ensure that the protective tape has been removed and look for dirty contacts or wear Replace each cartridge and run the BlackĆCartridge Alignment Procedure Instructions User s Guide chapter 1 D Replace the trailing cable D Replace the carriage D Replace the electronics module Error Ready There is a problem with the serial interface D Ensure the plotter s set...

Page 149: ...k for problems with the media motor and encoder and the electronics module D The mediaĆmotor worm and the right driveĆroller gear should have grease on them Parts Silicon grease C3190Ć60155 D If necessary remove the right driveĆroller gear from the drive roller Then if you cannot manually spin the roller it is probably jammed D Is the plotter located in an environment of high temperature and humid...

Page 150: ...rnal resistance of the motor driver may increase causing a decrease in the voltage between the motor contacts and a shutdown of the motor D Ensure that the encoder strip is not inverted damaged or absent D Reconnect or replace the trailing cable D Replace the carriage For more precise troubleshooting page 8Ć23 w System Errors Plain Error Roll Processor fault D Turn the plotter off and then on agai...

Page 151: ...Error Ready Roll Library Error Special firmware error See Plain Error Film Normal Electrical error The possible causes could be D Missing or badly seated cartridge D One end of the trailing cable is not connected or is badly connected or the trailing cable is faulty D Faulty fan or fan is disconnected D Faulty carriage PCA D Faulty main PCA Plain Error Film Fast Not enough memory for the sensor da...

Page 152: ... it D Check the bailĆlift system to see if it is working correctly D Use the bail cycle test to help troubleshoot For more precise troubleshooting page 8Ć23 w System Errors Load Media Error Film Fast Error in YĆaxis encoder quadrature Carriage axis Possible causes are D Broken or damaged encoder strip D Incorrect routing of the motor cables D Electrical noise in motors D Faulty motor encoder D Mot...

Page 153: ...h firmware revision the plotter is using since a given line number corresponds to different lines in different revisions Firmware A 01 03 Firmware A 01 04 Firmware A 01 05 and most frequent causes testmode c 1735 1739 YĆaxis servo error during bench run testmode c 1907 1973 X YĆaxis servo error during bench run testmode c 3014 3013 3079 Cartridge continuity D Cartridges badly seated D Faulty or ba...

Page 154: ...est of the inĆbuilt ROM and ROM SIMM performed at powerĆ on ROM SIMM badly seated Faulty ROM SIMM Faulty electronics module testmode c 3132 3131 3197 Error in the test of the masked ROM Faulty electronics module main c 187 187 187 Failure in cartridge initialization Faulty or badly connected trailing cable main c 314 314 314 Failure in fan connection test Faulty electronics module selftest c 1496 ...

Page 155: ...e in Fibis RAM sequence test Faulty electronics module selftest c 1573 1573 1573 Failure in Condor test If firmware is revision A 01 02 or earlier then change to latest Faulty electronics module ipc c 824 824 824 The SPROC did not respond within 10 seconds Faulty electronics module media_load c 862 or 889 or 993 or 1310 862 or 889 or 993 or 1310 862 or 889 or 993 or 1310 Bail error or YĆaxis servo...

Page 156: ...412 YĆaxis servo error carriage movement D Obstacle or friction in YĆaxis D Motor cable disconnected D Faulty carriage motor or motor cable pinched D Faulty encoder strip D Faulty carriage D Faulty electronics module servo c 417 or 431 417 or 431 XĆaxis servo error roll movement D Obstacle or friction in XĆaxis D Motor cable disconnected D Faulty media motor or motor cable pinched D Faulty electro...

Page 157: ...lso know which firmware revision the plotter is using since a given line number corresponds to different lines in different revisions Firmware A 01 00 and most frequent causes testmode c YĆaxis servo error during bench run testmode c 2499 X YĆaxis servo error during bench run testmode c 3614 Cartridge continuity D Cartridges badly seated D Faulty or badly connected trailing cable D Dirty carriage ...

Page 158: ...ulty electronics module testmode c 3733 Error in the test of the masked ROM D Faulty electronics module main c 238 Failure in cartridge initialization D Faulty or badly connected trailing cable main c 381 Failure in fan connection test D Faulty electronics module main c 230 or 354 Model ID configuration incorrect Reconfigure the plotter page 8Ć28 selftest c 1502 Failure in test to actuate inĆbuilt...

Page 159: ...RAM sequence test Faulty electronics module selftest c 1579 Failure in Condor test If firmware is revision A 01 02 or earlier then change to latest Faulty electronics module ipc c 813 or 824 The SPROC did not respond within 10 seconds Faulty electronics module media_load c 681 or 2403 or 2430 or 2619 Bail error or YĆaxis servo error Carriage knocked against bail Faulty encoder strip Faulty trailin...

Page 160: ...YĆaxis D Motor cable disconnected D Faulty carriage motor or motor cable pinched D Faulty encoder strip D Faulty carriage D Faulty electronics module servo c 417 or 431 XĆaxis servo error roll movement D Obstacle or friction in XĆaxis D Motor cable disconnected D Faulty media motor or motor cable pinched D Faulty electronics module bnixsystem c 2292 or 2414 or 2449 or 2750 Centronics Bitronics com...

Page 161: ... plotter If it is easy to reproduce a Steady 135 error then try one or all of the following steps for a possible solution Configure the EEROM with the correct model ID instructions page 8Ć28 Ensure that the trailing cable is properly connected at both ends Connect a new trailing cable outside the plotter to the carriage and electronics module without installing the cable completely If the error di...

Page 162: ...Remove the left cover page 6Ć10 Disconnect the media motor encoder cable from the main PCA connector ENC X Turn the plotter ON in Service Mode Hold the key down and press the key Once in Deconfiguration Mode the first and second LED columns should light up Using a suitable tool shortĆcircuit pins 1 and 2 the first two pins on the right of the media motor encoder connector ENC X The second and thir...

Page 163: ...nochrome plotter hold the key down and press the two keys at the same time Turn the plotter OFF Reconnect the media motor encoder cable to the main PCA connector ENC X Turn the plotter ON and print the Demo Plot to check if the plotter has been correctly configured If the plotter is still incorrectly configured repeat the model ID configuration procedure from step 2 Because all plotter calibration...

Page 164: ...oder strip Some black cartridges 51640A with USE BEFORE dates of April 96 and earlier may have thinĆfilm damage This means that the material used for channeling ink behind the nozzles can crack with aging When this happens ink seepage may cause many nozzles to fail eight or more Replace the black cartridge with one with USE BEFORE date of May 96 or later The connection between the carriage PCA and...

Page 165: ...carriage may not properly locate the engagement lever preventing the gears from engaging Any problems with the carriageĆmotor control system for example the encoder strip or associated mechanics could cause this problem Also if the carriage cannot find the true left stop during initialization caused by interference the engaging lever cannot be located The bail may fall from the up position This ca...

Page 166: ...s DesignJet series plotters or printers If a failure or damage to such HP products is found to be directly attributed to the use of thirdĆparty inks or offĆaxis ink systems or any other nonĆsupported HP supply or accessory the repair will NOT be covered under HP s warranty or maintenance contract In such cases standard time and material charges will be applied to service the plotter or printer Tro...

Page 167: ...not park the carriage correctly in the service station so the cartridges are not correctly capped The ink dries in the nozzles and the primer has no effect When you begin to load media and push it into the plotter with too much force too large a buckle forms in the media The roller is then not able to correctly grasp the media and misaligns it Instead load the media so that the sheet buckles only ...

Page 168: ... ...

Page 169: ...l test Power on tests Input output test Servo encoder test Sensors test Bail cycle test Front panel test Media axis test Carriage test Carriage axis test Bench run Modular test Encoder strip Carriage axis test Servo encoder test Modular test Bench run Front panel keys and LEDs Front panel test Modular test Media axis encoder and cable Servo encoder test Media axis test Modular test Bench run Media...

Page 170: ...2 and adapter number 5181Ć6640 to connect the Palmtop to the plotter s serial interface port Both cable and adaptor are included in the HP F1021B Connectivity Pack Turn the plotter on in service mode Turn the Palmtop on Open the Data Comm application on the Palmtop Press MENU Move to the Connect menu and press ENTER Ensure that Settings are the same for both plotter and Palmtop Again move to the C...

Page 171: ...ation However this time it parks beyond the engaging lever so that the gears are not engaged d The top of the roller rotates slightly forward and then back Status After the first cycle the Normal LED turns on steady if the bailĆcycle test has not found an error If an error occurs the Normal LED flashes OK Failed Output to the Serial Port Viewing Output 8 36 Error code If an error has occurred this...

Page 172: ...c 26 67 inches sec and 13 33 inches sec After the first cycle the Paper LED turns on steady if the carriageĆaxis test has not found an error If the test fails the Paper LED flashes OK Failed Output to the Serial Port Viewing Output 8 36 Error code If an error has occurred this code specifies more precisely what has gone wrong during the test Include this information in the report to your HP Respon...

Page 173: ...iage test has not found an error If the test fails one or both of these LEDs flash as indicated below Both OK Sensor Failed Flex Circuit Connection Failed Both Failed Output to the Serial Port Viewing Output 8 36 Error code If an error has occurred in the sensor test this code specifies more precisely what has gone wrong Include this information in the report to your HP Response Center if the prob...

Page 174: ...ady if the carriage test has not found an error If the test fails one two or all of these LEDs flash as indicated below All OK Optical Sensor Failed Flex Circuit Connection Failed All Failed Encoder Sensor Failed Output to the Serial Port Viewing Output 8 36 In order to send output to the serial port it is necessary to set the Verbose mode ON This can be done using the iverbose 1 i underware Error...

Page 175: ...the test key for this test If the test does not find an error the Load Media LED or the Ready LED if you have already loaded media turns on again Otherwise an error is reported by an error code on the front panel The error code is usually shown as a ISteady 1238I for DesignJet 230 and 250C or a ISteady 1389I for DesignJet 330 and 350C which indicates a system error See System Errors page 8Ć19 for ...

Page 176: ... frontĆpanel key except Shift If the key is operating correctly the Fast LED stays on steady until you take your finger off the key Repeat step for each key except Shift Finally press the Shift key If this key is working correctly the Fast LED comes on briefly and then all LEDs begin to flash to indicate that the test has ended Key Working OK Test Ended Front Panel Test Key Working OK Shift ...

Page 177: ...Connect the loopback connector to the serial port of the plotter If a connector is not available you can place a jumper between pins 2 and 3 of the serial port for the test In service mode hold down the SHIFT key and press Input Output test Input Output Test Shift The Load Media LED or the Ready LED if you have already loaded media turns off while the plotter performs the input output test The shi...

Page 178: ...Film LED turns on steady if the mediaĆaxis test has not found an error If the test fails the Film LED flashes OK Failed Output to the Serial Port Viewing Output 8 36 Maximum PWM The maximum PWM for each cycle A typical media axis PWM is 52 The maximum allowed is 65 Shift Media Axis Test Shift ...

Page 179: ...s each test passes See the following diagram for LED meanings Carriage sensor OK Carriage axis OK The front panel key that you are pressing is OK Cover closed and sensor OK Flex circuit OK Media axis OK Media present and sensor OK Carriage sensor failed Carriage axis failed Cover open or sensor failed Flex circuit connection failed Media axis failed Media not present or sensor failed Encoder Senso...

Page 180: ...o plot it without entering the service mode Use E A0Ćsize or D A1Ćsize media if you want to examine verticalĆline straightness VLS at both ends of the roller Otherwise A A4Ćsize media is sufficient Ready Print Quality Plot Print Quality Roll Sheet 0 The Ready light begins to flash and the media moves slightly forward The carriage moves to the right side of the plotter and the fan turns on The plot...

Page 181: ...ia LED should turn off Insert media into the rightĆhand side of the entry platen The Special Paper LED should turn on Remove the media The Special Paper LED should turn off The LED meanings are summarized as follows Cover closed and sensor OK Media present and sensor OK Cover open or sensor failed Media not present or sensor failed Press the Shift key when you want to stop the test Sensors Test Lo...

Page 182: ...e Ready LED should turn on Open the cover The Ready LED should turn off Insert media into the rightĆhand side of the entry platen The Coated LED should turn on Remove the media The Coated LED should turn off The LED meanings are summarized as follows Cover closed and sensor OK Media present and sensor OK Cover open or sensor failed Media not present or sensor failed Pinch arms lowered and sensor O...

Page 183: ...nterpret this information refer to page 8 19 Last System Error Data To correctly interpret this information refer to page 8 19 Bench Run Whether the bench run has been performed Bench Run Maximum Y Axis Carriage Axis PWM This should be less than 102 Typical value 75 Bench Run Maximum X Axis Media Axis PWM This should be less than 65 Typical value 52 Encoder Tests Maximum Y Axis Carriage Axis PWM T...

Page 184: ...Number of Bail Errors Number of System Errors Last System Error To correctly interpret this information refer to page 8 23 Last System Error Data To correctly interpret this information refer to page 8 23 Bench Run Whether the bench run has been performed Bench Run Maximum Y Axis Carriage Axis PWM This should be less than 102 Typical value 75 Bench Run Maximum X Axis Media Axis PWM This should be ...

Page 185: ... the need to enter the service mode This is because the customer will be requested to plot the service configuration plot and he will be given the following instructions to plot it without entering the service mode When the Ready LED lights up Hold down the SHIFT key and press Service Configuration Press the Cancel and Media Type keys together The Ready light begins to flash and then remains on st...

Page 186: ...service monitor Hold down the ALT key and press Service Monitor The frontĆpanel LEDs do not change Press Service Monitor The frontĆpanel LEDs do not change Send the file from the computer through the serial or parallel ports The Ready LED begins to flash Wait until the computer has indicated that it has sent the file The Ready LED continues to flash While the Ready LED is flashing hold down the AL...

Page 187: ...left end of the roller The roller rotates slightly The carriage moves to the center of the plotter Both the carriage and the roller then move backwards and forwards in cycles of six short steps changing direction between cycles Press any frontĆpanel key to stop the test If the test does not find an error the Load Media LED or the Ready LED if you have already loaded media turns on again If the tes...

Page 188: ...tions Details chapter 7 Clearing the EEROM also resets the factory spittoon value to 0 used Keep in mind that the value printed on the service configuration plot may greatly underestimate the amount of ink in the spittoon Read Settings Media Type Read Settings Media Type Align Cartridges Print Quality Align Cartridges Print Quality Cancel Replot Cancel Replot ...

Page 189: ...tions Details chapter 7 Clearing the EEROM also resets the factory spittoon value to 0 used Keep in mind that the value printed on the service configuration plot may greatly underestimate the amount of ink in the spittoon Replot Media Type Replot Media Type Form Feed Print Quality Form Feed Print Quality Roll Sheet Continue Plotting Roll Sheet Continue Plotting ...

Page 190: ...the HP DesignJet 230 330 is similar but only the patterns relevant to the black cartridge are printed Use a 10X magnifier to help identify plotĆquality problems 1 Area Fill 2 Nozzle Checkout 3 Vertical Line Straightness VLS 4 Pen to Pen Alignment Secondary Colors 5 Pen to Pen Alignment Primary Colors Fast Draft Normal Final Best Enhanced ËË ËË ÊÊ ÊÊ ËË ËË ÊÊ ÊÊ ËË ËË ÊÊ ÊÊ ...

Page 191: ...ct is faulty in one of the plotter cartridge chutes so that it doesn t make correct contact with the circuit on the cartridge See page 8Ć39 w Carriage Test D Nozzles touch the service station thus causing puddling to occur on the printĆhead D Some of the small slots on the encoder strip are damaged Therefore the plotter cannot position the carriage correctly during cartridge servicing D Cartridges...

Page 192: ...e Best printĆquality mode instead Drawings plotted with the color cartridges 51650C 51650M and 51650Y fade when exposed to light Colors become less vivid and less bright and change over time D Under direct sunlight After between 3 and 10 hours D Under office light After about 20 days D Laminated and under office light After about 24 days The use of some nonĆHP media types improves the lightfastnes...

Page 193: ...iage Swath Direction 1 2 3a 3b 4a 4b 1 No error 2 Bidirectional error 3a Theta Z error 3b Theta Z error 4a Combined error 4b Although the VLS specification satisfies the expectations of most customers some may complain even when the plotter is working within this specification If the VLS error is already less than 2 mils do not try to improve it Error numbered 2 above is called a bidirectional err...

Page 194: ...eads This can occur because D The mediaĆholding mechanism is not holding the media correctly and the media buckles D The carriageĆtoĆroller distance is too small Adjustment chapter 7 Changes of hue are noticed when printing in color One or more of the print cartridges is running out of ink Typically the inks of the four cartridges are used at different rates Replace the print cartridge with a new ...

Page 195: ...d lines See also User s Guide chapter 4 D Different color inks printed side by side run into each other D Ink absorbs into the paper spreading beyond the desired ink dot D Ink spreads along a fiber or fibers in the paper creating a spider web effect Plotting in fast mode D The ink is incompatible with the media type D Environmental conditions may affect the media Temperature or humidity levels are...

Page 196: ... ...

Page 197: ... ...

Page 198: ...code for Spain In the third position is the revision letter of the plotter The letter A identifies the original version of the plotter The next revision would have the letter B and so on In the fourth position is the last digit of the year of manufacture This is 5 for plotters made in 1995 as in the example above In the fifth position is the month of the year October is represented by the letter A...

Page 199: ...n level of the ROM SIMM installed in the electronics module With this information you must do the following 1 If the firmware revision level of the ROM SIMM in the old electronics module is than the firmware revision level of the new electronics module then you install the ROM SIMM into the module 2 If the firmware revision level of the ROM SIMM in the old electronics module is than the firmware r...

Page 200: ..._cpo J cso_cpo dir See the readme txt file for more information When you have downloaded the files you need please disconnect from the server since there are only a limited number of connections available J c C NET USE j d Go to the system prompt Type what is marked in bold letters below pressing Enter at the end of each line ftp 15 24 176 18 Name snotes Password Just press Enter ftp ls ftp cd cso...

Page 201: ...ars as follows In order to read the settings Setup Sheet Black Cartridge Alignment Sheet or Color Cartridge Test Sheet the paper is loaded again Once the paper is loaded the Read Settings button is pressed Then the carriage goes over the paper and tries to read the left top corner in order to determine which sheet has been loaded The plotter fails to read the settings and rejects the paper with Er...

Page 202: ... ...

Page 203: ... ...

Page 204: ...d assemblies that you can order they are listed in the following table Exchange assemblies are available only on a tradeĆin basis therefore you must return the defective assemblies for credit Exchange Assemblies HP Part Number Qty Description C3190 60139 1 Electronics Module C4699 60039 1 Electronics Module ...

Page 205: ...number on the drawing with the same number in the parts list for information on that part The total quantity for each part on the drawing is given as well as the part number To obtain replacement parts contact the nearest HP Support Office You must include the part number and part description in the order you send Also include the plotter model and serial number ...

Page 206: ...P Part Number Quantity Description 1 C3192Ć60003 2 Foot assembly 2 C3192Ć60001 1 X Brace Assembly D A1Ćsize C3193Ć60001 1 X Brace Assembly E A0Ćsize 3 C3192Ć60002 2 Legs Assembly 4 C3193Ć60003 1 Paper Diverter Assembly E A0Ćsize plotters only 5 C3192Ć00009 14 Screw ...

Page 207: ... ...

Page 208: ...C3190Ć40024 1 Carriage Top C3190Ć40024 1 Carriage Top DesignJet 250C C4694Ć40002 1 Carriage Top DesignJet 230 6 C3178Ć00030 C3178Ć00030 1 Carriage Label DesignJet 350C 250C 6 C4701Ć00009 1 Carriage Label DesignJet 330 7 See page 10Ć2 See page 10Ć2 1 Electronics Module 8 C3190Ć60038 C3190Ć60038 1 Trailing Cable Assy D A1Ćsize C3191Ć60038 C3191Ć60038 1 Trailing Cable Assy E A0Ćsize 9 C3190Ć40041 C31...

Page 209: ...10Ć7 Parts and Diagrams C4699Ć90000 Top and Back Covers Electronics Trailing Cable ...

Page 210: ... C4699Ć40005 C3190Ć40016 1 Right EndĆCover 5 C3190Ć40029 C3190Ć40029 1 PinchĆArm Lever 6 C3190Ć40045 C3190Ć40045 1 Switch Button 7 C3190Ć60144 C3190Ć60144 1 Front Panel Assy 8 C4699Ć00009 C3190Ć00033 1 Media Label 9 5961Ć3524 5961Ć3508 1 Serial Label 10 0515Ć1349 0515Ć1349 1 Screw M3 x 30 Mach T10 11 0535Ć0031 0535Ć0031 1 Nut HGX M3 x 2 4 12 See page 10Ć27 See page 10Ć27 1 FrontĆPanel Overlay 13 C...

Page 211: ... ...

Page 212: ... Pan Torx Stl 4 C3190Ć60106 C3190Ć60106 1 Encoder Strip D A1Ćsize C3191Ć60106 C3191Ć60106 1 Encoder Strip E A0Ćsize 5 0624Ć0704 0624Ć0704 1 Screw 6Ć19 375 Plas T15 6 3050Ć1267 3050Ć1267 1 Washer 7 C3190Ć40048 C3190Ć40048 1 Carriage Belt D A1Ćsize C3191Ć40048 C3191Ć40048 1 Carriage Belt E A0Ćsize 8 C4699Ć60036 1 Carriage assembly C3190Ć60143 1 Carriage assembly 250C C4694Ć60050 1 Carriage assembly ...

Page 213: ... ...

Page 214: ...ing 3 C3190Ć00013 1 Right Strap 4 0515Ć2765 1 Screw M4 2 x 35 Pan Torx Stl 5 0535Ć0031 1 Nut Hex M3 x 5 6 C3190Ć80010 1 Tensioner Spring 7 C3190Ć60145 1 CarriageĆMotor Assembly 8 3050Ć1267 1 Washer 9 C3190Ć40048 1 Carriage Belt D A1Ćsize C3191Ć40048 1 Carriage Belt E A0Ćsize 10 C3190Ć60106 1 Encoder Strip D A1Ćsize C3190Ć60106 1 Encoder Strip E A0Ćsize 6040Ć0858 AR Lubricant ...

Page 215: ...10Ć13 Parts and Diagrams C4699Ć90000 CarriageĆAxis Right End ...

Page 216: ... Drawing DesignJet 330 350C DesignJet 230 250C 1 0515Ć1743 0515Ć1743 3 Screw M4 x 17 Tap 20 2 C3190Ć60142 C3190Ć60142 1 Service Station Assembly 3 C4699Ć60002 C3190Ć60004 1 Spittoon Assembly 4 C4699Ć60003 C3190Ć60002 1 Primer Assembly 5 C4701Ć40002 1 Primer Cover DesignJet 330 C4694Ć40001 1 Primer Cover DesignJet 230 ...

Page 217: ... ...

Page 218: ...4699Ć60040 C3190Ć60090 1 Entry platen Assy D A1Ćsize Incl Antistatic Brush C4700Ć60040 C3191Ć60090 1 Entry platen Assy E A0Ćsize Incl Antistatic Brush 3 0515Ć2337 0515Ć2337 2 Screw M4 Dogpoint Tap 4 C1633Ć20006 C1633Ć20006 1 MediaĆMotor Mount 5 0515Ć2248 0515Ć2248 3 Screw M4 x 14 Tap T20 6 C3190Ć60140 C3190Ć60140 1 Media Sensor Assembly 7 0515Ć0382 0515Ć0382 2 Screw M4 x 15 Mach T15 8 C4699Ć60038 ...

Page 219: ... ...

Page 220: ...0Ć40019 1 Cam Gear 5 C1633Ć40027 1 Engaging Gear 6 C3190Ć80013 1 Cable Spring 7 C3190Ć40021 1 Gear Support 8 0510Ć0083 2 Ring Net 250 OD 9 C3190Ć60131 1 Clutch Assembly Incl Rings and Bushings 10 C3190Ć40055 2 Sideplate Bushing 11 C1633Ć20021 1 Shoulder Screw 12 C1633Ć40019 1 Overdrive Gear 13 3050Ć1415 1 Washer Flat 14 0515Ć1743 1 Screw M4 x 17 Tap T20 15 C3190Ć40020 1 BailĆLift Cam 16 0624Ć0704 ...

Page 221: ... ...

Page 222: ...10 C3191Ć60096 1 Overdrive Roller E A0Ćsize Incl Items 8 10 18 C3180Ć20001 2 Alignment Screw 19 0515Ć2337 2 Screw M4 Long Dogpoint 20 C3190Ć40022 1 Engaging Lever 21 0515Ć2200 1 Screw M3 x 8 Tap T10 22 C3190Ć60007 1 Bail Cable 23 C3190Ć40023 1 EngagingĆLever Support 24 07575Ć80012 1 GearĆSupport Spring 25 C3190Ć60095 1 Bail Assembly D A1Ćsize C3191Ć60095 1 Bail Assembly E A0Ćsize ...

Page 223: ... ...

Page 224: ... 2 C3190Ć60149 1 Left Cam Journal Assembly 3 C4699Ć60037 1 Right Cam Journal Assembly 4 C3190Ć40028 1 Lever Crank 5 C3190Ć40034 1 Crank Cover 6 C1633Ć40082 5 PinchĆArm Bushing D A1Ćsize C1633Ć40082 7 PinchĆArm Bushing E A0Ćsize 7 C1633Ć80005 5 PinchĆArm Spring D A1Ćsize C1633Ć80005 7 PinchĆArm Spring E A0Ćsize 8 C3190Ć60029 5 PinchĆArm Assembly D A1Ćsize C3190Ć60029 7 PinchĆArm Assembly E A0Ćsize ...

Page 225: ... ...

Page 226: ...350C Only Reference on Drawing HP Part Number Quantity Description 1 C3174Ć60013 1 RollĆFeed Assembly D A1Ćsize C3175Ć60013 1 RollĆFeed Assembly E A0Ćsize 2 C3174Ć60004 1 Cutter Assembly 3 C3174Ć60005 1 Spinde D A1Ćsize C3175Ć60005 1 Spindle E A0Ćsize 4 C3174Ć40011 2 End Cap ...

Page 227: ... ...

Page 228: ...0 60055 German C4694 60014 C3190 60054 Italian C4694 60017 C3190 60057 Japanese C4694 60018 C3190 60058 Korean C4694 60012 C3190 60052 Portuguese C4694 60019 C3190 60059 Spanish C4694 60016 C3190 60056 Taiwanese C4694 60013 C3190 60053 User Documentation DesignJet 330 350C Chinese C4699 90100 English C4699 90091 French C4699 90095 German C4699 90094 Italian C4699 90097 Japanese C4699 90098 Korean ...

Page 229: ...20 English C4701 60011 C4699 60011 French C4701 60015 C4699 60015 German C4701 60014 C4699 60014 Italian C4701 60017 C4699 60017 Japanese C4701 60018 C4699 60018 Korean C4701 60012 C4699 60012 Portuguese C4701 60019 C4699 60019 Spanish C4701 60016 C4699 60016 Taiwanese C4701 60013 C4699 60013 Other Documentation DesignJet 330 350C DesignJet 230 250C HP CAD Plotters Software Hardware Guide 5964 383...

Page 230: ...nd 330 350C 4 Mbyte SIMM C3131A 8 Mbyte SIMM C3133A 16 Mbyte SIMM C3146A 32 Mbyte SIMM C3975A1 C3578A2 1 32 bits wide no parity 2 36 bits wide parity External Print Servers DesignJet 330 350C DesignJet 230 250C HP JetDirect EX Ethernet J2591A J2382B Token Ring J2383B HP JetDirect EX Plus3 Ethernet J2593A Token Ring J2594A J2594A HP JetDirect Software For HP UX J2374C For Sun UNIX J2375C Color Upgr...

Page 231: ...ble length Connector type at comp ter end of cable DesignJet 330 350C DesignJet 230 250C computer end of cable HP Vectra or HP 24541A B serial interface card 9 pin connector HP 9000 workstations using 9 pin connectors IBM AT and compatible computers using 9 pin serial connectors 24542G 24542G 3 0 m 9 8 ft 9 pin female HP Vectra PC with HP 24541A B dual serial interface card using the 25 pin connec...

Page 232: ... DesignJet 230 250C computer end of cable Apple Macintosh Plus SE II Series Classic LC family Quadra family PowerBook PowerMac 17302A 17302A 1 5 m 4 9 ft 8 pin male mini DIN Apple Macintosh 128K and 512K 92219M 92219M 1 5 m 4 9 ft 9 pin male Extension cable 31391A 31391A 5 m 16 4 ft 25 pin female ...

Page 233: ... ...

Page 234: ...d HP plotter driver information 208 344 1691 24 hours 7 days Real time access over modem CompuServe HP FORUM Interactive dialog with worldwide HP customer community for exchange of information Must be a subscriber Ask for Agent 51 CompuServe connect charges apply to caller 800 524 3388 24 hours 7 days Real time access over modem Internet Information on products and plotter drivers for anyone with ...

Page 235: ...30 am 12 noon 1pm 4 pm PST Weekdays HP DIRECT Ordering Ordering of supplies and accessories directly from HP 800 538 8787 6am 5pm PST Parts Identification Assistance in identifying service parts 916 783 0804 M Tu W Th 6am 3pm MST Friday 6am 2pm MST Support Materials Organization Ordering of manuals and service parts directly from HP Must have a part number before calling 800 227 8164 M Tu Th F 6am...

Page 236: ...nglish 31 20 681 5792 Austria German 0660 8128 Belgium Dutch 0800 1 1906 French 0800 1 7043 Switzerland French 155 1526 German 155 1527 Germany German 0130 810061 Denmark Danish 800 10453 Spain Spanish 900 993123 France French 05 905900 United KIngdom English 0800 960271 Italy Italian 1678 59020 Norway Norwegian 800 11319 Netherlands Dutch 06 0222420 Sweden Swedish 020 795743 Finland Finnish 9800 ...

Page 237: ...o has Worldwide Web access through a hyper media viewer such as Mosaic ftp to 192 6 71 2 or ftp boi external hp com Name anonymous Password your e mail address 24 hours 7 days Real time access over modem World Wide Web http www dmo external hp com peripherals main html HP Support Assistant CD ROM A quarterly CD ROM subscription service from HP This online system provides technical information prod...

Page 238: ...319 M Tu Th F 08 30 18 00 Wednesday 8 30 16 00 European Service Agreements Initiated Product Details Within 30 days of purchase HP Support Pack HP SupportPack is a three year on site service agreement which you can buy within 30 days of purchasing your plotter With HP SupportPack you can protect your investment and ensure its maximum availability Your dealer can supply information about HP Support...

Page 239: ... 2 4743 111 or 42 2 4717 321 30 1 689 6503 or 30 1 689 6504 36 1 252 4505 or 36 1 252 4705 48 22 37 50 65 90 212 224 59 37 or 90 212 246 78 47 41 22 780 41 11 45 45 99 11 22 43 1 25000 555 32 2 778 38 00 358 0 88721 47 22 73 56 01 351 1 301 73 44 46 8 444 23 20 41 31 980 31 11 41 22 780 81 11 31 20 547 7750 44 1344 363344 33 1 69 82 60 99 49 2102 90 6300 39 2 92 104 551 34 1 631 18 30 or 34 1 631 ...

Page 240: ...ed HP plotter driver information Australia 03 9890 0276 New Zealand 09 356 3660 Taiwan 886 2 923 3233 login hp password bbs Worldwide 1 208 344 1691 24 hours 7 days Real time access over modem Internet Information on products and plotter drivers for anyone with ftp access to the Internet or who has Worldwide Web access through a hyper media viewer such as Mosaic ftp to 192 6 71 2 or ftp boi extern...

Page 241: ...lment Service Latest drivers Australia Tel 612 565 6099 Fax 612 519 5631 Japan Tel 03 5346 1891 Korea Tel 82 2 3452 7677 New Zealand Tel 02 565 6099 Fax 02 519 5631 Singapore Tel 65 740 4477 Fax 65 740 4499 For telephone support in the Asia Pacific region other than for those services listed above contact your local HP dealer ...

Page 242: ......

Page 243: ... ...

Page 244: ...tion ąComputerĆAided Manufacturing ąThe axis along which the carriage moves YĆaxis ąLine sensor ąPrint cartridge pen ąA parallel interface standard ąOf nozzles testing of nozzles by firing them one by one ąA programming method used to minimize data errors when data are transferred Part of a definition from The Harper Collins Dictionary of Computer Terms E Ian R Sinclair 1991 ąCentimeter s ąHP fiel...

Page 245: ...dels in the DesignJet series However the electronics module is orderable as one part you should not open it EPROMąErasable Programmable ReadĆOnly Memory ESDąElectrostatic discharge _FąDegree s Fahrenheit filmąA type of media flow modeąThe plotting of images that have already been rasterized by computer software and do not need to be rasterized by the plotter itself ftąfoot feet halfĆtoningąThe pla...

Page 246: ...ly before the plotter can place more ink adjacent to it ąModular Input Output ąMillimeter s ąService monitor ąMicroSoft DiskĆOperating System ąAn RTL command that indicates to the plotter that it will receive all data already in the order in which it should be plotted ąA system whereby ink is pumped to the cartridges from a reservoir that does not move with the carriage ąProgrammable Array Logic ą...

Page 247: ...n ąRandomĆAccess Memory ą1 A matrix of dots or pixels where each pixel is defined by a bit A bit that is on will print a dot on the paper A bit that is off will leave the area blank 2 A method for defining a plot directly in terms of the pixels rather than as vectors ąSoftware that converts graphics data to pixel format ąThe ratio of the amount of water vapor actually present in the air to the gre...

Page 248: ...me ąTransmission Control Protocol Internet Protocol ąA printĆquality error caused when the nozzles on a cartridge are not perpendicular to the carriage axis The error shows up as jagged vertical lines ąDescribes a type of media through which light passes ąThermal TurnĆOn Energy ąUniversal Asynchronous Receiver Transmitter ąA print mode in which plotting is performed while the carriage moves in one...

Page 249: ... ...

Page 250: ... 10Ć27 applications plotter 1Ć2 architecture multiprocessor 5Ć12 plotter 5Ć12 area fill banding 8Ć57 blotchy 8Ć58 printĆquality plot 8Ć56 ASIC 5Ć12 GlossaryĆ2 assembling See also reinstalling legs 3Ć5 plotter 3Ć2 rollĆfeed 3Ć8 automatic bail lift mechanism 5Ć6 autoswitching interface and network 1Ć3 back cover removing 6Ć33 bail 5Ć6 8Ć31 cam 8Ć31 cycle test frontĆpanel keys DesignJet 230 250C 7Ć6 ...

Page 251: ...Ć61 blooming 8Ć61 blotchy area fills 8Ć58 brush antiĆstatic 5Ć5 bushings 8Ć31 carriage guidance 5Ć6 friction 8Ć59 buttons 3Ć12 cables interface 2Ć2 part numbers 10Ć29 CAD GlossaryĆ2 calibrations 7Ć1 clearing parameters DesignJet 230 250C 8Ć54 DesignJet 330 350C 8Ć55 CAM GlossaryĆ2 cam gear wearing bail 8Ć31 Cancel key 3Ć12 3Ć13 See also stopping a test carriage 5Ć13 8Ć11 8Ć16 8Ć35 8Ć60 axis Glossa...

Page 252: ... 8Ć16 checkout GlossaryĆ2 checksum GlossaryĆ2 cleaning carriage wheel 8Ć31 cartridge contacts pads 8Ć30 drive roller 4Ć4 plotter 4Ć4 clearing the EEROM DesignJet 230 250C 8Ć54 DesignJet 330 350C 8Ć55 clogged tubes 8Ć30 clogging in service station 5Ć11 cluster halfĆtoning 3Ć14 coated LED 3Ć13 coating media 8Ć57 code firmware revision 8Ć30 9Ć3 codes error HP DesignJet 230 and 250C 8Ć6 to 8Ć12 HP Des...

Page 253: ...8Ć30 diagnostics software 7Ć5 diagrams and parts 10Ć1 diazo copiers wearing belt 8Ć31 dimensions plotter 2Ć3 dirt on carriage wheel 4Ć2 pulley 8Ć10 8Ć16 slider rod 4Ć2 dirty carriage wheel 8Ć31 contacts 8Ć7 8Ć14 encoder strip 8Ć59 pads 8Ć30 pulley 8Ć59 disconnecting frontĆpanel assembly 6Ć12 display data 8Ć52 GlossaryĆ2 display list 5Ć15 GlossaryĆ2 distance carriageĆtoĆmedia 5Ć7 diverter media 1Ć4...

Page 254: ...cs module 4Ć3 5Ć13 8Ć10 8Ć16 8Ć32 8Ć35 GlossaryĆ3 changing 8Ć32 faulty 8Ć32 removing 6Ć13 electrostatic discharge 6Ć2 encoder cable 8Ć17 mediaĆaxis 8Ć35 8Ć44 strip 8Ć10 8Ć16 8Ć31 8Ć35 8Ć38 8Ć57 damaged 8Ć30 removing 6Ć17 slots 8Ć59 tests 8Ć53 encoders carriage axis encoder strip 5Ć6 5Ć16 media axis connection to main PCA 5Ć13 plotter architecture 5Ć12 endĆpoint accuracy 7Ć8 endĆcovers removing lef...

Page 255: ...Ć10 steady 34 8Ć9 steady 3456 8Ć12 steady 346 8Ć10 steady 349 8Ć10 steady 356 8Ć11 steady 368 8Ć11 steady 38 8Ć9 steady 6 8Ć6 steady 9 8Ć6 HP DesignJet 330 and 350C 8Ć13 26 off 8Ć13 flashing 13 8Ć14 flashing 2 8Ć14 flashing 23 8Ć14 flashing 34 8Ć14 flashing 36 8Ć14 flashing 6 8Ć14 steady 123 8Ć15 steady 1234 8Ć17 steady 12345 8Ć18 steady 1235 8Ć17 steady 1345 8Ć17 steady 13459 8Ć18 steady 1346 8Ć1...

Page 256: ... 330 350C 8Ć50 revision code 9Ć3 flash ROM SIMM 5Ć14 9Ć3 flow mode 5Ć15 GlossaryĆ3 form feed 8Ć32 key 3Ć12 3Ć13 frequency 2Ć2 friction 8Ć59 slider rod 4Ć2 front panel assembly disconnecting 6Ć12 connection to main PCA 5Ć13 keys 8Ć35 DesignJet 230 250C 3Ć12 DesignJet 330 350C 3Ć13 keys and LEDs service mode 7Ć5 LEDs 8Ć35 DesignJet 230 250C 3Ć12 DesignJet 330 350C 3Ć13 overlay part numbers 10Ć27 PCA...

Page 257: ...See also ROM incompatible media 8Ć58 8Ć61 incorrect LED sequence 8Ć32 initialization mechanical 8Ć2 plotter 8Ć2 ink color 8Ć61 off axis 3Ć14 on roller 4Ć4 8Ć30 providing 5Ć7 separator 5Ć11 4Ć3 8Ć31 smearing 7Ć11 8Ć60 spilling 4Ć3 8Ć31 spray 8Ć58 thirdĆparty 3Ć14 8Ć32 input output interfaces 5Ć14 test DesignJet 230 250C 8Ć43 frontĆpanel keys DesignJet 230 250C 7Ć6 installation and configuration cha...

Page 258: ...3Ć14 length 7Ć8 merging 3Ć14 sensor 5Ć7 5Ć16 7Ć8 GlossaryĆ4 plotter architecture 5Ć12 width 3Ć14 linear encoder on carriage 5Ć16 liquids 6Ć2 load media LED 3Ć12 3Ć13 loading roll media 5Ć4 sheet media 5Ć2 loopback connector 8Ć43 test failure DesignJet 230 250C 8Ć10 DesignJet 330 350C 8Ć16 Macintosh 1Ć3 main PCA 5Ć13 main processor 5Ć12 mains 6Ć2 margin GlossaryĆ4 margins 1Ć5 marks starwheel 8Ć60 m...

Page 259: ...lors 8Ć61 mispositioned trailing cable 8Ć33 modular test 8Ć45 frontĆpanel keys DesignJet 230 250C 7Ć6 DesignJet 330 350C 7Ć7 moisture on plotter 4Ć2 monitor mode GlossaryĆ4 mono configuration frontĆpanel keys 7Ć7 key 8Ć29 monochrome 3Ć14 print mode 5Ć8 DesignJet 230 250C 5Ć8 DesignJet 330 350C 5Ć9 5Ć10 month of manufacture 9Ć2 motor carriage 5Ć6 connection to main PCA 5Ć13 plotter architecture 5Ć1...

Page 260: ...3Ć15 3Ć16 parts and diagrams chapter 10 pass GlossaryĆ4 pass advance 5Ć8 5Ć9 5Ć10 GlossaryĆ4 passes per swath 5Ć8 5Ć9 5Ć10 pattern halfĆtoning 3Ć14 PC GlossaryĆ5 HP Palmtop 8Ć36 PCA GlossaryĆ5 carriage 5Ć16 frontĆpanel 5Ć16 pen GlossaryĆ5 palette 3Ć14 settings setup sheet 3Ć15 3Ć16 pens alignment cartridges 8Ć56 number of service configuration plot DesignJet 230 250C 8Ć49 DesignJet 330 350C 8Ć50 p...

Page 261: ...ory chapter 9 information 1Ć1 line 30 GlossaryĆ5 protective earth terminal 6Ć2 puddling 8Ć57 pulley 5Ć6 8Ć10 8Ć16 8Ć35 removing 6Ć40 PWM 8Ć38 8Ć53 GlossaryĆ5 carriage axis service configuration plot DesignJet 230 250C 8Ć49 DesignJet 330 350C 8Ć50 media axis service configuration plot DesignJet 230 250C 8Ć49 DesignJet 330 350C 8Ć50 mediaĆaxis 8Ć44 radius of drive roller 8Ć49 RAM 1Ć3 GlossaryĆ5 conn...

Page 262: ...semblies 10Ć2 replacement parts 10Ć3 replacing mediaĆsensor assembly 6Ć16 replot key 3Ć12 3Ć13 repositioning trailing cable 6Ć35 resistance of motor driver 8Ć10 8Ć16 resolution 1Ć4 5Ć8 5Ć9 5Ć10 GlossaryĆ5 revision firmware code 9Ć3 letter plotter 9Ć2 level firmware code 8Ć30 right bracket removing 6Ć21 right endĆcover removing 6Ć10 rms GlossaryĆ5 roll LED 3Ć13 media 5Ć5 loading 5Ć4 roll sheet key ...

Page 263: ...ormat 9Ć2 server WCSO 9Ć4 service configuration frontĆpanel keys DesignJet 230 250C 7Ć6 configuration plot 4Ć3 DesignJet 230 250C 8Ć49 DesignJet 330 350C 8Ć50 printing 8Ć51 mode 1 entering 7Ć3 frontĆpanel keys DesignJet 230 250C 7Ć6 DesignJet 330 350C 7Ć7 mode 2 entering 7Ć4 frontĆpanel keys DesignJet 230 250C 7Ć6 DesignJet 330 350C 7Ć7 monitor 8Ć52 GlossaryĆ5 frontĆpanel keys DesignJet 230 250C 7...

Page 264: ...factory service configuration plot DesignJet 230 250C 8Ć49 DesignJet 330 350C 8Ć50 removing DesignJet 230 250C 6Ć23 DesignJet 330 350C 6Ć24 spray 8Ć58 spreading of ink 8Ć61 SPROC GlossaryĆ6 release service configuration plot DesignJet 230 250C 8Ć49 DesignJet 330 350C 8Ć50 starwheel marks 8Ć60 starwheels 8Ć31 static charge 5Ć5 8Ć31 stopping a test 7Ć4 storage environment 2Ć3 Sun OS 1Ć3 UNIX 10Ć28 s...

Page 265: ...ining for customer engineers ii translucent GlossaryĆ6 media 8Ć61 troubleshooting chapter 8 print quality 8Ć56 tips 8Ć30 troublesome plotters 8Ć32 TTOE 8Ć61 GlossaryĆ6 tubes on primer 8Ć30 turning plotter on 8Ć3 types media 1Ć4 UART GlossaryĆ6 uneven fill density 8Ć58 unidirectional print mode GlossaryĆ6 unpacking plotter 3Ć2 upgrade kit DesignJet 330 1Ć4 usage level of 4Ć2 user documentation part...

Page 266: ...over sensor Windows driver 8Ć8 8Ć14 wiper blades removing 6Ć6 wipers blades worn 8Ć30 workstation HP 712 8Ć8 8Ć14 XĆaxis GlossaryĆ6 See also media axis XĆaxis calibration XĆaxis calibration GlossaryĆ6 error DesignJet 230 250C 8Ć11 DesignJet 330 350C 8Ć16 service configuration plot DesignJet 330 350C 8Ć50 YĆaxis GlossaryĆ6 year of manufacture 9Ć2 ...

Page 267: ...esignJet 230 and 250C and introduces the HP DesignJet 330 and 350C 1st edition titled HP C4694A C4695A C3190A C3191A HP DesignJet 230 250C Service Manual June 1995 2nd edition titled HP C4694A C4695A C3190A C3191A C4701A C4702A C4699A C4700A HP DesignJet 230 250C 330 350C Service Manual March 1996 ...

Page 268: ...d C3191A D HP DesignJet 330 plotters models C4701A and C4702A D HP DesignJet 350C plotters models C4699A and C4700A For information about using these plotters refer to the corresponding user and quickĆreference guides The procedures described in this manual are to be performed by HPĆqualified service personnel only Recycled paper Printed in U S A 3 96 HP Internal Order Number C4699Ć90000 R ...

Reviews:

Related manuals for Designjet 230