Installing an Internal 3.5-inch Hard Drive
1.
Remove the old hard drive.
2.
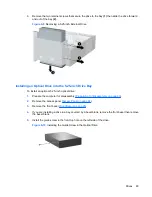
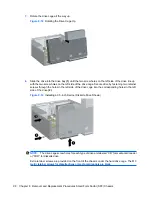
Install the guide screw in the middle hole on the right side of the drive.
NOTE:
When replacing a hard drive, remove the guide screws from the old drive for use with the
new drive.
Figure 8-24
Installing the Guide Screw in the Hard Drive
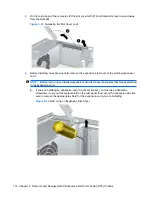
3.
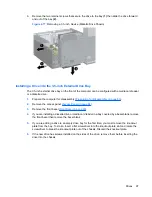
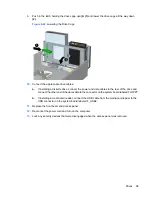
Align the guide screw on the drive with the slot on the chassis. Slide the hard drive into the drive
bay from the back until the two screw holes on the left side of the drive line up with the two screw
holes on the left side of the drive cage
(1)
.
4.
Secure the hard drive by fastening two retainer screws through the holes in the left side of the drive
cage into the corresponding holes in the left side of the hard drive
(2)
.
Figure 8-25
Installing an Internal Hard Drive
NOTE:
Extra retainer screws are provided on the front of the chassis under the hard drive cage.
The 6-32 retainer screws for hard drives are silver.
102 Chapter 8 Removal and Replacement Procedures Small Form Factor (SFF) Chassis

