Appendix B: Camera and Accessories Information
117
HP Accessories for Powering the Camera
Using the HP AC Power Adapter
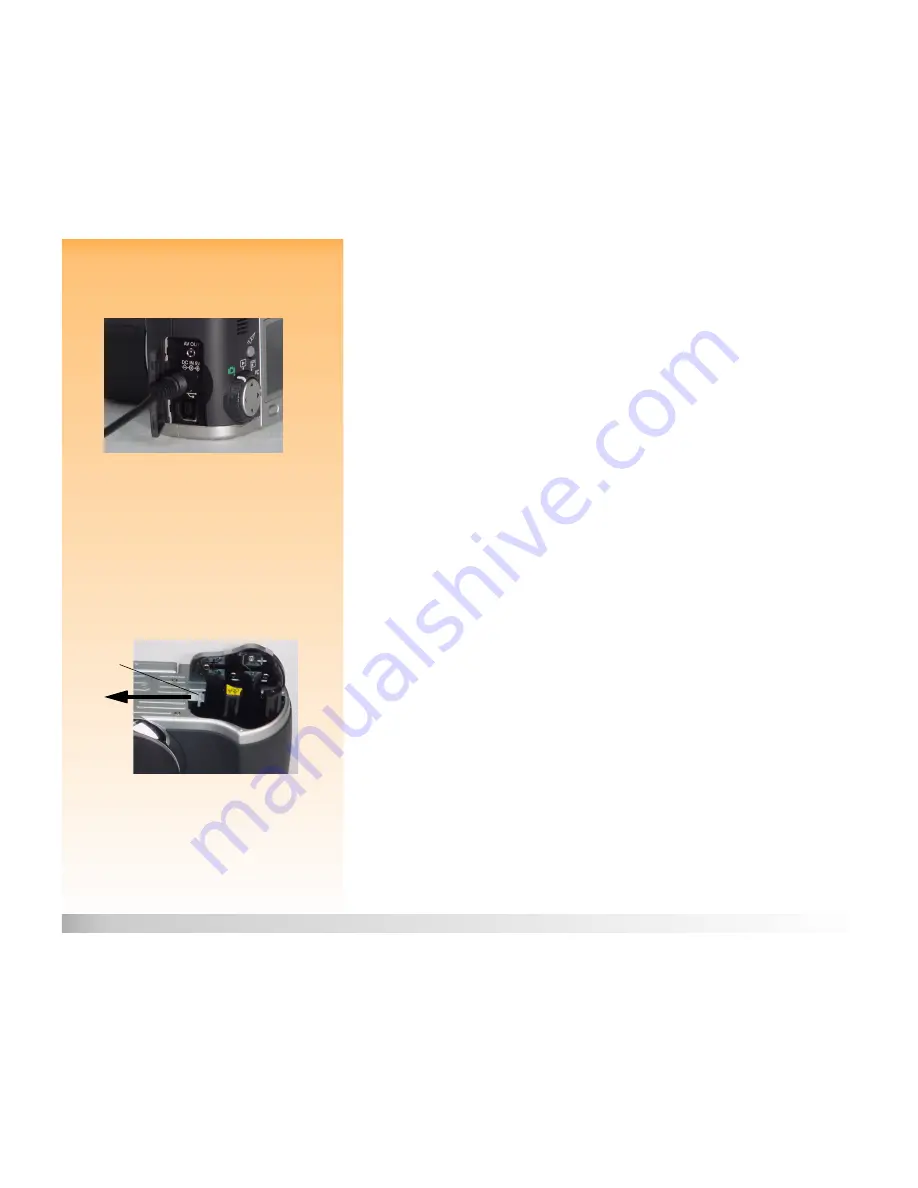
Figure 92:
Connecting the HP AC Power Adapter’s
Cable to the Camera
To connect the HP AC Power Adapter to the camera:
1
Plug the AC power adapter into a power source, such as a wall outlet or power strip.
2
Open the door to the connector compartment on the camera. The connector compartment is
located on the far right side of the camera when you are looking at the front of the camera.
3
Connect the round end of the AC power adapter’s cable to the middle (power adapter)
connector in the camera (see Figure 92).
To connect the HP AC Power Adapter to the HP Li Ion Recharger, see the next subsection.
Note:
Use the HP-approved AC power adapter
as the power source for the camera during
power-intensive operations, like when you are
using the camera’s image LCD for an extended
period of time.
Using the HP Li Ion Battery and Recharger
To install the HP Li Ion battery in the HP 912 camera:
1
Unlock and open the battery compartment on the bottom of the camera.
2
Remove any AA batteries from the battery compartment.
Figure 93:
Releasing the AA Battery Adapter
3
Release the AA battery adapter that is pre-installed inside the battery compartment by pushing
the gray tab inside the battery compartment in the direction of the arrow shown in Figure 93.
When released, the AA battery adapter pops up.
4
Remove the AA battery adapter from the camera.
5
Ensure the arrow on the Li Ion battery is pointing down and that the flat side of the Li Ion battery
is facing the flat, back wall of the camera’s battery compartment. Then insert the battery into the
battery compartment so that it pushes the gray tab to the side and allows the battery to drop
into the battery compartment.
6
Push the battery down until the gray tab snaps in place over the battery.
7
Close the battery compartment door by pushing it down until it snaps shut. The battery door
automatically locks when closed.
Gray
tab


