


31
For more information visit:
www.hornby.com
30
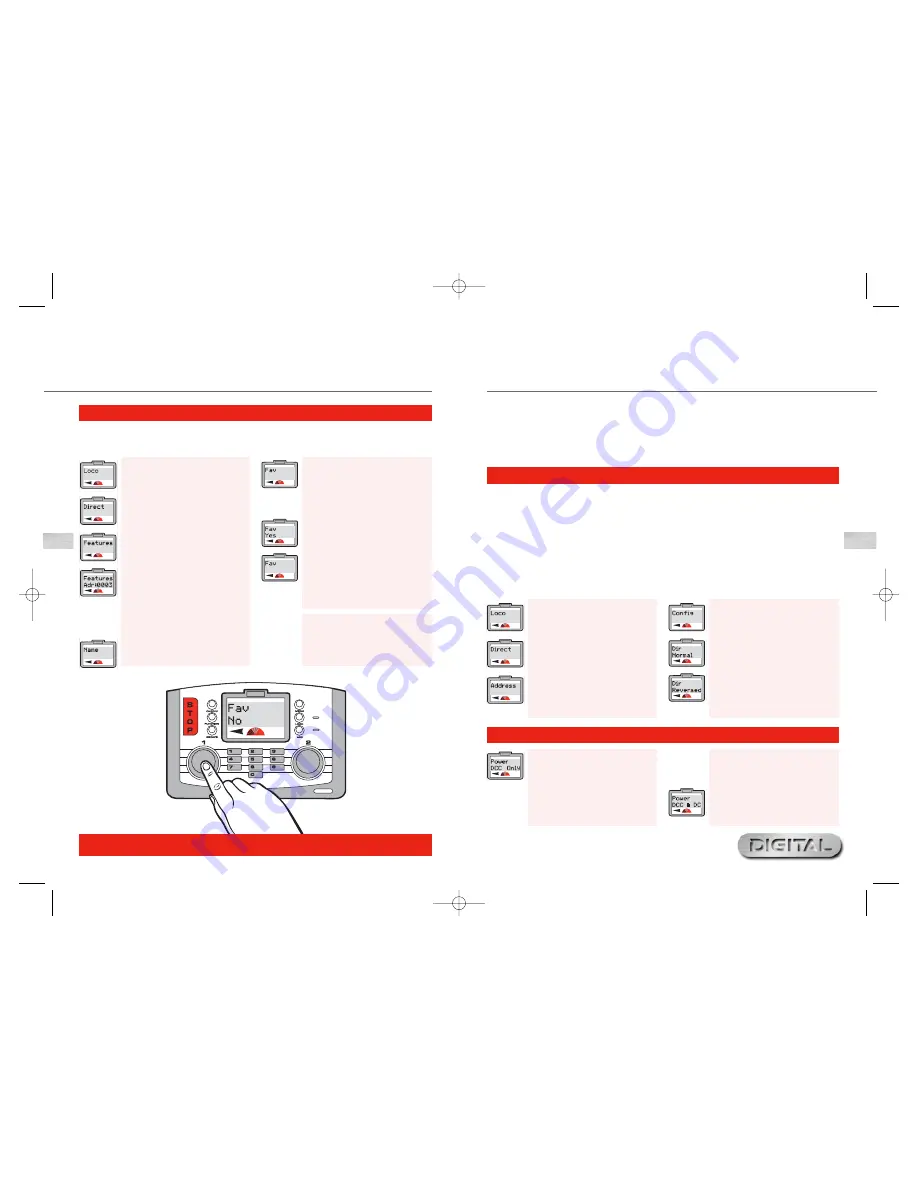
Locomotive Favourite Programming
1.
Press
Menu
. Screen shows
“
Loco
”.
2.
Press
Control 1
. Screen shows
“
Direct
”.
3.
Rotate
Control 1
until screen
shows “
Features
”.
4.
Press
Control 1
. Screen shows
“
Features Adr: 0003
” or the last
used locomotive address.
5.
Enter the locomotive address you
wish to add as a favourite using
Control 1
or the numeric keypad.
6.
Press
Control 1
. Screen shows
“
Name
”.
Please Note:
To call up locomotives that are not on
the Favourite list the Favourite setting
must be switched off. See page 29.
7.
Rotate
Control 1
until screen
shows “
Fav
”.
8.
Press
Control 1
. Screen shows
“
Fav No
”. See Fig 1.
9.
If you wish the locomotive to be
added to your Favourite list rotate
Control 1
until “
Fav Yes
” is
shown. Press
Control 1
to confirm.
Screen shows “
Fav
”.
10.
Press
Menu
to return to the main
screen.
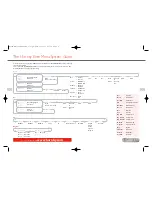
Now that the Favourite (
Fav
) function has been enabled locomotives required to be placed on the Favourite
List can be programmed as follows using Locomotive 1 as an example:
Using the Locomotive Favourites
Setting
(continued)
Fig 1
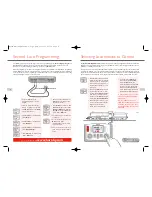
It is a commonly accepted practice in the United Kingdom that when a locomotive is in operation,
other than when shunting, the front of the locomotive normally faces left.This is easy to determine
when operating steam locomotives but not quite so obvious when a diesel or electric locomotive
has double cabs. As a rough guide the front of a diesel has the roof fan closest to the front, while
an electric locomotive’s front is determined by having the pantograph furthest away. These are
general guides but are not necessarily absolute.
After assigning an address to a locomotive, it may not move in the direction indicated by the arrow
shown on the main screen.This can be corrected by the following procedure.Although the following
instructions show the programming in Direct mode changing direction can be done on the main
line using the Operate mode.
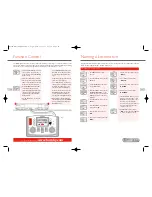
Advanced Locomotive Programming
Settings
Step 2: Power
6.
Screen shows “
Power DCC
Only
” or “
Power DCC & DC
”.
Please note that “
DCC Only
”
means that the Elite will support
only digital equipped locomotives.
(This is a default setting).
“
DCC & DC
” means that the Elite
supports digital or analogue locos.
7.
For this example rotate
Control 1
so that screen shows “
Power
DCC Only
”. Press
Control 1
to
confirm.
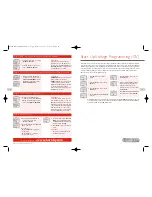
Step 1: Direction
1.
Press
Menu
. Screen shows
“
Loco
”.
2.
Press
Control 1
. Screen shows
“
Direct
”.
3.
Press
Control 1
. Screen shows
“
Address
”.
4.
Rotate
Control 1
until screen
shows “
Config
”.
5.
Press
Control 1
. Screen shows
“
Dir Normal
”. By rotating
Control 1
the screen shows either
“
Dir Normal
” or “
Dir Reversed
”.
For this example rotate the
Control
1
until screen shows “
Dir Normal
”
and press
Control 1
to confirm.
The following describes and provides direction for the overall programming of a locomotive as well as providing
instruction on programming
Direct CV
settings to both locomotives and accessories.
It is important to note the
Elite
is capable of changing the CVs on decoders, however not all decoders have
the facility for their CVs to be changed. Therefore it is important to check the specifications of the decoder
first before trying to change any of the CVs.
Elite HBook updated 6.3.07_Q6.qxd 13/3/07 13:09 Page 28


