


29
For more information visit:
www.hornby.com
28
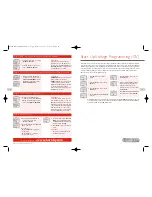
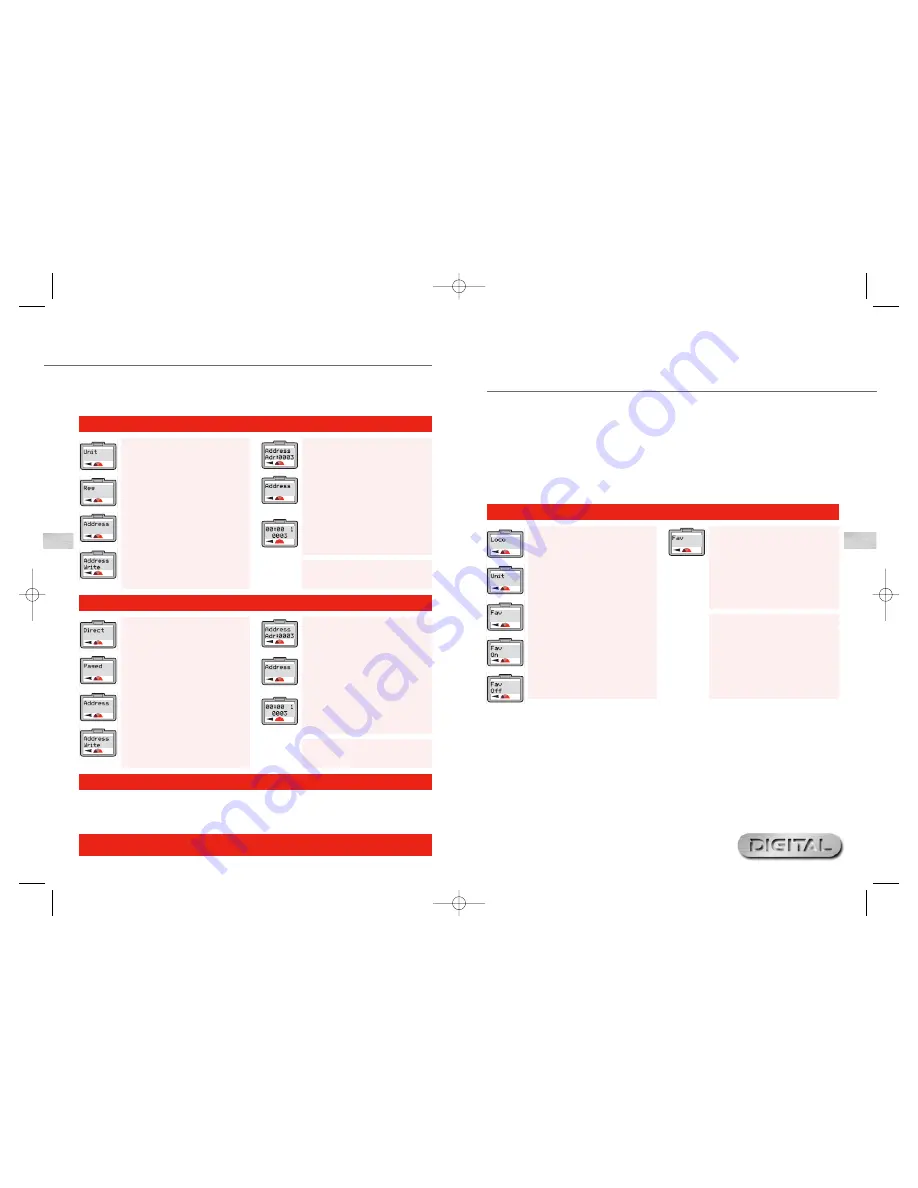
Alternative Programming Modes
Register Programming Mode
1.
Press
Menu
. Screen shows “
Loco
”.
Press
Control 1
to confirm. Screen
shows “
Direct
”.
2.
Rotate
Control 1
until screen
shows “
Reg
” and press
Control 1
to confirm.
3.
Screen shows “
Address
”. Press
Control 1
to confirm.
4.
Screen shows “
Address Write
”.
5.
Press
Control 1
to confirm. Screen
shows “
Address Adr:0003
” or
As well as supporting the more common
Direct Programming Mode
, the Elite also supports
Register
Programming Mode
,
Paged Programming Mode
and
Operate Programming Mode
. The following
describes how each mode can be accessed with the Elite Digital unit.
Paged Programming Mode
1.
Press
Menu
. Screen shows “
Loco
”.
Press
Control 1
to confirm. Screen
shows “
Direct
”.
2.
Rotate
Control 1
until screen
shows “
Paged
” and press
Control
1
to confirm.
3.
Screen shows “
Address
”. Press
Control 1
to confirm.
4.
Screen shows “
Address Write
”.
5.
Press
Control 1
to confirm. Screen
shows “
Address Adr:0003
” or
The
Operate Mode
can be used to change a locomotive’s CVs, i.e. Acceleration/Deceleration, etc. while the
locomotive is on the main line, i.e. not on Programming Track. However the
Operate Mode
will not allow you
to change the locomotive’s address (CV 1) either on the main line or on a Programming Track. See pages 37/39.
Please Note:
Use on Programming Track only.
Please Note:
Use on Programming Track only.
Operate Programming Mode
the last locomotive selected. Enter
the locomotive number you wish to
programme. Press
Control 1
to
confirm. Red LED flashes up to seven
times. Screen shows “
Address
”.
6.
Return the loco to the main track.
To operate the locomotive press
Menu
. Screen shows “
00:00 1
0003
” or the locomotive that
was programmed.
Using the Locomotive Favourites
Setting
1.
Press
Menu
. Screen shows “
Loco
”.
2.
Rotate
Control 1
until screen
shows “
Unit
”.
3.
Press
Control 1
to confirm. Screen
shows “
Train 0
”. This may vary
depending on the last action taken
in this mode. However, rotate
Control 1
until “
Fav
” is displayed.
4.
Press
Control 1
. Screen shows
“
Fav Off
” or “
Fav On
”.
5.
Rotate
Control 1
to either “
Fav
On
” or “
Fav Off
”.
6.
Press
Control 1
to confirm. Screen
shows “
Fav
”.
7.
Press
Menu
to return to the main
screen.
Please Note:
“
Fav On
” means that only those
locomotives that are on your favourites
list will be able to be called up and
operated.
“
Fav Off
” means that all locomotives
are available for operation.
The Favourites setting on the
Hornby Elite
is an extremely useful function for those who have a large stable
of locomotives or who use an array of 4 digit ID numbers. Most modellers have special locomotives that they
always use (Favourites) and these can be ‘marked’ accordingly when first programmed to the Hornby Elite with
up to 254 locomotives being able to be listed as Favourites.
For the Elite to show just those locomotives that are on the Favourites list the “
Fav
” setting should be set to
“
On
”.To do this the following procedure should be followed.
Please Note:
Before any additional locomotives can be programmed the Favourites setting should be switched
to “
Off
”.
Locomotive Favourite Listing and Enable / Disable Setting
the last locomotive selected. Enter
the locomotive number you wish to
programme. Press
Control 1
to
confirm. Red LED flashes up to seven
times. Screen shows “
Address
”.
6.
Return the loco to the main track.
To operate the locomotive press
Menu
. Screen shows “
00:00 1
0003
” or the locomotive that was
programmed.
Elite HBook updated 6.3.07_Q6.qxd 13/3/07 13:09 Page 26


