


Trim
©2017, 2018, 2019 Horizon Global™ Corp. –
Printed in Mexico
Sheet 9 of 60
24964NP
06-24-19
Rev. C
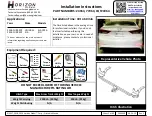
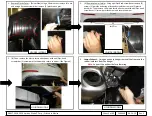
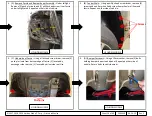
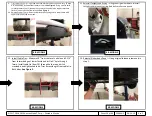
1.
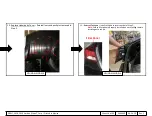
Remove Taillights
–
Open trunk. Remove access panel from behind
taillight. Using a 10mm socket, remove (2) hex nuts that secure taillight.
Unplug the electrical connector and push wiring with rubber grommet
through hole in body. Remove the taillight by gently pulling horizontally
rearward. Repeat on other side of vehicle.
Note
: During taillight removal, filler panel on side of light assembly
may detach from taillight. Ensure panel is reinstalled before taillights
are reinstalled on vehicle.
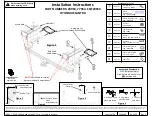
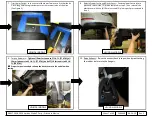
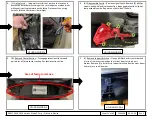
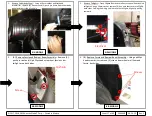
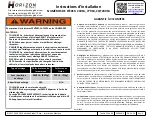
2.
Remove Underbody Panel
–
Using a 10mm socket and flat head
screwdriver, remove (4) hex nuts and (3) push pin rivets from underbody
panel on the driver's side of vehicle.
3. Lower Exhaust
–
Using an exhaust hanger removal tool (or pry bar)
remove the rubber isolators from hangers.
Note:
Support the exhaust before lowering.
HYUNDAI MODELS
HYUNDAI MODELS
Nuts
Push Pins
Nuts
Electrical
Plug
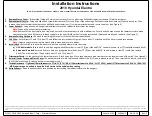
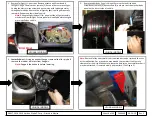
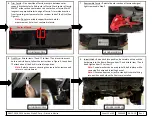
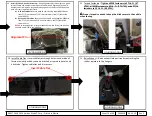
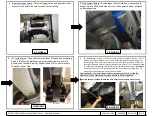
Note:
Removal of the heat shield is not required but can be removed to assist
with modification. Cut or bend the area around the rearmost stud to make
clearance for the hitch. Make sure to leave the hole in the heat shield so that it
may be reattached. If removed modify and reattach. (See Figure 5)
HYUNDAI MODELS
HYUNDAI MODELS
Filler Panel