Programming Function Blocks and Features
Video Recorder – User Manual
84
4.6 Enter Labels
Overview
Labeling lets you use the front panel buttons, a QWERTY keyboard, or barcode reader to assign
custom text identifiers to most data and functions to make them easily recognized on displays. Labeling
items makes programming and operation easier but is not required. You can assign all labels here or at
each individual programming menu (that is, at Program Analog Inputs, Program Alarms, etc.). For the
latter, you must enable labeling under ENABLE FEATURES in the main Program menu.
Entering labels with the front panel buttons
Use the Up Arrow and Down Arrow keys to select a character and the left arrow to move the cursor.
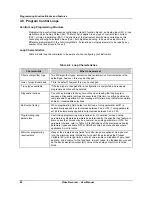
See Table 3-6 for these buttons’ functions. If you are entering several labels, this method can be
tedious because you must scroll through A-Z and 0-9 to pick each character. Consider using a
keyboard or barcode reader instead.
Entering labels with a QWERTY keyboard
Using a QWERTY keyboard is easier and faster if you are entering many labels. See Section 3.6 for
keyboard connection procedure.
To enter label with the keyboard:
1. Select Enter Labels.
2. Select the function block whose label you want to change.
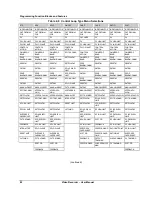
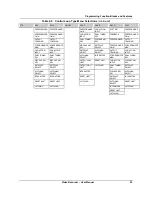
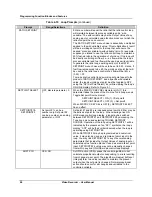
3. Select the label you want to change (Table 4-3).
4. Press Enter to move cursor to the right side of the display.
5. Type in the new label with the keyboard. The instrument accepts A…Z, a…z, 0…9, (,), -, +, /, *, ^,
(.), =.
6. Press Enter to accept the new label.
Entering labels with a barcode reader
Using a barcode reader is easier and faster if you are entering many labels. See Section 3.6 for
barcode reader connection procedure.
To enter label with the barcode reader:
1. Select Enter Labels.
2. Select the function block whose label you want to change.
3. Select the label you want to change (Table 4-3).
4. Press Enter to move cursor to the right side of the display.
5. Scan in the new label with the barcode reader. Allowable characters are: 0…9, A…Z, -, +, /,
6. Press Enter to accept the new label.
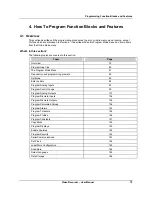
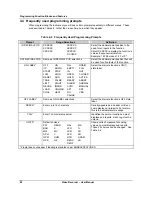
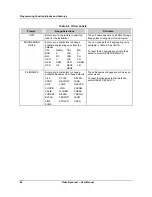
After selecting ENTER LABELS, choose an item (such as Analog Inputs) to label. Use the prompts in
Table 4-3. All text and numeric keys may be used for labels; no characters are prohibited. To cancel an
entry, press the ESC key on the keyboard or press the Menu button on the front panel.
Summary of Contents for VRX180
Page 1: ...Issue 3 03 03 US1I 6228 Video Recorder VRX180 User Manual ...
Page 2: ...Issue 3 03 03 US1I 6228 ...
Page 6: ...iv Video Recorder User Manual ...
Page 48: ...Installation Video Recorder User Manual 34 ...
Page 222: ...Setpoint Profiler Video Recorder User Manual 208 ...
Page 234: ...Online Operations Using Primary Displays Video Recorder User Manual 220 ...
Page 278: ...Appendix A Video Recorder User Manual 264 ...


