


1 - 6
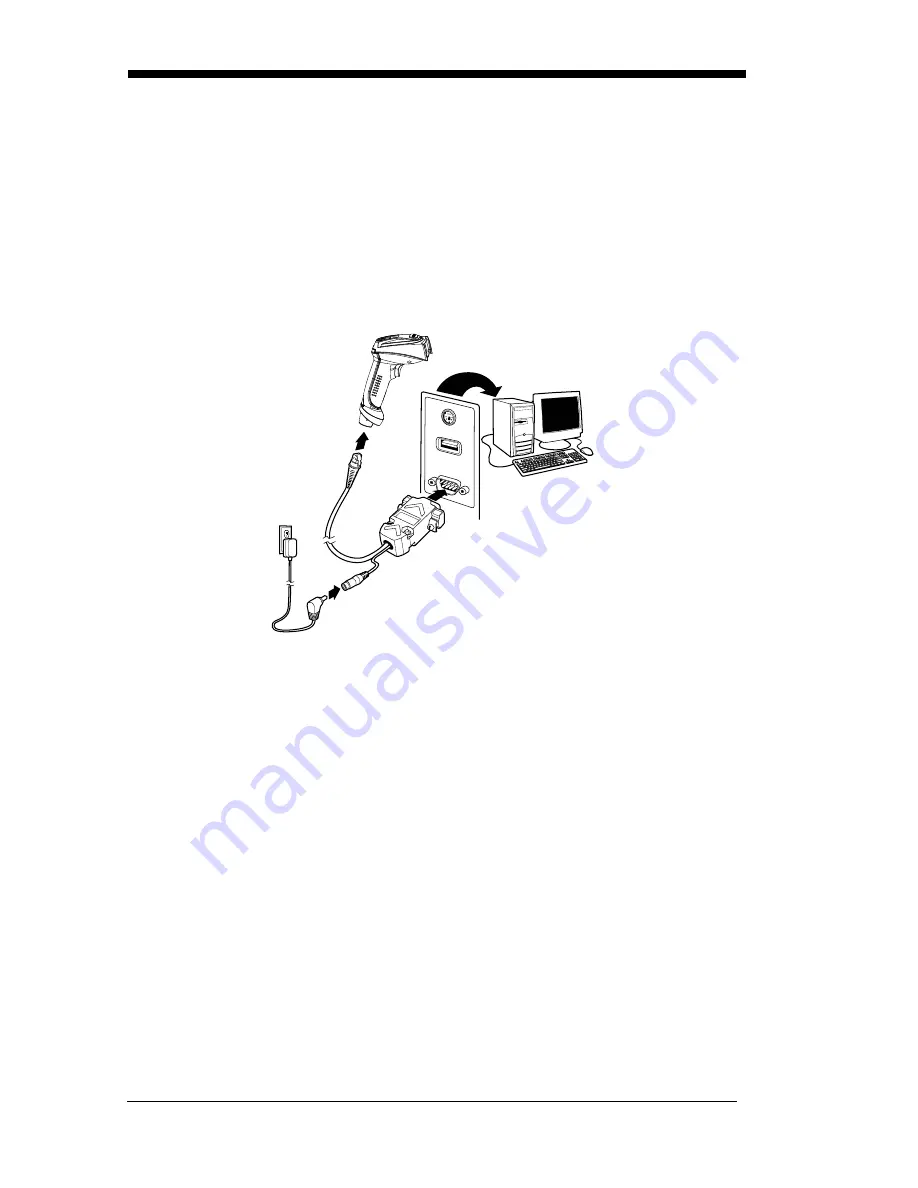
Connecting the Imager with RS-232 Serial Port
Note: See
"Imager Models"
on page 1-2 to determine which interfaces apply to
your imager.
1. Turn off power to the terminal/computer.
2. Connect the appropriate interface cable to the imager.
Note: For the imager to work properly, you must have the correct cable for your
type of terminal/computer.
3. Plug the serial connector into the serial port on your computer. Tighten the
two screws to secure the connector to the port.
4. Plug the power supply into the cable.
5. Once the imager has been fully connected, power up the computer.
6. Program the imager for an RS-232 Serial Port interface using the Plug and
Play barcode on
page 1-11
.
Connecting the Imager with RS-232 Wedge
Note: See
"Imager Models"
on page 1-2 to determine which interfaces apply to
your imager.
Your imager uses True and TTL signal levels to wedge into an RS-232 serial
network. Use only serial wedge cables to prevent damage to the imager. Refer
to
RS-232 Baud Rate
on page 2-10 to set the baud rate and communications
protocol.
Summary of Contents for 4600g
Page 1: ... 4600rp 4600g 4600r 4800i Commercial Retail Industrial Area Imager User s Guide ...
Page 6: ......
Page 16: ...x ...
Page 32: ...1 16 ...
Page 72: ...3 24 ...
Page 80: ...4 8 ...
Page 144: ...7 50 ...
Page 164: ...8 20 ...
Page 178: ...9 14 ...
Page 230: ...14 6 ...
Page 244: ...OCR Programming Chart a e d g c h t l r ...
Page 245: ...OCR Programming Chart T D A O Save Discard ...


