Date of Issue: April 2008
4-5
WDP30X
c. INSPECTION
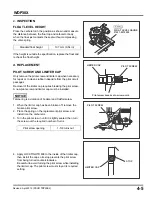
FLOAT LEVEL HEIGHT
Place the carburetor in the position as shown and measure
the distance between the float top and carburetor body
when the float just contacts the seat without compressing
the valve spring.
If the height is outside the specification, replace the float and
recheck the float height.
d. REPLACEMENT
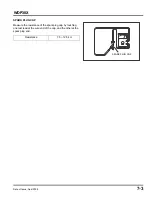
PILOT SCREW AND LIMITER CAP
Only remove the pilot screw and limiter cap when necessary
for repair or to clean stubborn deposits from the pilot circuit
passages.
Removal of the limiter cap requires breaking the pilot screw.
A new pilot screw and limiter cap must be installed.
NOTICE
Tampering is a violation of Federal and California law.
1. When the limiter cap has been broken off, remove the
broken pilot screw.
2. Place the spring on the replacement pilot screw, and
install it on the carburetor.
3. Turn the pilot screw in until it is lightly seated, then turn
the screw out the required number of turns.
4. Apply LOCKTIGHT® 638 to the inside of the limiter cap,
then install the cap so its stop prevents the pilot screw
from being turned counterclockwise.
Be careful to avoid turning the pilot screw while installing
the limiter cap. The pilot screw must stay at its required
setting.
Standard float height
13.7 mm (0.54 in)
Pilot screw opening
1-5/8 turns out
Pilot screw breaks at narrow point.
LIMITER CAP
PILOT SCREW
FLOAT LEVEL GAUGE
07401-0010000
PILOT SCREW
STOP
LIMITER CAP
Revised: April 2012 (PSV61TDP00E2)
Summary of Contents for WDP30X
Page 3: ...ii Revised April 2012 PSV61TDP00E2 WDP30X...
Page 9: ...1 6 Date of Issue April 2008 WDP30X...
Page 19: ...2 10 Date of Issue April 2008 WDP30X...
Page 43: ...6 2 Date of Issue April 2008 WDP30X...
Page 47: ...7 4 Date of Issue April 2008 WDP30X...
Page 55: ...8 8 Date of Issue April 2008 WDP30X...


