98
E
qu
ip
m
en
t
-
5
2012 Trip
Manual Override – Living Room
While it is recommended to diagnose and
repair the problem so the slideout room
operates as intended, conditions may require
the slideout room be retracted manually.
Turn off both the battery and house
disconnect switches.
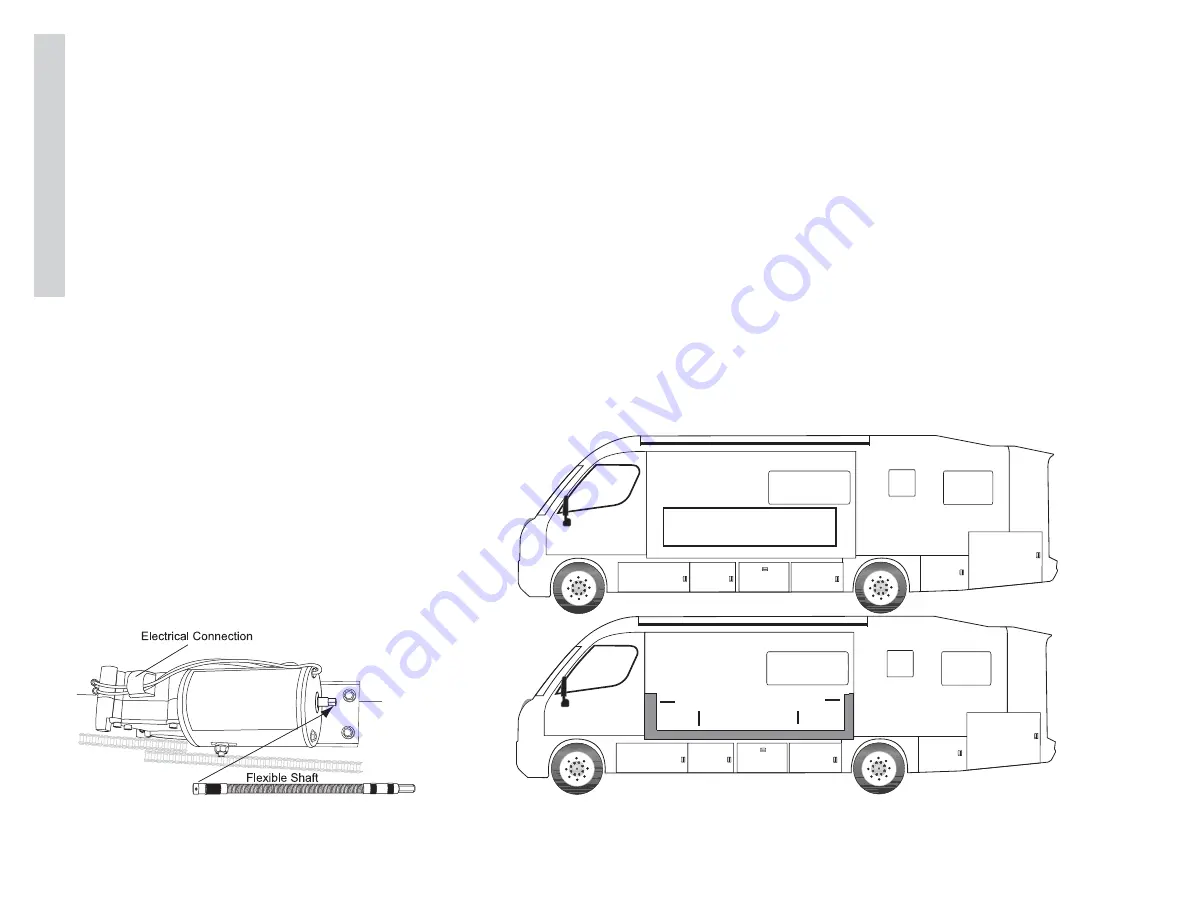
The slideout motor is located near the
ceiling of the slideout. It may necessary
to remove the fascia for full access.
Disconnect the slideout motor electrical
plug to remove 12 Volt DC power
from the slideout motor. The plug can
be located by following wires that run
from the motor to the plug.
Attach the flexible shaft to the fitting
on the end of the slideout motor.
Attach a socket and ratchet or drill to
the other end of the flexible shaft.
Turn in proper direction to move the
room. If the cables tighten and the
motor is difficult to turn, reverse the
direction. Over-torquing can cause
severe damage.
Take the motorhome to an authorized
repair center.
Broken Cable:
If a cable on the slideout breaks, it is
recommended to call an authorized repair
center for assistance. If obtaining assisstance
is not possible, the slideout must be manually
pushed in. When pushing, use extreme caution
and safety. Take extra precaution to prevent
pinched fingers. Avoid getting fingers near
edge of slideout wall or around wall edge.
Push only at points indicated (see
illustration.) Keep fingers away from frayed
or broken cables. A frayed or broken cable is
sharp and will cut. Cables can also jam then
whip free causing serious injury.
Manual Procedure:
Turn off both the battery and house
disconnect switches.
The slideout room is heavy. Use safety
and care when pushing to prevent
personal injury. It will require several
people working in unison to push the
room into position.
Once the slideout is in position, take
the motorhome to an authorized repair
center.
push heRe
do not push
010799
Do not push in shaded area
031277d
Summary of Contents for Trip 2012
Page 1: ...2 0 1 2 B YHOL I D A YR A MB L E R O w n e r s Ma n u a l...
Page 13: ...Notes...
Page 45: ...40 Driv ing Safety 2 2012 Trip Weight Record Sheet...
Page 51: ...46 Driv ing Safety 2 2012 Trip Notes...
Page 138: ...133 W ater Sy stems 6 2012 Trip Water System Diagram 040487va...
Page 139: ...134 Wat er Sy stems 6 2012 Trip Notes...
Page 151: ...146 Pro p ane Sy tems 7 2012 Trip Notes...
Page 173: ...168 Ho us e Electr ical 8 2012 Trip Notes...
Page 190: ...185 Chassis Electrical 9 2012 Trip Engine No Start Flow Chart...
Page 191: ...186 Ch as s is Electr ical 9 2012 Trip Notes...
Page 237: ...232 Ch assis 10 2012 Trip Notes...


