
17
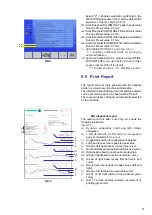
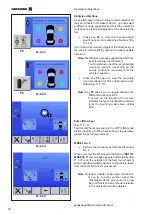
9.4-2
9.4.1-1
9.4.1-3
9.4.1-2
9.4-1
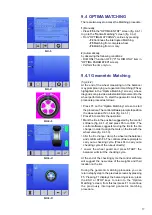
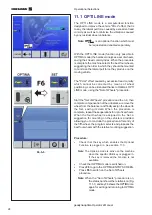
9.4 OPTIMA MATCHING
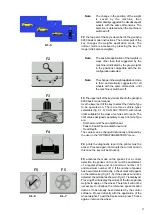
There are two ways to access the Matching procedure:
1
) Manually,
• Press
F5
in the "OPTIMA ENTRY" screen (fig. 9.4-1)
to go to the "Optima Matching" screen
(fig. 9.4-2)
.
• From "OPTIMA MATCHING" continue by pressing
- F2
Continues the interrupted Matching.
- F5
Matching from complete wheel.
- F6
Matching from rim only.
2
) Automatically,
by observing the following conditions:
• RIM ONLY function OFF ("0" for RIM ONLY item in
"OPTIMA PARAMETER" screen).
• Perform the rim only run.
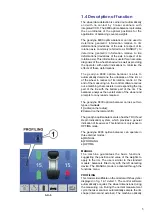
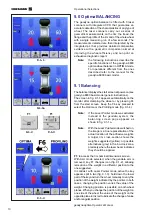
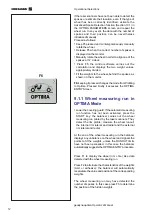
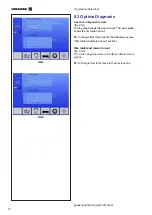
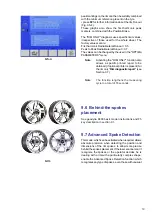
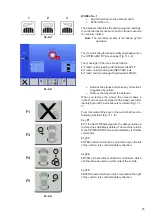
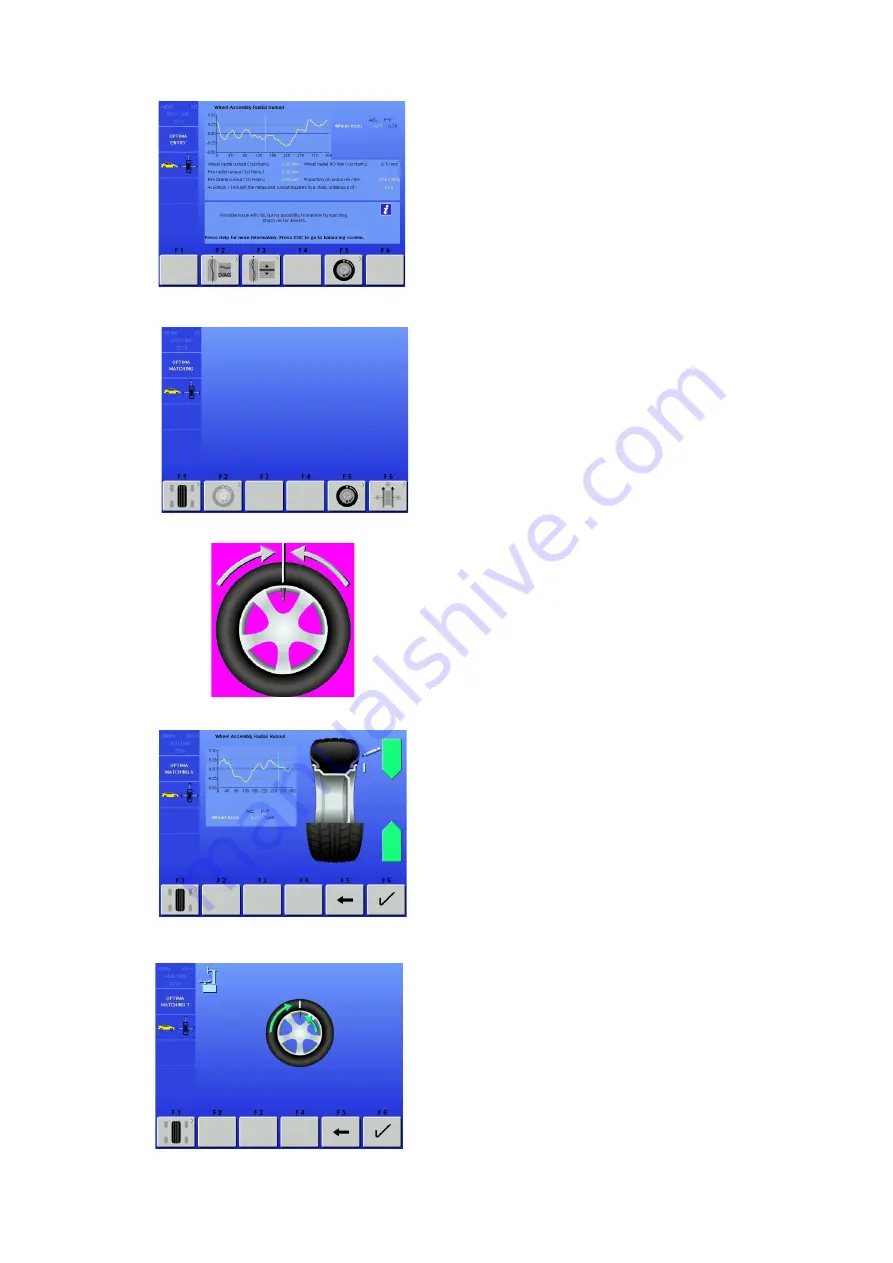
9.4.1 Geometric Matching
(fig. 9.4-2)
At the end of the wheel measuring run the balancer
may prompt carrying out a geometric matching (F5 key
highlighted in the “Optima Matching” screen), whose
diagnosis can provide a substantial improvement to the
wheel performance. To start the geometric matching
procedure proceed as follows:
•
Press F5 on the “Optima Matching” screen to start
the procedure. The control software prompts to position
the wheel valve at 12 o’clock (fig. 9.4.1-1).
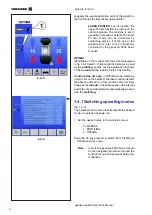
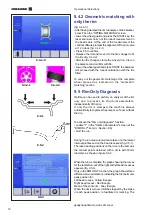
•
Press F6 to confirm the operation.
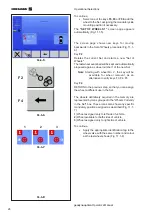
•
Mark the tire in the position suggested by the control
software (fig. 9.4.1-2) and press F6 to confirm. The
control software suggests moving the tire to the tire
changer in order to align the mark on the tire with the
wheel valve (fig. 9.4.1-3).
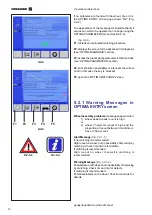
•
After the tire changer, clamp the
wheel on the balancer
and confirm with F6. The control software prompts to
carry out a checking cycle. (Press F4 to carry out a
checking cycle of the runout directly).
•
Lower the wheel guard and press START: the
balancer will start the checking cycle.
At the end of the checking cycle the control software
will suggest the new value of the weights and their
location on the rim.
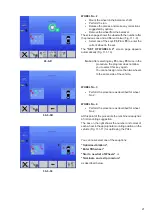
During the geometric matching procedure you can
return step by step to the previous screens by pressing
F5. Pressing F1 displays the balancing screen; press
the ESC or STOP keys to return to the “Optima
Matching” screen; from this last press F1 to continue
the previously interrupted geometric matching
procedure.
Summary of Contents for geodyna optima
Page 1: ...geodyna optima Additional instructions Wheel balancer ...
Page 2: ......
Page 55: ...53 geodyna optima Operator s Manual Manuel d Utilisation Note Note page La página de la nota ...
Page 56: ...54 Electrical diagram ...
Page 57: ...55 Electrical diagram ...
Page 58: ...56 Electrical diagram ...
Page 59: ...57 Electrical diagram ...
Page 61: ...Note page ...


