9
2.
Insert the wing tube in fuselage and install
both wings, you don’t need the wing bolts
now.
3.
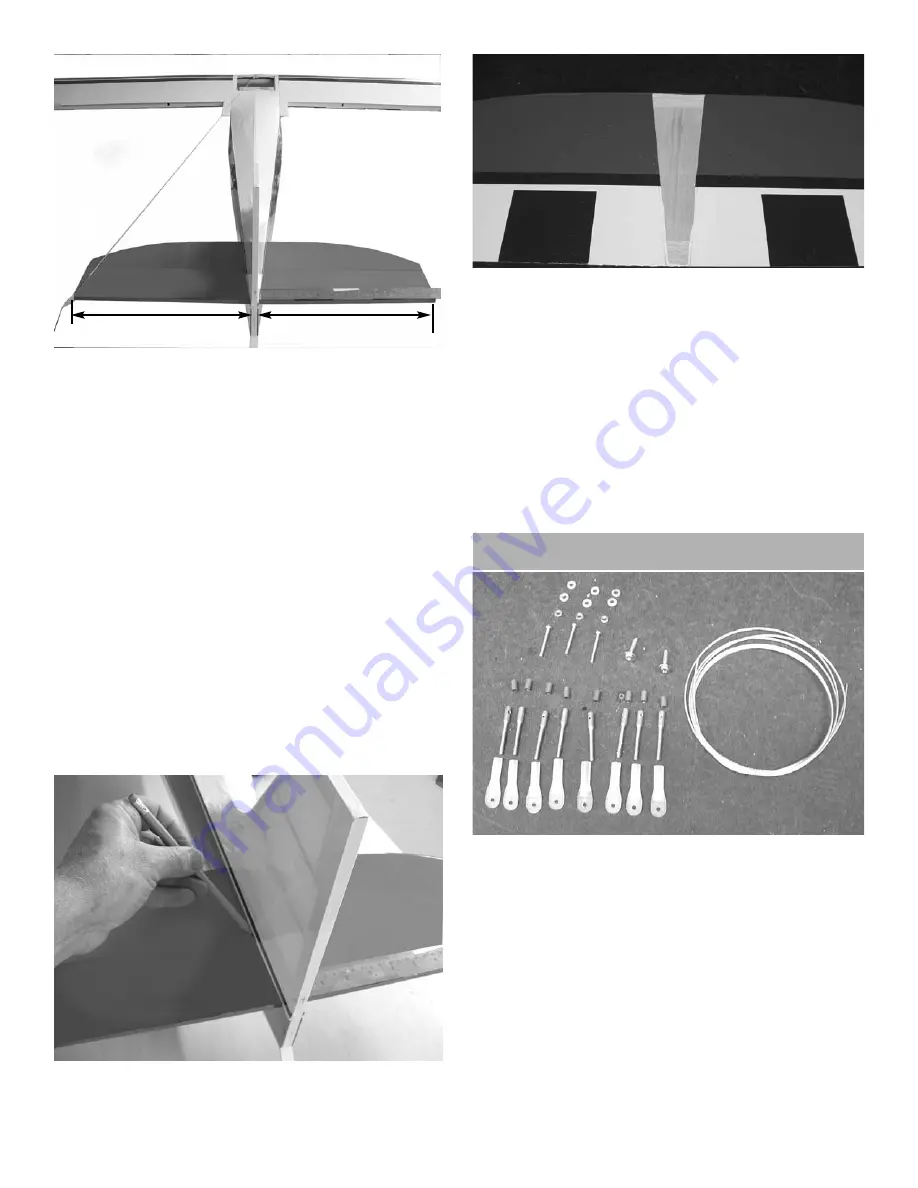
Install the stab in the slot and use a ruler to
center it at the trailing edge making sure both
sides are equal.
4.
Put a straight pin in the center of the fuselage
just in front of the top hatch and attach a piece
of string to it.
Pull the string to the rear tip of the stab and
put a piece of masking tape. Swing the string
over to the other tip and measure where the
tape is. Move the stab half the distance to the
tape and reposition the tape. When you have
the stab adjusted where you can swing the
string from one tip to the other and the tape is
the same without moving the tape, the stab
will be square to the fuselage.
Sight down the fuselage to the wing and make
sure the stab is parallel to the wing. Shim one
side if necessary.
5.
When satisfied with the alignment, mark the
stab top and bottom and both sides next to the
fuselage.
6.
Use a razor blade and carefully cut just
through the covering and not into the wood
and remove the covering top and bottom. Stay
1/8” inside the line you marked so no wood
will show.
7.
Reinstall the stab up to the cut and apply
epoxy glue top and bottom. Use 30 minute so
you will have time to work.
Realign the stab using the mark on the stab.
Sight down the fuse and make sure the stab is
parallel to the wing. Use alcohol to clean the
excess epoxy. Set aside till cured.
Flying Wires
1.
Collect the following items
(1) Braided wire
(2) #4x3/8” screws
(8) Nylon fittings
(8) 2-56 rigging couplers
(8) cable swages
(3) #2 x3/4” screws
(3) #2 nuts
(6) #2 flat washers


