54
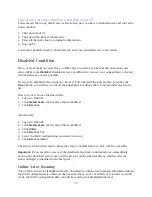
1.
Click
Start
2.
Go to
Control
Panel
3.
Click
System
and
Security
4.
Under
Administrative
Tools
click
Create
and
format
hard
disk
partitions
.
Alternatively you can search
Disk
Management
in the start search bar
5.
Find the disk you wish to format
6.
Right Click and select
New
Simple
Volume
7.
Follow the on screen instructions
8.
When finished, you will notice the
Unallocated
space
becomes your OS format (NTFS).
Note
: Disks capacity that are shown in Disk Utility (Mac) and Disk Management (Windows)
should be equivalent or nearly equivalent to your array shown in
Logical
Device
Information.
If
you created a 12 TB RAID 5 array using 4 disks, you will see one 12 TB disk appear in your OS
disk manager and not 4 disks.
Replacing a Failed Disk
When a disk in your array fails it is important to get it replaced or rebuilt as soon as possible to
prevent any data loss.
1.
There are 2 ways to locate a failed disk:
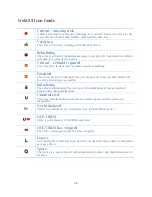
Look at the front panel for the RED disk error LED to be LIT.
Log in to WebGUI and check the
Logical
Tab
2.
Once disk has been identified press the disk tray blue tab and slide the drive out.
3.
Replace the failed drive with a new drive
4.
If auto rebuild is enabled, the rebuild process should start immediately
5.
If auto rebuild is disabled, click rescan on the left panel to initiate rebuilding
Rebuilding Your Array
In order to rebuild your array, the first step is to identify which physical disk is causing the
error.
Identify a failed disk
Check Disk Tray LEDs
Check WebGUI Event Log
Front Panel LED
The LED for a failed disk will be a SOLID RED. Promptly replace the disk with a new one and
begin rebuilding.
Checking in the Event Log
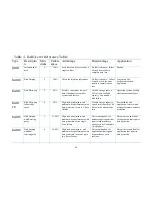
Some common disk failures will be logged under Events as:
Disk bad sectors
Disk controller#-channel# failed
The controller assigns the disk numbers chronologically from bottom to top.
Summary of Contents for RocketStor 6314A
Page 1: ...1 RocketStor 6314A User Manual Sept 25 2015 Revision v1 02 HighPoint Technologies Inc...
Page 13: ...13...
Page 18: ...18...

