Setup | Single steps for setup
8
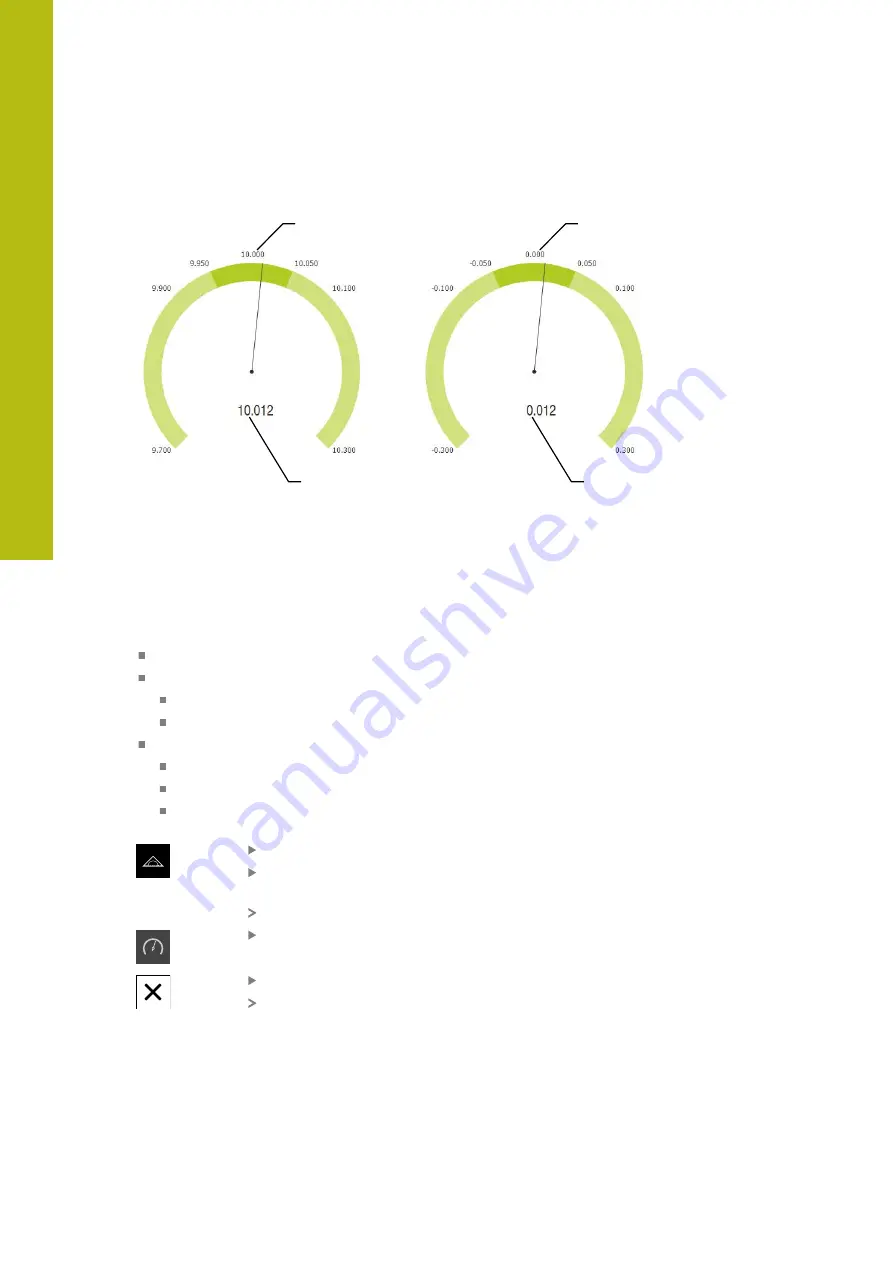
Comparison of graphical depictions
1
2
Figure 21: Example of an absolute
measurement
1
Nominal value (e.g., 10.000)
2
Actual value (e.g., 10.012)
1
2
Figure 22: Example of a difference
measurement
1
Nominal value (e.g., 0.000)
2
Difference from nominal value:
(e.g., 0.012)
Adding a function element
The following steps are necessary in order to configure the
dial gage
function:
Add the
dial gage
function element to the Inspector
Set the general parameters
Assign names
Value input
Configure parameters of the individual axes
Activate the dial gage for the desired axes
Enter limit values
Activate and configure switching functions if required
Tap
Measure
in the main menu
Drag an empty field of the Inspector to the left into the
workspace
The dialog for selecting the function element is opened
Tap the
dial gage
function element
Tap
Close
The
dial gage
function element is available in the Inspector
136
HEIDENHAIN | GAGE-CHEK 2000 | Operating Instructions | 08/2020
Summary of Contents for GAGE-CHEK 2000 Series
Page 1: ...GAGE CHEK 2000 Operating Instructions Evaluation Unit English en 08 2020 ...
Page 12: ......
Page 13: ...1 Fundamentals ...
Page 22: ......
Page 23: ...2 Safety ...
Page 28: ......
Page 29: ...3 Transport and storage ...
Page 34: ......
Page 35: ...4 Mounting ...
Page 41: ...5 Installation ...
Page 51: ...6 Basic operation ...
Page 74: ......
Page 75: ...7 Commissioning ...
Page 119: ...8 Setup ...
Page 154: ......
Page 155: ...9 Measuring ...
Page 169: ...10 File management ...
Page 176: ......
Page 177: ...11 Settings ...
Page 210: ......
Page 211: ...12 Servicing and maintenance ...
Page 220: ......
Page 221: ...13 What to do if ...
Page 225: ...14 Removal and disposal ...
Page 227: ...15 Specifications ...


