21
07/22
7027-804H
6
Appliance Set-Up
A. Rear Shroud Installation
Tools Required:
Electric drill, #26 drill bit, Phillips
screwdriver, 3/8 inch wrench, and 7/16 inch socket wrench.
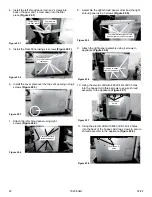
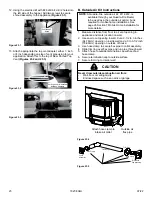
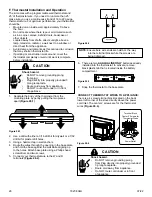
Figure 21.4
Figure 21.5
Figure 21.3
Attach bolts and nuts in
these locations.
Figure 21.1
Figure 21.2
Remove top vent
adapter from the
this adapter
Use the two holes
Use the two holes
Note for the follow step verify the use of the correct hole
placement for the filler piece attachment.
Verify gasket is installed between adapters before moving
onto the next step. Failure to do so may cause leaking of
soot and smoke into the home.
1. Remove the top vent adapter from the vertical exhaust
transition pipe
(Figures 21.1 and 21.2)
.
2. Using a Phillips head screwdriver and two screws to
attach Filler Bracket
(Figure 21.3)
.
3. Using a 3/8-inch wrench and 7/16-inch socket wrench
fasten Rear Shroud Top Vent to the exhaust transition
with two bolts and two nuts. Secure with two clamps
from the appliance
(Figures 21.4 and 21.5)
.
Needed to complete installation of the Rear Shroud
Assembly; 811-0680, will need to purchase one of the
following kits:
or
3 Inch Top Vent
Adapter (811-0660)
4 Inch Top Vent
Adapter (811-0670)
Do not drill any holes into the appliance until the
shroud assembly is attached to the appliance via
screws completely; this will ensure the holes line up
between the appliance and the shroud assembly.
Summary of Contents for Quadra-Fire CB1200
Page 31: ...31 07 22 7027 804H...

