Using the Scheduling Panel Setup Wizard
28
AMX RoomBook Scheduling Touch Panels - Instruction Manual
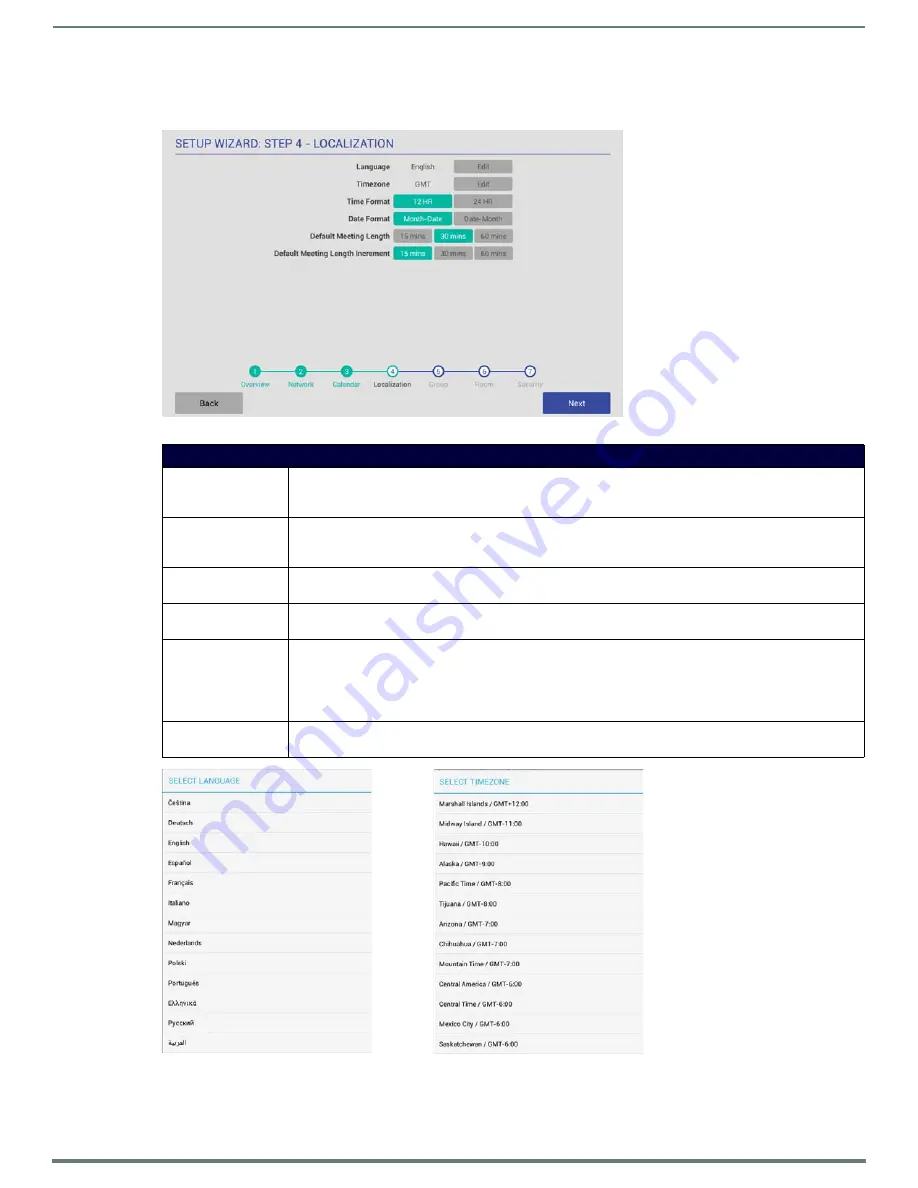
Setup Wizard: Step 4 - LOCALIZATION
Use the options in the
LOCALIZATION
pages to select a language and time zone to be displayed on this panel (FIG. 34):
Fill in these fields and press
Next
to proceed (press
Back
to return to the CALENDAR page).
FIG. 34
Setup Wizard: Step 4 - LOCALIZATION
Setup Wizard - LOCALIZATION page options
Language
Indicates the current language setting for this panel (default =
English
). To change languages, press the
Language
Edit
button.
This invokes the SELECT LANGUAGE window (see FIG. 35). Press to select a language.
Time Zone
Indicates the current time zone setting for this panel (default =
GMT
). To change the time zone setting, press the
Time Zone
Edit
button.
This invokes the SELECT TIME ZONE window (see FIG. 35). Press to select the appropriate time zone.
Time Format
Indicates the current time display setting for this panel (default =
12-hour
).
To change the time display to 24-hour format, press the
24-hour
button.
Date Format
Indicates the current date display setting for this panel (default =
Month-Date
).
To change the date display to Month-Date format, press the
Month-Date
button.
Default Meeting Length This setting specifies how many times each hour this panel can indicate separate meetings. The default setting is
15 minutes
, in which case this panel can schedule up to 4 meetings in an hour.
To change the default meeting increment setting, press either the
30 mins
or
60 mins
button.
• With
30 mins
selected, this panel can schedule a meeting every 30 minutes.
• With
60 mins
selected, this panel can schedule a meeting every 60 minutes.
Default Meeting
Increment
Indicates the current default meeting length setting for this panel (default =
30 minutes
).
To change the default meeting length setting, press either the
15 mins
or
60 mins
button.
FIG. 35
SELECT LANGUAGE and SELECT TIMEZONE dialogs


