background image

PRE-BUILT

90

%

540

540

EDGE

EDGE

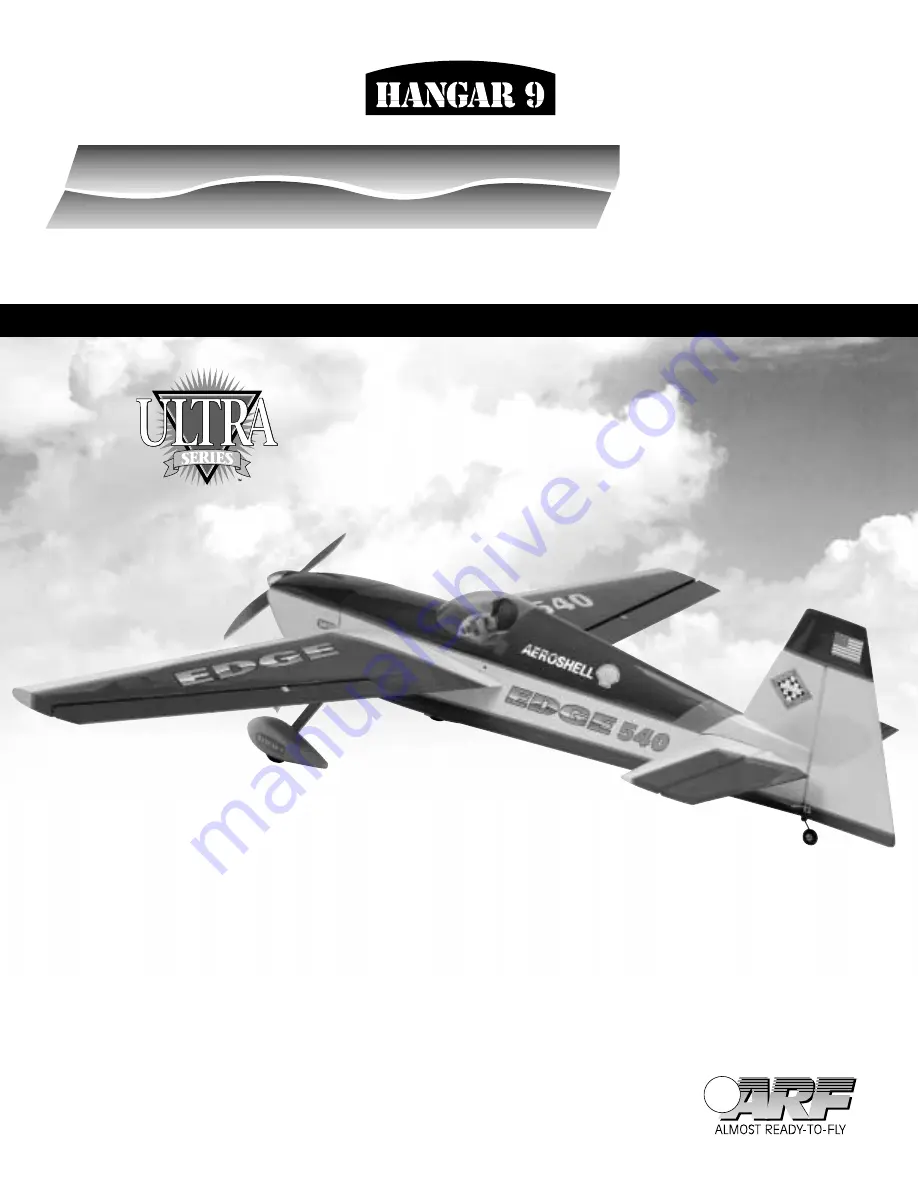
Ultra Aerobatic 1.20 ARF

EDGE

EDGE

TM

TM

Specifications

Wingspan:

. . . . . . . . . . . . . . . . . . . . . . . . . . . . . . . . . . . . . . 

78

′′

198.10 cm

Length:

. . . . . . . . . . . . . . . . . . . . . . . . . . . . . . . . . . . . . . . . 

68.5

′′

174 cm

Wing Area:

. . . . . . . . . . . . . . . . . . . . . . . . . . . . . 

1010 sq. in 651.6 dm

2

Weight (Approx.):

. . . . . . . . . . . . . . . . . . . . 

11-13 lbs

5-5.9 kg

Recommended Engines: 1.08 –1.50 2-Stroke

1.20 –1.80 4-Stroke

• 90% prebuilt 
• High-quality hardware included
• Precovered in genuine Goldberg UltraCote

®

• Prefinished fiberglass cowl and wheel pants

INSTRUCTION MANUAL

Summary of Contents for EDGE 540

Page 1: ...pan 78 198 10 cm Length 68 5 174 cm Wing Area 1010 sq in 651 6 dm2 Weight Approx 11 13 lbs 5 5 9 kg Recommended Engines 1 08 1 50 2 Stroke 1 20 1 80 4 Stroke 90 prebuilt High quality hardware included Precovered in genuine Goldberg UltraCote Prefinished fiberglass cowl and wheel pants INSTRUCTION MANUAL ...

Page 2: ...8 Hinging the Rudder and Installing the Tailwheel 21 Section 9 Installing the Rudder and Elevator Control Horns 23 Section 10 Mounting the Main Landing Gear 26 Section 11 Assembling and Mounting the Wheel Pants 27 Section 12 Installing the Engine 2 4 Stroke 29 Section 13 Assembling and Installing the Fuel Tank 30 Section 14 Installing the Radio 32 Section 15 Installing the Control Linkages Rudder ...

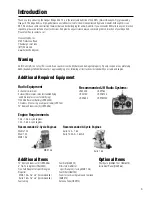
Page 3: ...d flying sites following all instructions included with your radio and engine Additional Required Equipment Radio Equipment 4 channels minimum 5 servos 50 in oz plus servo for standard flying and 90 in oz plus servos for 3 D flying 1100mAh Receiver Battery JRPB4240 Y Harness if not using a computer radio JRP133 12 Aileron Extensions 2 JRPA098 Engine Requirements 1 08 1 48 2 cycle engines 1 20 1 80...

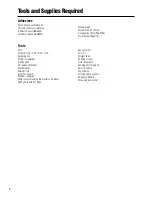
Page 4: ...liers CA remover debonder Standard pliers Mixing sticks 5 32 hex wrench Medium sandpaper Moto tool with sanding drum and cut off wheel Hobby knife with 11 blade Masking tape Threadlock Z 42 Pacer Canopy Glue Pacer PAAPT56 Silver Solder Staybrite Epoxy brushes Scissors Straight edge Rubbing alcohol 1 16 hex wrench Sanding stick medium Small round file Paper towels Felt tipped pen or pencil 90 degre...

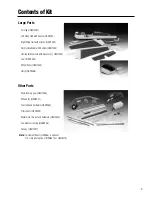
Page 5: ...rizontal Stabilizer with Elevator s HAN1353 Cowl HAN1354 Wheel Pants HAN1355 Hatch HAN1358 Other Parts Main landing gear HAN1356 Wheels 2 HAN2027 Fuel tank and hardware HAN1460 Trim sheets HAN1359 Metal motor mount and hardware HAN2033 Tail wheel assembly HAN2026 Canopy HAN1357 Note Instrument Panel HAN186 is optional 1 4 scale pilot optional HAN8272 or HAN8275 ...

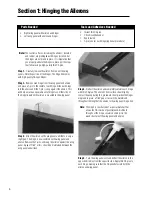
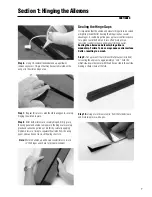
Page 6: ...ug the aileron against the wing panel A gap of 1 64 or less should be maintained between the wing panel and aileron Step 4 Deflect the aileron and completely saturate each hinge with thin CA glue The aileron s front surface should lightly contact the wing during this procedure Ideally when the hinges are glued in place a 1 64 gap or less will be maintained throughout the length of the aileron to t...

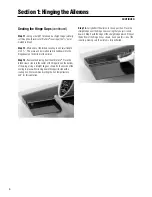
Page 7: ...proper movement Sealing the Hinge Gaps It s imperative that the aileron and elevator hinge lines be sealed airtight to prevent flutter Sealing the hinge line has several advantages A sealed hinge line gives a greater control response for a given control deflection It also offers more precise consistent control response and makes trimming easier Sealing the aileron and elevator hinge line is mandat...

Page 8: ...e side into the center of the hinge line on the bottom of the wing Using a straight edge as shown hold one side of the overing in place while ironing down theopposite side with a sealing iron We recommend setting the iron temperature to 320 for this operation Step 14 Fully deflect the aileron in the up position Place the straight edge over the hinge line covering that you just ironed down in Step ...

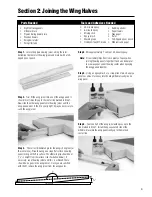
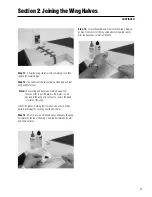
Page 9: ...it remove the wing joiner from the wing panels Step 4 Mix approximately 1 ounce of 30 minute epoxy Note It is extremely important to use plenty of epoxy when joining the wing panels together It will also be helpful to use wax paper under the wing center when epoxying the wing panels together Step 5 Using an epoxy brush or a scrap piece of wood apply a generous amount of epoxy into the wing dihedra...

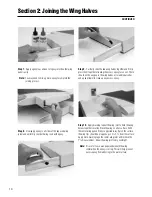
Page 10: ...ng alcohol and a paper towel to clean up any excess epoxy Step 10 Apply masking tape at the wing joint to hold the wing halves together securely Place the wing on a flat surface With the center wing panels firmly supported to lay flat on the surface the wing tips should be propped up so it is 11 8 from the surface Apply more masking tape the center wing joint and recheck the 11 8 measurement Allow...

Page 11: ...o cut into the wood structure of the wing Trial fit the pieces marking their location Use a sharp hobby knife to trim away the covering over the bolt holes Step 13 Mix 1 4 ounce of 6 minute epoxy and epoxy the wing bolt plates to the top of the wing The wing bolt plate holes will be drilled out later Step 14 Locate the yellow and blue center trim tape Apply a portion to the center of the top and b...

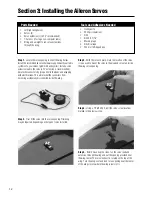
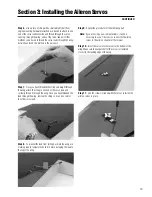
Page 12: ...ount the servo to the plywood servo rail inside the wing servo opening Step 4 Using a 1 16 drill bit drill the servo screw locations marked in the previous step Step 5 Before mounting the servo run the servo lead and extension through the wing and out the opening provided near the wing center The servo lead exit is located on the top of the wing Turn the wing over and look for an opening near the ...

Page 13: ...he lead through the wing remove the string so it can be used for the other servo lead Step 8 To prevent the lead from falling back into the wing use masking tape to temporarily hold it in place by taping the lead to the top of the wing Step 9 Repeat the procedure for the other wing half Note If you are using a non computer radio it will be necessary to use a Y harness to connect both aileron servo...

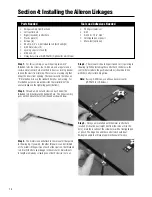
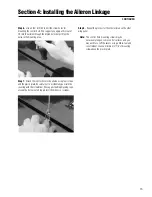
Page 14: ...djustments in length are made by screwing one or both clevises in or out Step 4 The servo arm should be positioned so it is pointing to the wing tip When installing the control horn the holes in the control horns where the pushrod attaches should be in line with the control surface hinge line Note If using 3 D throws use a heavy duty servo arm JRPA215 for JR Servos Step 5 Once you are satisfied wi...

Page 15: ...l not to accidentally puncture the covering with the screwdriver We suggest putting masking tape around the horn area to help protect it from dents or scrapes Step 8 Repeat the process for the other aileron on the other wing panel Note The control horn mounting screws may be excessively long on some control surfaces and you may wish to cut off the excess using a Moto tool and cut off wheel Leave a...

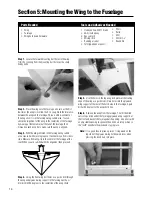
Page 16: ...ll bit Drill 90 degrees to the centerline of the wing chord Step 5 Use the holes in the top wing bolt plates at the trailing edge of the wing as a guide to drill two holes into the plywood wing support at the rear of the hatch area in the fuselage Again drill at 90 degrees to the wing chord line Step 6 Remove the wing from the fuselage Trial fit the blind nuts into position under the fuselage plyw...

Page 17: ...the rear of the fuselage carefully remove the tape holding the shaped fairing blocks onto the fuselage Note they are in two separate pieces and fit over the horizontal stabilizer and around the vertical stabilizer Section 5 Mounting the Wing to the Fuselage CONTINUED Section 6 Installing the Tail Fuselage Fuselage Wing Horizontal stabilizer with elevators Vertical stabilizer with rudder Thin CA gl...

Page 18: ... is centered on the marks made in Step 3 Step 5 Attach the wing and measure from the front tips of the horizontal stabilizer to the wing tips Each should be the same distance from the wing Make any adjustments necessary to make sure the horizontal stabilizer is aligned with the wing Step 6 When you are satisfied with the position of the horizontal stabilizer use a felt tipped pen or pencil to mark...

Page 19: ...r pencil The mark should leave a slight indentation in the covering Carefully remove the vertical stabilizer and tail pieces Remove the covering 1 8 from where you made the marks using the procedure as described in Step 6 Caution Do not cut into the wood below the covering This will weaken the structure Step 9 Mix approximately 1 ounce of 30 minute epoxy and apply to the vertical stabilizer and ta...

Page 20: ...e sure to remove the t pins first Wipe away any excess CA with CA debonder and a paper towel Section 6 Installing the Tail CONTINUED Section 7 Hinging the Horizontal Stabilizer and Elevator s Fuselage Fuselage with Vertical and horizontal stabilizers attached Elevators 2 Thin CA glue CA remover debonder Paper towels T pins Parts Needed Tools and Adhesives Needed Step 11 Carefully check the alignme...

Page 21: ...es are dry check that they are securely in place by trying to pull the elevator from the horizontal stabilizer Caution Use care not to crush the structure Step 4 Repeat steps 1 3 for the other elevator half Step 5 Work the elevators up and down several times to work in the hinges and check for freedom of movement Section 7 Hinging the Horizontal Stabilizer and Elevator s CONTINUED Section 8 Hingin...

Page 22: ... knife or a Moto tool cut a slot or groove into the back of the fuselage vertical stabilizer as marked in Step 3 This groove will be used to accept the tail wheel pivot bushing Step 6 Trial fit the tail wheel assembly and rudder in place with the hinges Deflect the rudder making sure the tail wheel turns freely with the rudder and there is no binding Step 7 When you are satisfied with the fit disa...

Page 23: ... wheel slightly so the wheel will spin freely on the axle Step 1 Locate a standard and reverse control horn and the associated hardware Note that on the bottom of the control horn the one with no markings is the standard horn and the one with the R is the reverse control horn The right as relates to the pilot sitting in the cockpit elevator uses the standard horn the left elevator uses the reverse...

Page 24: ... sure to use CA to strengthen the mounting of the control horn Step 6 Carefully install the screws and engage the plastic plate on the other side We suggest you cover the area with masking tape around the horn to prevent damage to the covering if the screwdriver slips Once the right elevator control horn is installed repeat the process for the left elevator Step 7 Locate a standard and reverse con...

Page 25: ...e two horns on the rudder one on either side with the standard horn on the left side and the reverse horn on the right side The plastic plate will be used as a retainer on one side Use caution when screwing in the screws so that the covering is not damaged if the screwdriver slips Section 9 Installing the Control Horns CONTINUED ...

Page 26: ...unting holes Step 2 Trial fit the aluminum main landing gear over the holes in the fuselage Step 3 Using the hardware provided mount the main landing gear to the fuselage Apply Locktite Z 42 to the threads of the screws to help secure them to the blind nuts in the fuselage Section 10 Installing the Main Landing Gear Fuselage Main landing gear Mounting hardware Hobby knife with 11 blade Phillips sc...

Page 27: ...le and a smaller hole above it This smaller hole will be used to secure the wheel pant in the proper position relative to the fuselage Do not mark the small hole yet Step 4 Drill the main axle hole using a 1 2 drill bit It is helpful to start with a 1 8 pilot hole first Once the hole is drilled trial fit the axle to the opening again You may have to enlarge the hole further Use a fine round file t...

Page 28: ... opening onto the wheel pant This mark can be made by passing a small drill bit through the hole and marking the surface of the wheel pant Remove the wheel pant and drill a 3 32 hole in the wheel pant as marked Step 10 Repeat Step 9 for the other wheel pant Step 11 Epoxy a 4 40 blind nut into the small hole drilled in the wheel pant plywood brace inside the wheel pant Allow the epoxy to cure compl...

Page 29: ...otor mount position on the firewall making sure the mounts are parallel to the bottom of the firewall Once the proper distance between the motor mounts is determined and they are parallel to the bottom of the firewall tighten the bolts mounting the motor mount to the firewall securely A drop of Locktite Z 42 on the bolt threads will help prevent loosening in flight Step 5 Position the engine along...

Page 30: ...her tube This will be the vent tube Bend one end up about 60 degrees but no more than 90 degrees Caution You can use your fingers to bend the tubing but be careful not to kink the tubing If you have access to a small tubing bender use it to make the bend Refer to photo below Step 4 Slide the vent tube into the other open hole in the stopper and caps Note An option is to trim the length of the vent...

Page 31: ...reely trim a portion of the fuel tubing to shorten the length and try again Step 9 When you are satisfied with the movement of the clunk and the vent tube is properly positioned to point to the top of the tank tighten the 3 mm screw so the caps move toward each other and compress the rubber stopper in the tank stopper opening This compression will help seal the stopper into the tank opening Import...

Page 32: ...rvo on the servo rails next Place it so it is in the center of the fuselage with the servo arm facing toward the rear of the fuselage The rudder servo uses a pull pull linkage so leave ample room between its servo arm and that of the elevator servo arm Install the elevator servo next placing it to the left as if one were sitting in the cockpit of the aircraft of the rudder servo Make sure there is...

Page 33: ...attached it to the plywood above the fuel tank directly behind the firewall platform using Velcro For the receiver we used a J TEC Pillow Pack attached Velcro to the plywood floor behind the fuel tank next to the throttle servo and also attached the receiver Pillow Pack to the floor using velcro Step 7 Route the antenna back through the fuselage using an antenna tube not included or route it out t...

Page 34: ...ill be on the top bottom side between the two Step 3 Use a 1 8 drill bit and drill the holes marked on the wood push rod Round out the holes so the rods will fit flush against the wood push rod A groove can be cut from the holes to the end of the wood push rod to help secure the rods in place when applying epoxy Step 4 Fit the two 12 threaded rods on either side of the wood pushrod along side the ...

Page 35: ...s that pass through the fuselage rear The illustration below gives an approximate idea of how to bend the rods so they would exit the fuselage Attach a nut and a clevis to each elevator threaded pushrod end Screw in approximately 10 turns Connect each clevis to the outer hole of each elevator control horn Adjustments to each elevator position can be done by screwing the clevis in or out on the thr...

Page 36: ... and clevis attached Step 16 Once you are satisfied with the length silver solder the threaded coupler to the music wire using the same procedure as outlined in step 15 After the solder has cooled again check the security of the joint Repeat the process for the other link Step 17 Once both pull pull linkages have been constructed connect to the rudder servo control horns outer holes Final adjustme...

Page 37: ...der head of the engine you are going to mount in the Edge 540 Mount the engine and place the template over it Use a piece of cardboard or heavy paper that can be taped to the fuselage and folded back Remove the engine fold back the template and slide the cowl over the fuselage Unfold the template so it rests on the cowl at the position where the engine cylinder will be located Mark the cowl for th...

Page 38: ...located on either side of the cowl With the cowl in position the top screw is located 11 2 from the edge of the cowl to the front 1 2 down from the blue yellow color line on the top of the cowl The bottom screw is located directly below the top screw 31 4 at a location 11 2 from the edge of the cowl and 3 8 up from the yellow blue color line at the bottom of the cowl Step 7 Once the mounting holes...

Page 39: ...on 17 Mounting the Hatch with canopy Step 3 Locate the instrument panel decal from the decal sheet Cut the instrument panel out and trial fit it to the hatch area in the front area of the cockpit When you are satisfied with the fit peel away the backing and apply the instrument panel decal to the instrument panel area Hangar 9 makes an optional instrument panel HAN186 which can be used in place of...

Page 40: ...atch using canopy glue such as Pacer 560 Masking tape can be used to hold the canopy in place while the glue dries Allow the canopy glue to dry at least 24 hours Trim tape for the canopy can be applied now Blue trim strips are provided Step 8 With the instrument panel pilot optional and canopy mounted to the hatch slide the hatch into the fuselage Carefully screw in the four 4 40 cap screws and wa...

Page 41: ...l pants Step 4 The Aeroshelle decal can be applied to both sides of the fuselage turtledeck behind the canopy as shown in the photo below The Edge 540 decal is placed on each side of the fuselage behind the hatch area Step 5 The IMAC and American Flag are applied to both sides of the vertical stabilizer and rudder as shown Step 6 The Edge 540 decal is applied to the top of the wing the Edge decal ...

Page 42: ...r the first few flights then increase the throws to your liking The 3 D rates allow the Edge 540 to perform the new generation of aerobatic maneuvers such as waterfalls elevators and harriers However they also make the model very sensitive It is recommended that the 3 D rates be tried only after becoming familiar with your Edge 540 Section 19 Balancing the Edge 540 Section 20 Control Throw Recomme...

Page 43: ...anual are a result of the flight testing on the prototype Edge There are no secrets If you follow the instructions and these tips your Edge will be set up just like ours Although a computer radio is not mandatory it is preferable in this model We use Exponential on all controls to soften the feel around neutral This makes it easier to fly smooth in precision maneuvers and also makes it less likely...

Page 44: ... to avoid over controling the model Let s Get Down To It When flying aerobatics with a larger model you will find that it will do everything just like a smaller model only better and easier There are just a few exceptions to how things are done Throttle management is a must You have to throttle back to idle when the nose is pointed down Snap Rolls Just like the need to be throttle managed like a f...

Page 45: ...re to use Expo Setting the CG toward the aft location will help but I have had great results even at the forward CG location This is a wing tester and can be extremely violent but will always generate gasps of excitement But done correctly the Edge can handle the challenge How to do it Start from about 400 500 feet straight and level chop throttle and push the nose straight down As soon as the mod...

Page 46: ...r down from a hundred feet down to 20 feet or less and power up into a Torque Roll Ooh Worst way to mess up Let your direction control rudder get away from you after starting too low you could snap it right into the ground Ouch The Harrier What is it It is very slow forward flight in a very nose high about 45 degrees attitude Setup Same as the Elevator and the raised ailerons help in this maneuver...

Page 47: ...left around its roll axis The in line midwing configuration of the Edge makes it one of the easiest Torque rollers around Setup Full 3 D throws in elevator and rudder are a must An aft CG helps a little Also gyros provide the best aid to stabilize the aircraft They won t do the maneuver for you but they ll help I found them a fantastic tool in learning to torque roll kinda like training wheels A f...

Page 48: ...nder too much speed and it over stresses the wing Watch the speed The Wall What it is The Wall is a Parachute turned on end The model starts in normal level flight and suddenly corners nose up 90 degrees as if it hit a wall Setup Same as the Elevator and the raised ailerons help in this maneuver too How to do it Start from about 100 feet straight and level chop throttle and as the model begins to ...

Page 49: ...ting bolts Range Test Your Radio Step 1 Before each flying session be sure to range check your radio This is accomplished by turning on your transmitter with the antenna collapsed Turn on the radio in your airplane With your airplane on the ground you should be able to walk 30 paces away from your airplane and still have complete control of all functions If not don t attempt to fly Have your radio...

Page 50: ...nts under special circumstances involving consideration of side conditions and model size weight speed and power must be jointly approved by the AMA President and the Executive Director Under all circumstances if my model weights over 20 pounds I will fly it in accordance with paragraph 5 of this section of the AMA Safety Code I will not fly my model unless it is identified with my name and addres...

Page 51: ...icensed Amateurs are authorized to operate equipment on Amateur Band frequencies I will not knowingly operate an R C system within 3 miles of a pre existing model club flying site without a frequency sharing agreement with that club I will not fly my model aircraft in any racing competition which allows models over 20 pounds unless that competition event is AMA sanctioned For the purpose of this p...

Page 52: ...52 ...

Page 53: ...53 Template Cut Out of Cowl Bottom MDS 1 48 ...

Page 54: ...54 ...

Page 55: ...55 ...

Page 56: ... 2000 Horizon Hobby Inc www horizonhobby com ...

Page 57: ...57 ...

Page 58: ...58 ...

Page 59: ...59 ...

Reviews: