background image

7 - 10

Dolphin® 9500/9550 Mobile Computer User’s Guide

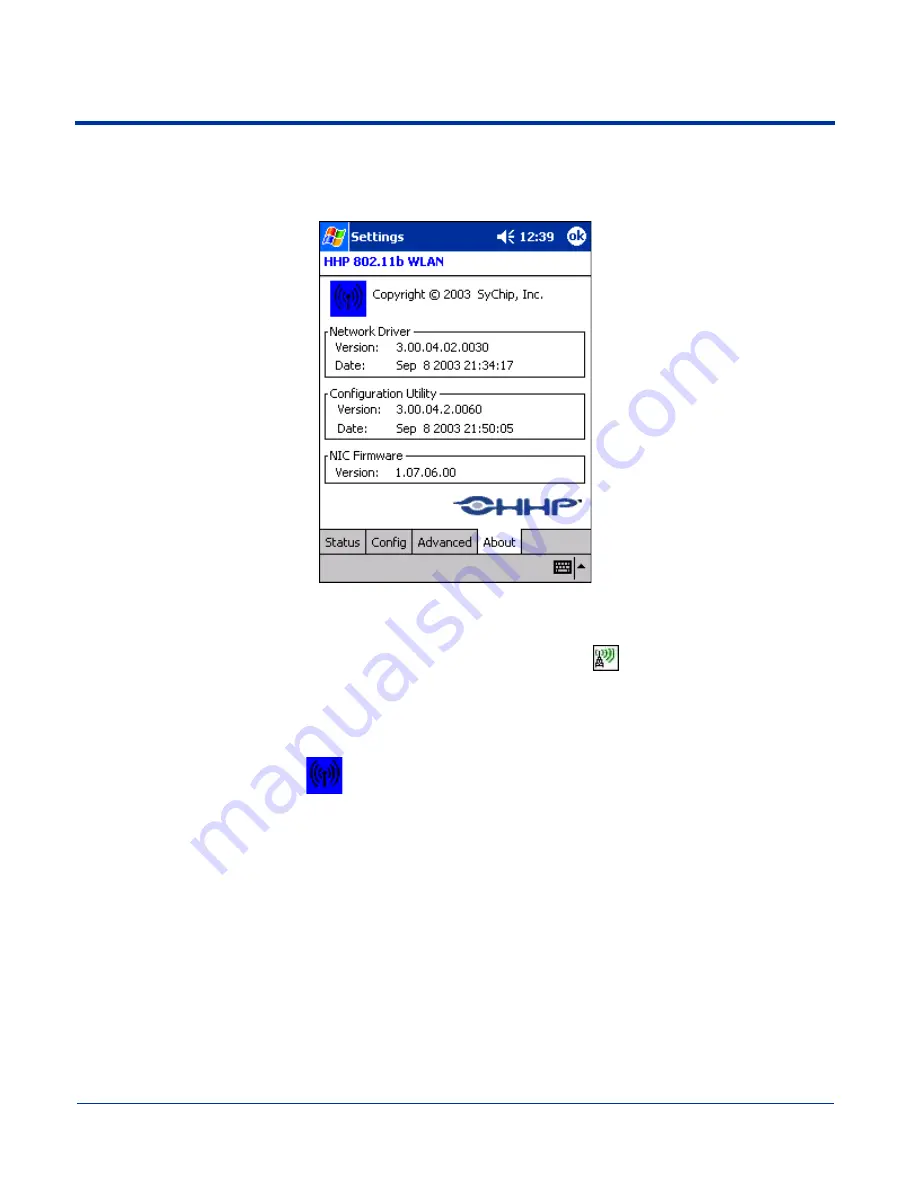
About Tab

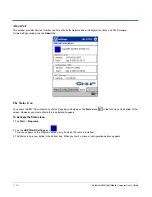
This window provides Version Number and time of build for Network Driver, Configuration Utility, and NIC Firmware. 

On the Settings window, tap the 

About

 tab. 

The Status Icon

You access the 801.11b configuration utility by tapping and holding on the 

Status

 icon 

 in the task tray at the bottom of the 

screen. However, you must activate this icon before it appears. 

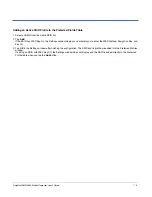
To Activate the Status Icon

1. Tap 

Start

 > 

Programs.

2. Tap the 

HHP


WLAN


Settings

 icon 

.

This icon appears on the Programs window only if an 802.11b radio is installed.

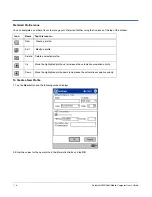
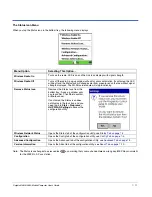
3. The Status icon is now active in the bottom tray. When you tap it, a menu of configuration options appears.

Summary of Contents for Dolphin 9550

Page 1: ...User s Guide Dolphin 9500 9550 Mobile Computer Windows Powered Pocket PC 2002...

Page 2: ...3 9 15 and 9 17 9 22 with permission from INTRINSYC Software Inc Other product names mentioned in this manual may be trademarks or registered trademarks of their respective companies and are hereby ac...

Page 3: ...Other Electrically Powered Devices 1 6 Microwaves 1 6 Care and Cleaning of the Dolphin 9500 9550 1 6 Chapter 2 Getting Started Overview 2 1 Dolphin 9500 9550 Models and Options 2 2 Image Engine Optio...

Page 4: ...enus 4 4 Selecting Programs 4 5 Imager 4 6 Decoding 4 6 Capturing Images 4 8 Using the Keyboards 4 9 35 Key Numeric Alpha Keyboard 4 12 43 Key Alpha Numeric Keyboard 4 13 56 Key Full Alpha Numeric Key...

Page 5: ...ing 5 26 Network Card Connections 5 27 Network Adapters 5 28 Editing Properties 5 29 Chapter 6 Communications Overview 6 1 Help on Connecting 6 1 Installing Additional Software 6 1 Using ActiveSync 6...

Page 6: ...Setting Menus 7 22 Port Setting Parameters 7 24 Certificate Management 7 25 Chapter 8 Wireless PAN Communications with Bluetooth Overview 8 1 Powering Up the Bluetooth Radio Driver 8 1 Setting Up You...

Page 7: ...t Internet Explorer 9 17 Accessing Pocket Internet Explorer 9 17 Browse the Internet on Your Terminal 9 17 The Mobile Favorites Folder 9 18 Creating and Synchronizing Mobile Favorites 9 18 Using Avant...

Page 8: ...el 11 3 Powering the Dolphin Terminal 11 4 Charging the Dolphin Terminal 11 4 Installing the Dolphin Mobile Base 11 5 Mounting the Mobile Base 11 5 Powering the Dolphin Mobile Base 11 6 Setting the Mo...

Page 9: ...6 Chapter 14 Warranty Support and Service Limited Warranty 14 1 How to Extend Your Warranty 14 1 Return Information 14 2 Calling for an RMA Number 14 2 Service and Repair Locations 14 2 Shipping 14 2...

Page 10: ...x Dolphin 9500 9550 Mobile Computer User s Guide...

Page 11: ...Intel X Scale 400MHz RISC microprocessor for fast processing A Microsoft Windows for Pocket PC platform that is easily programmable with standard programming tools 64 MB RAM and 32 MB Flash memory co...

Page 12: ...n 9550 Dolphin 9500 Dolphin 9550 Safety labels appear here Safety information is embedded in the plastic here Safety labels appear here THESE DRAWINGS AND SPECIFICATIONS ARE THE PROPERTY AND CONFIDENT...

Page 13: ...Directive and the 73 23 EEC Low Voltage Directive For further information please contact Hand Held Products Inc Nijverheidsweg 9 5627 BT Eindhoven The Netherlands HHP shall not be liable for use of ou...

Page 14: ...ITTEN PERMISSION c Canada 1693B9503 FCC ID HD5950003 0681 N10410 Hand Held Products Inc www hhp com THESE DRAWINGS AND SPECIFICATIONS ARE THE PROPERTY AND CONFIDENTIAL MATERIAL OF HAND HELD PRODUCTS I...

Page 15: ...nt into an outlet on a circuit different from that to which the receiver is connected Consult the dealer or an experienced radio TV technician for help If necessary the user should consult the dealer...

Page 16: ...m over a frequency range of 26 to 1000MHz The maximum allowable field strength emitted by the Dolphin is 0 3V m according to Subpart B of Part 1 of the FCC rules Therefore the Dolphin RF has no effect...

Page 17: ...et most any enterprise mobile data collection requirement There are three keyboard options and a 240 x 320 pixel backlit 1 4 VGA display available in color or monochrome The Dolphin 9500 9550 platform...

Page 18: ...h the added convenience of an integrated pistol grip style form factor for high volume scanning applications Dolphin 9500 9550 WLAN 802 11b These terminals integrate the basic functionality of the Bat...

Page 19: ...e Mobile Base its main battery pack charges in less that four hours The serial connector supports RS 232 communication and power out to peripheral devices such as hand held scanners For more informati...

Page 20: ...erminal and charge the battery pack This accessory converts the 12 Volts out of the vehicle to the 9 Volts required by the terminal Protective Enclosure This enclosure wraps around the terminal to pro...

Page 21: ...aved 2 or 5 Matrix 2 of 5 Plessey PosiCode RSS Straight 2 of 5 IATA Straight 2 of 5 Industrial Telepen Trioptic Code UCC EAN 128 UPC and UPC A 2D Symbologies Aztec Code 16K Composite Data Matrix MaxiC...

Page 22: ...hin terminal or battery 1 Unpack the Li ion battery pack Hold the terminal with the front panel keyboard facing down On the Dolphin 9500 detach the handstrap 2 Take the battery and insert the end with...

Page 23: ...til the Dock LED lights solid green to indicate that the terminal is properly seated 3 The battery pack begins charging Other Charging Options When the Li ion battery is installed in the terminal conn...

Page 24: ...he screen by tapping the target five times Use the stylus provided by HHP Alignment should always be performed with a stylus designed for touch screen applications The small point is required for accu...

Page 25: ...ed at any major computer retail store or directly from HHP Inc Please contact HHP directly for part numbers and pricing Step 7 Set the Time Zone After screen alignment is completed the Location screen...

Page 26: ...e after every hard reset of the terminal It is a good idea to set the time and date now before you begin using the device To set the time and date go to Start Settings Systems tab Clock to set the dat...

Page 27: ...scan LED lights red and a green aimer beam projects out from the scanner 3 When a good scan is obtained the decode LED lights solid green and the terminal beeps The bar code readout appears on the sc...

Page 28: ...nd the Escape ESC keys for approximately five seconds 2 The decode and scan LEDs light for approximately three seconds 3 The terminal re initializes see page 2 8 for details Suspend Mode To put the Do...

Page 29: ...ection devices like the Dolphin 9500 9550 terminal Memory Main Board IPSM The standard memory configuration is 64 MB RAM and 32 MB non volatile Flash Secure Digital Card SD Dolphin 9500 9550 terminals...

Page 30: ...ture a 3 5 liquid crystal display LCD touch screen and is covered with an industrial protective lens The video graphic array VGA resolution is 1 4 240 X 320 pixel The touch screen is activated with th...

Page 31: ...sor through software programs The up and down arrows are programmed to perform specific functions when pressed in combination with the Blue and Red modifier keys Keyboard The Dolphin 9500 9550 series...

Page 32: ...ymbologies With the latest CMOS based technology the engine works like a digital camera and enables digital image capture signature capture and reading of OCR characters Digital images taken with the...

Page 33: ...ed or removed Microphone Dolphin 9500 9550 terminals feature an integrated microphone that provides audio input to the terminal Battery Battery Well The Battery Well is a recessed area on the back of...

Page 34: ...enable the Dolphin 9550 to rest in a nose down position on a flat surface See Rubber Bumpers on page 3 7 Image Engine Window This is the front view of the window For more information see Image Engine...

Page 35: ...at you can attach to the handle in this location an Rubber Bumpers The following graphic shows the Dolphin 9550 in a nose down position resting on its rubber bumpers Stylus The stylus is used to opera...

Page 36: ...oor seals the memory interface from moisture and particle intrusion and provides secure storage for read write data However the user can open the access door manually to gain access to the SD You can...

Page 37: ...with Dolphin 9500 series peripherals via RS 232 or USB For RS 232 the maximum communication speed is 115 Kbps with a seven baud rate setting For USB the communication speed is 12 Mbps If the periphera...

Page 38: ...he battery pack in the auxiliary battery well of the HomeBase see page 10 7 Charging Time The Li ion battery pack requires four hours to charge completely Internal Backup Battery Located inside the te...

Page 39: ...tor the battery is adequately charged If the main battery is low and the terminal is in suspend mode pressing the SCAN or Power button does not wake the Dolphin 9500 9550 terminal you must replace the...

Page 40: ...keep batteries stored in a charger that is connected to a power source Guidelines for Battery Use and Disposal The following are general guidelines for the safe use and disposal of batteries Use only...

Page 41: ...ite Codes See Bar Code Symbologies Supported on page 2 5 OCR Fonts See Bar Code Symbologies Supported on page 2 5 Three Keyboard Options 35 key numeric shifted alpha 43 key alpha shifted numeric and 5...

Page 42: ...ther and adjustable removable hand strap Peripherals Accessories Dolphin HomeBase Charging communications cradle with auxiliary battery well Data transfer via RS 232 serial or USB ports Dolphin Mobile...

Page 43: ...uch Screen HHP recommends using screen protectors to protect the touch screen especially when used with applications that require high volume interfacing with the touch screen Screen protectors help p...

Page 44: ...o display it by tapping Start and then Today On the Today screen you can see at a glance important information for the day Your day at a glance Tap to create a new item Tap to switch to a program Tap...

Page 45: ...s in programs The command bar includes menu names buttons and the Input Panel button To create a new item in the current program tap New To see the name of a button tap and hold the stylus on the butt...

Page 46: ...ct The actions in the pop up menus vary from program to program To access a pop up menu tap and hold the stylus on the item name of the action you want to perform the action When the menu appears lift...

Page 47: ...program tap Start Programs then the program name Note Some programs have abbreviated labels for check boxes and drop down lists To see the full spelling of an abbreviated label tap and hold the stylus...

Page 48: ...7 To achieve the best read the aiming beam should be centered horizontally across the bar code ALD ALD provides fast reading of linear and stacked linear bar codes To achieve a positive read when rea...

Page 49: ...d closer to the code and larger when it is farther from the code Symbologies with smaller bars or elements mil size should be read closer to the unit Symbologies with larger bars or elements mil size...

Page 50: ...pression method used by the software application used to take images The average size of the image file is approximately 4 8K However the size of the image depends on the content of the image the more...

Page 51: ...r both right and left hand operation The silver background of both the keys and the overlay enhances the readability of each The overlay of all three keyboards are color coded to indicate the function...

Page 52: ...e characters press Red key SP and hold down the SP key Delete DEL This key appears on both the 35 and 56 keyboard The Delete key deletes the next character forward each time the key is pressed On the...

Page 53: ...mode and lowercase alphabet mode Use SFT toggle Caps Lock on and off by double tapping it or by pressing SFT the Red modifier key When Caps Lock is toggled on characters are uppercase when toggled of...

Page 54: ...s you to toggle between the numeric and alpha modes Numeric mode is when you type numbers with the number keys Alpha mode is when you type letters with the number keys The letters on the overlay above...

Page 55: ...toggle between the alpha and numeric modes alpha mode is when you type letters with the letter keys Numeric mode is when you type numbers with the letter keys The numbers on the overlay above specific...

Page 56: ...keyboard combinations for specific functions and special characters on each keyboard For charts of the key combinations associated with each keyboard layout see the Appendix A of the Dolphin 9500 9550...

Page 57: ...ot when you tap the screen You can adjust the contrast using the keyboard or the system settings Using the Keyboard Press and hold the Red Modifier key ESC to decrease the contrast Red Modifier key TA...

Page 58: ...50 Mobile Computer User s Guide Using the System Settings Tap Start Settings System tab Contrast The current settings are displayed Use the slider to adjust the contrast to the desired setting Tap OK...

Page 59: ...s of light to and from other IrDA compliant devices such as printers and PCs or to other Dolphin 9500 9550 terminals 802 11b Radio The Dolphin 9500 9550 may be equipped with a WiFi compliant interoper...

Page 60: ...e radio state It enables you to choose which radios on the terminal are powered up When powered up the radio is transmitting when powered down the radio is not transmitting Single Radio Configuration...

Page 61: ...s field displays error messages when a radio cannot be enabled 2 Select the radio in the Radio Modes list and tap Apply The radio drivers are powered down and powered up in the proper sequence For exa...

Page 62: ...anticipates the word you are typing or writing and displays it above the input panel When you tap the displayed word it is inserted into your text at the insertion point The more you use your Dolphin...

Page 63: ...stylus 1 Tap the arrow next to the Input Panel button and then Block Recognizer 2 Write a letter in the box When you write a letter it is converted to typed text that appears on the screen For specifi...

Page 64: ...ide Input Panel Options You can set input options by going to Start Settings Personal tab Input The following graphics are the tab windows where you can customize the input panel to your preferences I...

Page 65: ...ow to switch to writing mode To Select Writing If you want to edit or format writing you must select it first 1 Tap and hold the stylus next to the text you want to select until the insertion point ap...

Page 66: ...ed while writing cannot Note You may want to change the zoom level so that you can more easily work on or view your drawing Tap Tools and then a zoom level Selecting a Drawing To edit or format a draw...

Page 67: ...n alarm in Clock you ll be notified in any of the following ways A message box appears on the screen A sound which you can specify is played To choose reminder types and sounds tap Start Settings Pers...

Page 68: ...kly find information that is taking up storage space select Larger than 64 KB in Type You can also use the File Explorer to find files and organize these files into folders On the Start menu tap Progr...

Page 69: ...ersonal tab System settings are comprised of the following three tabs Personal tab Enables you to customize buttons input methods menus etc see Personal Tab on page 5 2 System tab Enables you to adjus...

Page 70: ...panel For details see Input Panel Options on page 4 22 Menus Customize what appears on the Start menu and to enable a pop up menu from the New button Owner Information Enter your contact information...

Page 71: ...ed you can either use File Explorer to move the program or ActiveSync on the desktop computer to create a shortcut to the program and place the shortcut in the Start Menu folder Note We recommend that...

Page 72: ...er Here you are performing the same basic process as on the terminal except that you are using the Explore Windows Explorer utility to cut and paste 1 Open ActiveSync Explore 2 Navigate to the program...

Page 73: ...ing About The About system setting displays specific information about what is loaded on the terminal It contains three tabs Version tab Displays the information about the software operating system an...

Page 74: ...ntments scheduled events and any function on a schedule runs off this setting You need to set the time zone and time after each hard reset see Setting the Time and Date on page 2 10 CPU Speed This sys...

Page 75: ...d want to connect the terminal to additional Bluetooth devices To Disable the IrDA Port 1 Tap Disable IrDA ports 2 You receive a message stating that you need to reset the terminal before the change t...

Page 76: ...total memory capacity of current RAM memory Storage The part of RAM memory used for storing programs and program data Program The part of RAM memory used to run programs Fields Under Storage and Memo...

Page 77: ...ms for example are stored in IPSM so that they are always installed at cold boot startup When IPSM is selected in the drop down list the Storage Card tab displays the IPSM memory capacity and usage st...

Page 78: ...ms Anytime you stop a running program it frees up RAM memory Be advised that when you stop a program here any unsaved data in that program is lost To free up memory without risking data loss return to...

Page 79: ...mode see Suspend Mode on page 2 12 Radio Manager The Radio Manager enables you to see which radios are powered up on the Dolphin terminal In this system setting you power up and power down radios loa...

Page 80: ...0 Mobile Computer User s Guide The Region tab displays an overview of the region selected in the drop down list at the top The terminal is loaded with a number of pre programmed regional settings Sele...

Page 81: ...s installed on the terminal Use this setting to troubleshoot when you receive messages that the device is out of memory The programs removed are removed from RAM memory Any program usually cab or dll...

Page 82: ...ram is removed 4 Verify that the program no longer appears in the list Memory The Remove Programs screen displays the total storage memory available It adjusts automatically when a program is removed...

Page 83: ...Dolphin 9500 9550 displays support ClearType font rendering ClearType is a Microsoft technology that dramatically increases the readability of text on LCD displays Select the Enable ClearType tap OK...

Page 84: ...network connections There are three main components Beam Enables you to verify and adjust the infrared settings of the IrDA port For details see Using Infrared on page 6 5 Connections Enables you to...

Page 85: ...ettings for each internet connection It leads you through a series of screens and tabs that enable you to enter both basic and advanced network and dial up information General tab This tab enables you...

Page 86: ...Make a New Connection screen appears 3 Complete the fields Enter a name for the connection in the first field My Connection is auto filled by default You can type over it with the SIP that appears or...

Page 87: ...here the new connection name and number appear in the list You can tap on it any time to edit the settings Advanced Settings When making a new connection see page 5 18 or editing an existing connectio...

Page 88: ...n preferences Data Bits Can be set between 4 and 8 Parity Can be set to None Odd Even Mark or Space Stop Bits Can be set to 1 1 5 or 2 Flow Control Can be set to Software Hardware or None Terminal set...

Page 89: ...r Internet Settings for more information see page 5 17 Modem tab The Modem tab for Work Settings functions the same way it does for Internet Settings for more information see To Configure Internet Set...

Page 90: ...ions have been established only New appears 2 Tap New to make a new connection 3 Enter a name for the connection and type the desired IP address Tap Advanced The system processes the information and t...

Page 91: ...k with a firewall In this case you would connect to the internet via a proxy server To Connect Via Proxy Server 1 Open Work Settings and tap the Proxy Server tab 2 Check the first box then check This...

Page 92: ...d to the Work Settings screen which now lists the new Proxy Server connection Deleting Connections To delete a connection at any time you need to navigate to it from the Connections tab On the Modem t...

Page 93: ...formation see Internet Settings on page 5 17 You also have the option of tapping the Proxy Settings tab to have this connection go through a proxy server For more information see Proxy Settings on pag...

Page 94: ...settings on the Connections tab see page 5 17 any time In either of the first two drop down lists Internet and Work select the desired setting Tap Connect and the terminal begins connecting to the ne...

Page 95: ...ide 5 27 Network Card Connections The third field on the Connections tab see page 5 17 enables you to select the connection setting of your network card You can have your network card use your interne...

Page 96: ...tab see page 5 17 tapping Network Adapters enables you to review the adapters installed on the terminal and the properties associated with each To see the IP addresses and Name Servers of a network a...

Page 97: ...ve any changes When you edit the properties of an existing adapter you must perform a soft reset see Soft Reset Warm Boot on page 2 12 so that new registry entries created by the changes can be read b...

Page 98: ...5 30 Dolphin 9500 9550 Mobile Computer User s Guide...

Page 99: ...l Installed Help Inbox or Connections For troubleshooting information go to the Pocket PC website at http www microsoft com windowsmobile products pocketpc Installing Additional Software In addition t...

Page 100: ...on your desktop computer insert the Microsoft Companion CD into the CD ROM drive of your desktop computer Click the yellow arrow then Start Here and follow the directions on your screen When communica...

Page 101: ...igned for the Pocket PC and your processor You can verify your processor by tapping Start Settings System tab About Version tab Make a note of the information in the Processor field 1 Download the pro...

Page 102: ...occurs after every hard reset place the program file in the Autoinstall folder My Pocket PC IPSM Autoinstall 8 Depending on the program you may need to open File Explorer on the terminal navigate to t...

Page 103: ...uipped with infrared This can include but is not limited to Pocket PC information such as Contacts and Tasks as well as software upgrades Verify That the IrDA Port is Enabled The IrDA port must be ena...

Page 104: ...ive data from other infrared devices To verify tap Start Settings Connections tab Beam The Beam Settings window should appear as follows IrDA Port Location on the Terminal The above graphics shows a D...

Page 105: ...15 Kbps Sending 1 Align the IrDA ports 2 Open the program where you created the item you want to send and locate the item in the list You can also beam files but not folders from File Explorer 3 Tap a...

Page 106: ...e Beam Settings are not set to receive or you ve aligned two IrDA ports and the terminal is still not receiving go to Start Programs Infrared Receive The terminal searches for the sending device If th...

Page 107: ...processor by tapping Start Settings System tab About Version tab Make a note of the information in the Processor field 1 Determine your device and processor type so that you know which version of the...

Page 108: ...6 10 Dolphin 9500 9550 Mobile Computer User s Guide...

Page 109: ...als Powering Up the 802 11b Radio Driver When the mobile computer is first initialized the radio driver for the 802 11b module is installed Before using the radio make sure that the 802 11b radio is p...

Page 110: ...escan Tap this button to start a rescan process to search for an AP with a stronger signal in the network Link Quality Displays the signal to noise ratio Strength Displays the signal strength of the r...

Page 111: ...enter another IP address to ping Size Bytes Displays the current bytes size 32 is the default You can select up to 8192 from the drop down list Timeout ms Displays the current timeout 500 is the defa...

Page 112: ...nity of the host It displays only those SSIDs that accept broadcast associations Each record displays information in the following six fields The screen may not display all the fields in the following...

Page 113: ...the Settings window displays and prompts you to enter the WEP Method Encryption Key and Key ID 3 Tap OK in the Settings window after finishing the configuration The SSID and its profile are added into...

Page 114: ...ofile 1 Tap the New button and the following screen displays 2 Enter the values for the new profile in the information fields and tap OK Icon Name Tap this icon to New Create a profile Edit Modify a p...

Page 115: ...ions in this drop down list determine what characters can be used to create the Encryption Key Select one of the following five Encryption Key Character sets differ depending on the selected WEP metho...

Page 116: ...be deleted either from the Preferred List or from the Preferred List and Registry To delete a profile select highlight a profile and tap the Delete button and the following screen displays From the po...

Page 117: ...ble Where Sync field consists of 56 bits Auto TX Preamble Automatically change between long and short preamble mode transmission based on the AP configurations This is the default Preamble Mode A Prea...

Page 118: ...the 801 11b configuration utility by tapping and holding on the Status icon in the task tray at the bottom of the screen However you must activate this icon before it appears To Activate the Status Ic...

Page 119: ...green to red on the top without signal strength displayed The WLAN card module will stop functioning Remove Status Icon Removes the Status Icon from the bottom tray A pop up window asks you to confir...

Page 120: ...eless card properly installed even if it isn t connected to a network If the card isn t in the computer the installation program can t make the proper program and protocol associations The appropriate...

Page 121: ...e password combination If a second set of credentials is required you need to know the exact user name and password These are typically case sensitive User name _______________________________________...

Page 122: ...____________________________________ Password ________________________________________ 5 What is the tunnel authentication protocol ____ CHAP Challenge Handshake Authentication Protocol ____ MS CHAP M...

Page 123: ...d for the tunnel authentication User name _______________________________________ Password ________________________________________ 5 What is the tunnel authentication protocol ____ MS CHAP v2 Microso...

Page 124: ...parameters If the EAP configuration doesn t match your network configuration you can t access the network 1 On the terminal open the client by going to Start Programs Meetinghouse AEGIS Client The Ma...

Page 125: ...tion or you may need to enter server related information that you ve already gathered on your worksheet for TLS TTLS and PEAP 7 When you ve entered the server information tap OK to save the configurat...

Page 126: ...if different users share the computer Third each port may need to have its default settings changed The Configuration screen has three tabs 1 User settings tab where you configure the authentication...

Page 127: ...cause it is invoked by the computer before a user is logged on which means that a password won t be provided Use certificate area This box is an option for TTLS and PEAP It causes the AEGIS Client to...

Page 128: ...ebug message to four error asterisks a time stamp and a message Logs fill memory quickly especially if the Debugging level is chosen Do not use the Debugging option for a significant length of time be...

Page 129: ...be used during authentication Allow intermediate certificates Selecting this option enables a number of unspecified certificates to be in the server certificate chain between the server certificate a...

Page 130: ...ld on a port on the main screen These commands allow the port to use 802 1X authentication change the port configuration and remove it from the port list The Port menu commands are Enable and Disable...

Page 131: ...stops 802 1X authentication Restart Same as a Stop followed by Start Configure Opens the Configuration screen displaying the User tab Install Protocol Selecting this option binds the 802 1X protocol...

Page 132: ...n the connecting state before restarting when there is no response Number of Start Attempts The number of times the Client restarts before giving up At that point the Client then defaults to the authe...

Page 133: ...e systems there may not be a certificate If that is the case you can use the section below as a primer on OS X certificate management Installing Certificates with CertAdd Pocket PC doesn t have a nati...

Page 134: ...7 26 Dolphin 9500 9550 Mobile Computer User s Guide...

Page 135: ...recommended for normal usage then this step is not necessary This step would be used to change the friendly name of your mobile computer 1 Tap the Bluetooth icon that appears in the task tray on the T...

Page 136: ...ge 5 7 1 Tap on the Bluetooth icon on the Today screen Select Advanced Features then My Bluetooth Device Note If you installed OBEX the menu also lists Transfer via Bluetooth 2 The My Bluetooth Device...

Page 137: ...by When prompted select the device type you seek 4 When the search is complete a screen reports the discovered Bluetooth devices Check the box next to any device you wish to save information about i e...

Page 138: ...us on the Bluetooth device you want to bond with In the pop up menu select Bond 3 Alternatively after selecting a device tap on the Bond icon Or tap on Device then select Bond 4 The Bluetooth Device B...

Page 139: ...ully bonded with the other device tap Finish View Device Properties Follow these steps to view the properties of an already discovered device 1 If not open launch the Bluetooth Devices folder Tap on t...

Page 140: ...e Complete these steps 1 Tap on Tools and select My Favorites 2 Tap on the tab for the type of device you would like to set a favorite for If needed use the arrow buttons to scroll and find the tab yo...

Page 141: ...Device From the Folder If you no longer plan to connect with it you can delete a device from the Bluetooth Devices folder 1 If not open launch the Bluetooth Devices folder 2 Tap and hold your stylus o...

Page 142: ...lane 1 The Bluetooth icon should appear in the task tray on the Today screen Tap on the icon 2 In the pop up menu select Turn Transmitter OFF 3 The Bluetooth Card radio transmitter shuts off The Bluet...

Page 143: ...ur mobile computer automatically tries to connect to your favorite computer b The Connect To screen appears reporting that it is trying to connect to Wireless ActiveSync c After a successful connectio...

Page 144: ...lso start the device search by tapping Find in the Bluetooth Devices screen b After the search is complete select the computer you wish to ActiveSync with and tap Select If the computer is not listed...

Page 145: ...tains no favorite access point a When you tap Bluetooth LAN Access a screen appears that allows you to choose which access point to connect to in your Bluetooth Devices folder Choose an access point f...

Page 146: ...files etc SCENARIO 3 Your Bluetooth Devices folder has no access points a When you tap Bluetooth LAN Access the mobile computer automatically begins to search for new Bluetooth devices Note You can al...

Page 147: ...Dolphin 9500 9550 Mobile Computer User s Guide 8 13 e After a successful connection is made the screen reports Connected f Now you are ready to access your LAN for Internet access files etc...

Page 148: ...ast two operations receive contact or file and enable file sharing are server oriented They involve accepting objects in an exchange initiated by another Bluetooth device Exchange Business Cards 1 Mak...

Page 149: ...ices Folder then it begins to search for Bluetooth devices nearby 5 Select the Bluetooth device you wish to exchange business cards with If the device is not listed tap Find 6 Your mobile computer beg...

Page 150: ...to send the contact s to If the desired device is not listed tap Find 6 Your mobile computer processes and send the contact s Send a File 1 Make sure the other Bluetooth device is set up to receive a...

Page 151: ...ces in the Bluetooth Devices Folder then it begins to search for Bluetooth devices nearby 4 Select the Bluetooth device you wish to send a file If the desired device is not listed tap Find 5 In the ne...

Page 152: ...ou are running the OBEX from Remote device refers to the Bluetooth device you are trying to transfer files with Prepare for File Transfer 1 Make sure the remote device has file sharing enabled It must...

Page 153: ...connection 6 After the devices successfully connect the Bluetooth File Explorer appears Half of the screen shows contents of the remote device while the other half shows contents of your device the lo...

Page 154: ...or Get from remote icon as applicable The inappropriate icon should be gray 3 A screen reports the status of the transfer 4 After the transfer a copy of each selected item should appear in the other d...

Page 155: ...then tap Delete remote item s or Delete local item s as applicable 3 Tap and hold your stylus an item in either the remote or local device that you wish to put in a new folder In the pop up menu sele...

Page 156: ...ed for the remote device Exit Bluetooth File Explorer To exit the Bluetooth File Explorer tap File Exit Receive Contact or File 1 Tap on the Bluetooth icon In the pop up menu tap Transfer via Bluetoot...

Page 157: ...creen appears Your mobile computer waits two minutes for the remote device to connect 3 After successfully connecting to the remote device the screen report Connected 4 If two minutes passes before yo...

Page 158: ...as being supported by the Bluetooth system Assign a Dialing Prefix If you have not already assigned a dialing prefix during the install process you can do so by following these steps 1 Go to Start Set...

Page 159: ...5 Your mobile computer connects to your phone and begins dialing The Dialer can dial a phone number containing any of the following non numeric characters space A B C D T P W The following string can...

Page 160: ...s 1 Tap on the Bluetooth task tray icon In the pop up menu select Get Connected 2 Follow the Bluetooth Get Connected Wizard In the second screen use the drop down list to select your Bluetooth phone T...

Page 161: ...if you want to bond select 2 Add to paired devices Do not tap ACCEPT 8 Tap Finish After successfully connecting the phone appears in the Bluetooth Devices folder On the Today screen the Bluetooth ico...

Page 162: ...ugh each screen but do not complete the described procedures until you exit the wizard Bonding with your phone This must be completed to establish the Bluetooth connection and involves dial up network...

Page 163: ...network or ISP 1 Go to Start Settings Connections tab Connections In the top field select Internet Settings and tap Modify Then tap New 2 On the Make a New Connection screen enter a name for the dial...

Page 164: ...tap Advanced see Advanced Settings on page 5 19 7 ONLY FOR MOTOROLA TIMEPORT 270C OR NOKIA 3650 6310 7650 8910 8910i a After you tap Connect for the first time the phone displays a message asking if...

Page 165: ...e right tab to access the Paired devices list Highlight your mobile computer then press OPTIONS Scroll to Set as authorized then press SELECT In the confirmation screen press YES Automatic Connections...

Page 166: ...8 32 Dolphin 9500 9550 Mobile Computer User s Guide...

Page 167: ...u can check your appointments in one of several views Agenda Day Week Month and Year and easily switch views by using the View menu Note You can customize the Calendar display such as changing the fir...

Page 168: ...a recording For more information on creating notes refer to Notes on page 9 10 7 When finished tap OK to return to the calendar Note If you select Remind me in an appointment you will be reminded acc...

Page 169: ...dicate how you want meeting requests sent by tapping Tools and then Options If you send and receive e mail messages through ActiveSync select ActiveSync To Schedule a Meeting 1 Create an appointment 2...

Page 170: ...the road Note To change the way information is displayed in the list tap Tools Options Tap and enter part of a name to quickly find it in the list Tap to display or edit the contact details Tap and h...

Page 171: ...st enter a contact name in the box under the navigation bar To show all contacts again clear text from the box or tap the button to the right of the box In the contact list tap the category list label...

Page 172: ...Guide Using the Summary Screen When you tap a contact in the contact list a summary screen is displayed To change the contact information tap Edit View contact details Tap to view notes Tap to change...

Page 173: ...nge the way information is displayed in the list tap Tools Options Tap to create a new task Select the sort order of the list Indicates high priority Select the category of tasks you want displayed in...

Page 174: ...the list In the task list you can display tasks by category 5 To add notes tap the Notes tab You can enter text draw or create a recording For more information on creating notes refer to Notes on pag...

Page 175: ...e 9 9 Using the Summary Screen When you tap a task in the task list a summary screen is displayed To change the task tap Edit View task details View notes Tap to show and hide additional summary infor...

Page 176: ...ding in a note If a note is open when you create the recording it will be included in the note as an icon If the note list is displayed it will be created as a stand alone recording Tap to open a note...

Page 177: ...more information about using the input panel writing and drawing on the screen and creating recordings see Using the Dolphin 9500 9550 Mobile Computer on page 4 1 Tap to return to the note list the n...

Page 178: ...ote You can also synchronize e mail messages with your desktop computer from a remote location For more information see Chapter 7 Connecting Directly to an E mail Server In addition to synchronizing e...

Page 179: ...efault the most recently received messages are displayed first in the list Select the sort order for messages Select the service and folder you want to display Tap to connect to the selected service T...

Page 180: ...hold the message you want to retrieve On the pop up menu tap Mark for Download The icons in the Inbox message list give you visual indications of message status You specify your downloading preference...

Page 181: ...ived tap Edit Options and select Request SMS text message delivery notification before sending the message Managing E mail Messages and Folders Messages are displayed in one of five folders for each s...

Page 182: ...the messages while away from your desktop computer If you use SMS messages are stored in the Inbox folder If you use POP3 and you move e mail messages to a folder you created the link is broken betwee...

Page 183: ...to the Internet through an ISP or a network connection and browse the Web Browse the Internet on Your Terminal You must set up a connection to your ISP or corporate network using Connections before b...

Page 184: ...can view pages while you are disconnected from your ISP and desktop computer Use the Internet Explorer plug in installed with ActiveSync to create mobile favorites 1 On your desktop computer open Int...

Page 185: ...ee ActiveSync Help Limit the number of downloaded linked pages In Internet Explorer on the desktop computer right click the mobile favorite you want to change and then Properties On the Download tab s...

Page 186: ...nize the terminal with your desktop computer and then tap the My Channels button to complete the AvantGo setup When synchronization is complete tap the AvantGo Channels link in your list of favorites...

Page 187: ...box that template appears with appropriate text and formatting already provided You can open only one document at a time when you open a second document you ll be asked to save the first You can save...

Page 188: ...typed text see Using the Keyboards on page 4 9 To format existing text and to edit text first select the text You can select text as you do in a Word document using your stylus instead of the mouse to...

Page 189: ...page 4 1 Writing on the Screen in Pocket Word If you cross three ruled lines in a single stylus stroke the writing becomes a drawing and can be edited and manipulated as described in the following sec...

Page 190: ...stroke within or touching the drawing box becomes part of the drawing For more information on drawing and selecting drawings see Using the Dolphin 9500 9550 Mobile Computer on page 4 1 For more infor...

Page 191: ...ing To display the toolbar tap View Toolbar If your workbook contains sensitive information you can protect it with a password To do so open the workbook tap Edit and then Password Every time you open...

Page 192: ...9 26 Dolphin 9500 9550 Mobile Computer User s Guide...

Page 193: ...full speed USB port the data transmission rate goes up to 12 Mbps HomeBases cannot be physically connected to each other sometimes referred to as daisy chained but can be networked together via a ser...

Page 194: ...letely charges a battery pack in less than four hours Auxiliary Battery Well See Auxiliary Battery Well on page 10 4 DOCK LED Turns solid green when the Dolphin terminal is properly seated in the Dolp...

Page 195: ...e host device The color of this LED differs if the HomeBase is using the serial or USB port connection If using the serial port If using the USB port This color means Red Serial data is being sent fro...

Page 196: ...a peripheral device such as a desktop computer or printer When the Dolphin 9500 9550 is seated in the terminal well it is connected to the peripheral device via the HomeBase The USB port on the HomeB...

Page 197: ...oltage accordingly Only the power adapter cable from HHP converts the voltage appropriately HHP recommends that you leave the Dolphin HomeBase connected to its power source at all times so that it is...

Page 198: ...ase Serial Connector The following diagram displays the pin diagram of the serial connector of the HomeBase Note Signals referenced are for a DTE device The HomeBase is at a right angle to the printed...

Page 199: ...6 1 Connect the HomeBase to the power supply provided by HHP 2 Slide the terminal into the terminal well until the Dock LED lights green to indicate that the terminal is properly seated 3 The battery...

Page 200: ...he HHP power cable and HHP power adapter cable For RS 232 communications a Serial cable For USB communications a USB cable Setting up the HomeBase for RS 232 Communications Connecting the Cables Conne...

Page 201: ...ect the PC tab 3 Check the Enable synchronization box and select the desired option from the pull down list 115200 Default is recommended for an RS 232 connection 4 Tap OK 5 Place the Dolphin in the c...

Page 202: ...Required Equipment HomeBase with power supply USB Cable ActiveSync v3 7 or above Windows 98 second edition Windows Me Windows 2000 or Windows XP computer Note The HomeBase does not support Windows NT...

Page 203: ...ection from the drop down list 4 Tap OK 5 Place the Dolphin in the cradle The Dolphin 9500 9550 attempts to start an ActiveSync connection with the desktop computer automatically Setting up the Deskto...

Page 204: ...off the terminal automatically powers on If the terminal does not power on verify that the HHP power supply is properly connected to the cradle and plugged into a functioning outlet The Dolphin 9500 9...

Page 205: ...the future Desk Mounting Dolphin charging communication cradles have a DIN rail 7 5 X 35 mm slot on the bottom to allow for secure desk attachment of the unit if desired To mount the HomeBase you slid...

Page 206: ...cess to the power and communications ports For more details on both ports see Rear Panel on page 10 4 Secure screws to the bottom panel by sliding them into the available slots Fasten the screws to se...

Page 207: ...battery pack in less than four hours The Mobile Base also provides power to the intelligent battery charging system in all Dolphin terminals that senses when a full charge has been achieved and switc...

Page 208: ...pack Mounting Brackets Use these to mount the Mobile Base to a fixed location DOCK LED Illuminates solid green when the Dolphin terminal is properly seated in the terminal well COMM LED Indicates the...

Page 209: ...e appropriate cable comes with the kit you ordered The 12 VDC cable can be used with a cigarette lighter outlet The 24 VDC pigtail cable can be used to hard wire into the vehicle power bus Verify that...

Page 210: ...Mobile Base supplies charging power to the Dolphin terminal so that the terminal can monitor the charging of its battery pack This charging method protects the battery from being damaged by overchargi...

Page 211: ...he turnscrew 2 Insert the ball joint of the mounting bracket to the back of the bracket 3 Insert the ball joint on the back of the Mobile Base into the other side of the bracket 4 Tighten the turnscre...

Page 212: ...bile Base Connectors The power and RS 232 connectors are located on the bottom panel For more information see Bottom Panel on page 11 3 Brackets Bracket The bracket contains the turnscrew and two slot...

Page 213: ...cable depends on whether the other device is set up as a Data Communications Equipment DCE or Data Terminal Equipment DTE device The Mobile Base Communication Port is configured as a DCE device To co...

Page 214: ...circuit board PCB The ninth pin sends 500mA at 5V power out This can power a peripheral device such as a mobile printer as long as that peripheral device can accept 500mA at 5V Configuring the Dolphin...

Page 215: ...9 4 Select the appropriate baud rate for connecting to the RS 232 Host Device 11520 is the default 5 Tap OK and close the ActiveSync window on the Dolphin 9500 9550 terminal 6 Place the Dolphin in th...

Page 216: ...11 10 Dolphin 9500 9550 Mobile Computer User s Guide...

Page 217: ...ng process CC CV that is recommended for Li Ion batteries The process monitors changes in temperature current and voltage Convenient Storage Intelligent battery charging makes the Dolphin ChargeBase a...

Page 218: ...displays a Dock LED on the front that lights solid green when a terminal is properly seated which means that the terminal and the base are connected Charge LEDs Each terminal well displays a Charge L...

Page 219: ...o the circuitry of the Dolphin ChargeBase 1 Be sure the power switch on the power adapter is in the OFF position 2 Plug the power cord into the power adapter 3 Plug the power connector cable into the...

Page 220: ...the Dock LED lights solid green 3 Charging begins immediately Removing To remove a terminal grasp it firmly in your hand and lift it up and out of the terminal well The LEDs for the terminal well tur...

Page 221: ...ed into all Dolphin terminals that prevents overcharging This means that Dolphin terminals may be stored in the ChargeBase indefinitely without damage to the terminals battery packs or the ChargeBase...

Page 222: ...ust allow users easy access to the power connector The ChargeBase should be oriented so that users can easily read the labels Bottom Panel The bottom panel of the Dolphin 9500 9550 ChargeBase offers t...

Page 223: ...Dolphin 9500 9550 Mobile Computer User s Guide 12 7 2 Turn the ChargeBase and DIN Rail right side up 3 Secure the DIN Rail to a stable flat horizontal surface...

Page 224: ...ack to accommodate the connector cables The bottom panel of the ChargeBase contains rubber feet that hold it steady on a flat surface Those rubber feet need to be removed prior to applying the mountin...

Page 225: ...Dolphin 9500 9550 Mobile Computer User s Guide 12 9 3 Using the nuts and bolts secure the mounting brackets to the bottom panel 4 Secure the mounting brackets to an appropriate horizontal surface...

Page 226: ...12 10 Dolphin 9500 9550 Mobile Computer User s Guide...

Page 227: ...monitors changes in temperature current and voltage The charger also resets and calibrates battery pack data to accurately show battery status on the Dolphin display Use only Dolphin 9500 series perip...

Page 228: ...ress this button to start a battery analyze cycle For more information see Using the Battery Analyzer on page 13 4 Status LEDs A status LED is located above each of the four battery slots The color of...

Page 229: ...e battery has been properly inserted Removing To remove a battery pack push the locking tab down and pull the battery out from the charging slot with a hinging motion Storing Batteries Recommendations...

Page 230: ...the charge capacity of Li ion batteries over time The LEDs in this slot provides a readout of the battery s capacity after a complete discharge and full charge They tell you the maximum charge level t...

Page 231: ...sy access to power switch and power connector the QuadCharger should be oriented so that users can easily insert and remove battery packs and read the labels especially for the Battery Analyzer Mounti...

Page 232: ...ke sure the POWER switch is ON and the battery pack is properly seated The Status LED lights red during charging Try to charge the battery in one of the other charging slots If the red Status LED come...

Page 233: ...AMAGES AND IN NO EVENT SHALL ANY LIABILITY OF HHP ARISING IN CONNECTION WITH ANY PRODUCT SOLD HEREUNDER WHETHER SUCH LIABILITY ARISES FROM A CLAIM BASED ON CONTRACT WARRANTY TORT OR OTHERWISE EXCEED T...

Page 234: ...rmation Product type and serial number Brief description of problem Dated proof of purchase If your equipment is still covered under the initial end user s product warranty please notify the Product S...

Page 235: ...2 4263 Option 4 8 a m to 6 p m EST Fax number 315 685 4960 E mail support HHP com Europe Middle East and Africa Telephone European Ofc 31 0 40 29 01 600 U K Ofc 44 1925 240055 E mail euro_support HHP...

Page 236: ...14 4 Dolphin 9500 9550 Mobile Computer User s Guide...

Page 237: ...nning of the previous word CTRL DOWN ARROW Move the insertion point to the beginning of the next paragraph CTRL UP ARROW Move the insertion point to the beginning of the previous paragraph SHIFT with...

Page 238: ...Characters The following table displays the special functions performed and characters inserted using the blue key Key Combination Function Special Character Blue key D minus Blue key H _ underscore B...

Page 239: ...that are not defined on the 43 key version of the Dolphin 9500 9550 keyboard Key Combination Function Special Character Red key ESC Lightens Contrast Red key TAB Darkens Contrast Red key SFT Toggles o...

Page 240: ...mputer User s Guide Key Combinations Using Blue Sft Keys Miscellaneous Key Combinations Key Key Combinations Function Special Characters SFT Blue T SFT Blue X Key Key Combinations Function Special Cha...

Page 241: ...Computer User s Guide A 5 35 Key Numeric Alpha Keyboard Blue Key Functions and Characters Key Combination Function Special Character Blue key Blue key Blue key F1 Blue key F2 Blue key F3 Blue key F4...

Page 242: ...ned on the 35 key version of the Dolphin keyboard Key Combinations Using Alpha SFT Keys ALT Key Combinations Key Key Combination Function Special Character ALPHA SFT 1 ALPHA SFT 2 ALPHA SFT 3 ALPHA SF...

Page 243: ...Functions and Characters Key Combination Function Special Character Blue key Blue key Blue key A Blue key B Blue key E _ Blue key F Key Combination Function Special Character Red key ESC Lightens Cont...

Page 244: ...Red key F F6 Red key G F7 Red key H F8 Red key I F9 Red key J F10 Red key K F11 Red key L F12 Red key M F13 Red key N F14 Red key O F15 Red key P F16 Red key Q F17 Red key R F18 Red key S F19 Red key...

Page 245: ...ial characters that are not defined on the 56 key version of the Dolphin keyboard SFT Key Combinations ALT Key Combinations Key Combination Function Special Character SFT 1 SFT 2 SFT 3 SFT 4 SFT 5 SFT...

Page 246: ...ule If there is no Bluetooth hardware installed on the terminal this com port is unassigned Com Port 3 Raw Infrared Com Port 4 Com Port 5 USB virtual serial port Com Port 6 IrDA if IrDA is enabled If...

Page 247: ......

Page 248: ...95 9550 UG Rev B...

Reviews: