53
A2-26
Adjustments and tool changes
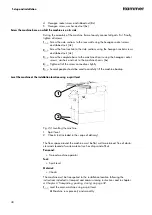
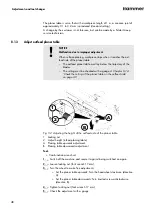
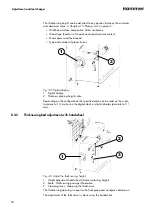
Close the planer tables and prepare the machine to operate
1
2
3
4
5
Fig. 38: Close planer tables
1 Planer table clamping lever (outfeed side)
2 Planer table clamping lever (infeed side)
3 Planer fence clamp
4 Tilt the bridge guard back in place
5 Connect extraction hose
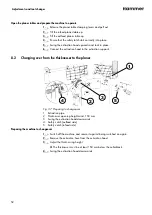
1.
Lift the safety catch.
2.
Close the outfeed planer table.
3.
Close the infeed planer table.
4.
Push the planing table clamping lever in and lock in place.
5.
Slide the planer fence under both of the clamping plates from the front.
6.
Slide the planer fence in until it hits the stop and clamp it into place using
both of the clamping levers.
7.
Release the planer guard clamp.
8.
Turn the bridge guard by 180° and clamp again.
9.
Connect the extraction hood to the extraction supports.
8.3
Adjust the thicknesser unit
8.3.1
Thicknesser clearance height - general information
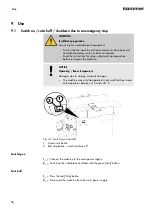
NOTICE
Damage due to restriction of the movement direction
Danger of wedging when moving the thicknesser downwards.
−
Ensure that the thicknessing table movement is not restricted.
−
Do not place any workpieces or other items under the thick-
nesser.
When adjusting the thicknessing infeed height (particularly when lowering),
ensure that no workpieces or other objects have been placed beneath the table
(wedging threat). To compensate for any play in the thread, adjust the thick-
nessing table moving it upwards.


