Change Recording Paper
The record paper must be replaced by a new piece of paper after a record period, and see the
steps of changing record paper below:
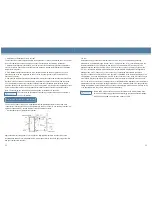
Press Key 3#, the scriber will move to the outer side;
After the scriber has moved away from the record paper totally, release the hold-down bolt and
change new record paper, and please align the starting time scale of record paper with the
reference line of panel carefully;
The adjustment modes of temperature measurement tap position and record period.
After normal power-on of machine, press and hold Key 3# for at least about 5s, when a “click” is
heard, the pointer of recorder stops walking, which means the recorder switches to the set mode;
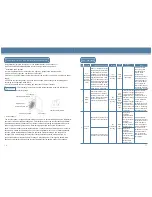
Press Key 1# to switch over temperature measurement tap position and the color of indicator
light shown in following figure will change with each press. Different colors represent different tap
positions, and the corresponding of color and tap position is as follows:
Green: -40°C~+30°C (applicable to this product and must be selected)
Yellow: -115°C +50°C
Red: -200°C
~
+0°C
Note: According to aforementioned temperature tap position, before the temperature reaches the
record scope, the recorder won’t work.
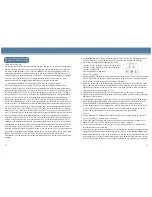
Press Key 2# to select record period. There are two kinds of record period in total to choose and
they should be distinguished according to the sound made by machine:
The record period is 24h: rapid, short buzzing made by machine;
The record period is 7 days: Continuous short buzzing made by machine: (recommended period
and saving paper)
Adjust tap position and period in place and press Key 3# to exit setup.
Paper calibration
After power-on, tap position and period adjustment, for the accuracy of test, the setting of tap
position and period will take effect after paper calibration on equipment. If tap position and period
are not adjusted after power-on, 5s later, the machine will enter paper calibration mode
automatically and the paper calibration mode is as follow:
After pressing 3#, the scriber will move to the mark position of -40t firstly and stay here for 3s.
check whether pointer position and the scale of paper are matched at this time. If not, the pointer
can be adjusted finely by pressing 1# or 2#.
3s later, the scriber will: Move to the position of -20°C from that of -40°C. And stay here for 3s. At
this time, the pointer also can be adjusted finely according to aforementioned method;
Then the scriber will move from the position of -20
℃
to scale position of 0
℃
to be measured and
stay here for 3s, and the pointer position can also be adjusted finely;
3s later, the scriber will slide to appointed scale according to the present perceived temperature,
then the calibration ends.
After retightening hold-down bolt and pressing Key 3# again, the recorder will switch to the
process of paper calibration. Please refer to the explanation of last page to calibrate the
installation of paper;
After calibration, the temperature recorder will switch to normal record status.
Time and ID (serial no. of recorder) setting of recorder
Insert the storage card of recorder into the recorder, the indicator light of storage card flashes.
Press Key B, if the time and ID of storage card has been set, the recorder will update the time
and ID, and eliminate all internal records such as temperature and time record.
After operation is complete, the indicator light of storage card will be on constantly, otherwise the
light keep flashing status;
Data reading of recorder
Insert the storage card of recorder into the recorder, the indicator light of storage card begins to
flash;
Press Key A, if there is enough space in storage card, the data will be transferred into storage
card, and the indicator light will be on constantly after successful transfer. If the data fails to be
transferred, the indicator light of storage card will maintain flashing status.
Remove the storage card and connect it with computer to view data through equipped USB kit.
Calibration adjustment of recorder
Connect the temperature recorder to power supply and put temperature sensing probe in a stable
temperature environment (e.g. 0
℃
of ice water mixture), after the temperature recorder enters
temperature status, press and hold 1# or 2# (for about 5s), the recorder will enter temperature
calibration status after a “click” made by buzzer. Apply 1# and 2# to conduct lateral adjustment to
make the pointer align with the temperature scale on record paper, stop adjustment, press Key 3# to
confirm or for 5s, after a “click” made by buzzer, the temperature recorder will exit temperature
calibration status automatically and return to temperature record status.
The recorder saves data in storage card every 1h and can keep 2 weeks of
data at most. When the usable space is full, the new data will cover the earliest
hour of record.
After the storage card has read out data, the recorder will still save the collected
data. Only when ID or real time is reset, the data can be cleared.
The recorder has been calibrated before leaving factory. Please do not adjust
the recorder unless special circumstances.
When the refrigerator is not energized and discontinued, please be sure the
key of recorder is in the “0” end, avoid over discharge of the battery of recorder
to damage the battery.
23
22
Summary of Contents for HXC-158B
Page 2: ......


