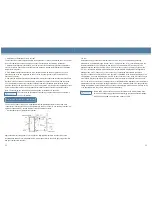
Maintenance and change of emergency battery of the recorder
When the green LED of recorder flashes, there are two checking methods:
1. Discharge the emergency battery. If the LED lamp is off and the recorder stops operation, it
indicates that there is problem on the recorder main power (220V/50HZ). Please check whether
there is power outage, short circuit or loose wiring. Install the emergency power when the recorder
operates normally after maintenance of main power. If LED lamp stops flashing, it indicates that the
emergency power is normal. If the LED lamp continues flashing, it indicates that power of
emergency battery is low. Emergency battery needs to be changed until the LED green lamp stops
flashing.
2. Discharge the emergency power. LED lamp of power supply continues flashing and recorder
operates normally, which indicates that the main power is normal and the power of emergency
battery is so low that it needs to be changed until LED green lamp works and stops flashing.
Change Recording Paper
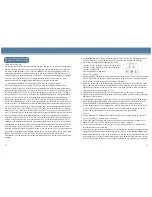
Change of recording paper shall be conducted in the following steps:
1. Find the compress button (3#) on the left corner and in front of recorder panel;
2. Press the button (3#) for about 1 second until the recording pen starts moving to the left side;
3. Loosen the middle bolt when the recording pen moves outside the recording paper. Replace the
old paper with a new one. Align the time line on paper with the time groove on the panel (there is a
small groove on left side of the panel);
4. Tighten the central bolt again. Press the button-3# for about 1 second, to reset the recording pen
and start recording temperature;
5. Examine that whether the recording pen operates well on the paper. If not, beam of the recording
pen can be adjusted to make the nib contact with recording paper. (Note: Do not damage the nib
and beam. If the adjustment is difficult, screw-driver can be used to discharge the beam. Install the
beam after curving the beam through slight force. Repeat the above operations);
6. Accurate recording of the recording pen shall be guaranteed. Calibrate accuracy of the recording
pen after exchange of paper. The method is as follow: Press button (3#) until recording pen leaves
the paper. And press button (3#) again until the pen returns to the paper. At this moment, the pen
will pause at the most external temperature scaling line of the recording paper (this scaling line does
not have to be marked with temperature value, but must be the one at the most external circle). If
the pen does not pause at the above position, you can use 1# or 2# arrow key to adjust the position
within 5 seconds, to align the nib to the scaling line at the most external circle. If position of the pen
is not adjusted well within 5 seconds, please repeat Step 6.
19
26
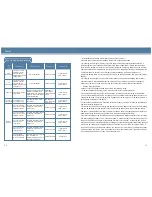
Alarm
or
safety
Phenomenon
Alarm indication
Buzzer alarm
High
temperature
Low
temperature
Power cut
The door is
open slightly
Sensor
abnormal
Alarm light flashes
Alarm light flashes
The temperature display area
displays the temperature in
refrigerator for 60s, then stops
displaying for 60s, and they will
conduct alternatively
After delay for 10min, alarm
light flashes
Pulse sound alarm
Within 48h of
power outage,
pulse sound alarm
occurs
After delay for
10min, pulse sound
alarm occurs
If the upper or lower
temperature sensor
perceives that the
refrigerator temperature
is higher than 6
℃
Refrigerator is in power
outage status
The outside door is
open slightly or fully
Open circuit or short
circuit occurs on upper
temperature sensor
If the upper or lower
temperature sensor
perceives that the
refrigerator temperature
is lower than 2
℃
Open circuit or short
circuit occurs on lower
temperature sensor
Open circuit or short
circuit occurs on
control sensor
Open circuit or short
circuit occurs on
defrosting sensor
The alarm light flashes and E1
is displayed in temperature
display area
The alarm light flashes and E2
is displayed in temperature
display area
The alarm light flashes and E3
is displayed in temperature
display area
The alarm light flashes and E4
is displayed in temperature
display area
The rechargeable
battery voltage is too
low or not connected.
The alarm light is on constantly.
“E5” is displayed in
temperature display area for 3
times and 3s each time.
Safe operation
Trigger remote
alarm contact
Uninfluenced
Pulse sound alarm
Pulse sound alarm
Pulse sound alarm
Pulse sound alarm
Pulse sound alarm
Pulse sound alarm
Trigger remote
alarm contact
Trigger remote
alarm contact
Trigger remote
alarm contact
Trigger remote
alarm contact
Trigger remote
alarm contact
Trigger remote
alarm contact
Trigger remote
alarm contact
HXC-158/158B/358/358B/608/608B
Alarm
Summary of Contents for HXC-158B
Page 2: ......


