G0532 2HP Dry Spray Booth
-15-
Note
:
Do not completely tighten hardware at
this time.
2.
Repeat
Step 1
to install the left skew board
on the opposite side of the exhaust fan.
3.
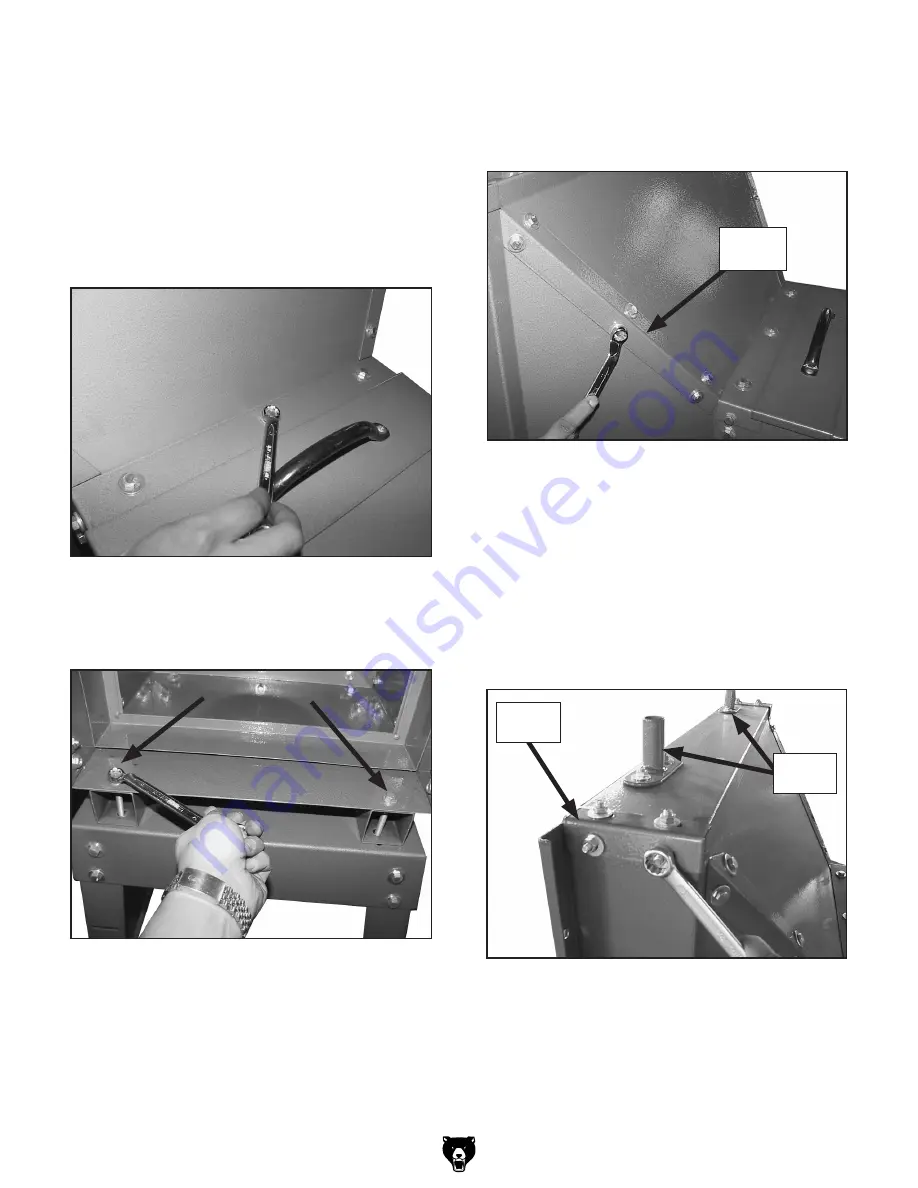
Fasten the upper skew board to the top of the
exhaust fan with three
5
⁄
16
"-18
x
3
⁄
4
" hex bolts,
six flat washers and three hex nuts, as shown
in
Figure 8
.
4.
Remove the two
5
⁄
16
"-18 x 3" hex bolts shown
in
Figure 9
.
Figure 8.
Installing upper skew board.
6.
Fasten a large brace over the seam of the
right and upper skew boards (
Figure 10
),
using six
1
⁄
4
"-20 x
1
⁄
2
" hex bolts, 12 flat wash-
ers and six hex nuts.
Figure 9.
Removing hex bolts.
Figure 11.
Installing small brace.
Figure 10.
Installing large brace over skew
board seams.
8.
Place a small brace over the seam of the
skew boards shown in
Figure 11
and fasten
with four
1
⁄
4
"-20 x
5
⁄
8
" flat head screws, four
flat washers, and four hex nuts.
Large
Brace
Small
Brace
7.
Fasten the three remaining large braces over
the rest of the skew board seams, repeating
Step 6
for each.
5.
Align the lower skew board mounting holes
with those on the exhaust fan and secure with
the bolts removed in
Step 4
, four flat wash-
ers, and two
hex nuts.
9.
Install the three remaining small braces over
the other corners, repeating
Step 8
.
10.
Install the curtain braces with four
1
⁄
4
"-20 x
5
⁄
8
"
flat head screws, flat washers, and hex nuts
as shown in
Figure 11
.
Curtain
Braces
Summary of Contents for G0532
Page 5: ...G0532 2HP Dry Spray Booth 3 Data Sheet ...
Page 6: ... 4 G0532 2HP Dry Spray Booth ...
Page 14: ... 12 G0532 2HP Dry Spray Booth Hardware Recognition Chart ...
Page 26: ... 24 G0532 2HP Dry Spray Booth 115V Wiring Diagram ...
Page 27: ...G0532 2HP Dry Spray Booth 25 230V Wiring Diagram ...
Page 28: ... 26 G0532 2HP Dry Spray Booth Parts Breakdown ...
Page 32: ... 30 G0532 2HP Dry Spray Booth ...
Page 35: ......


