8
❏
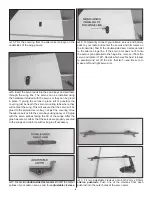
5. Trim the covering from the aileron servo bays on the
undersides of the wing panels.
❏
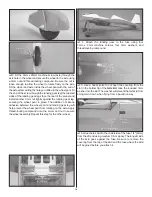
6. Insert the servo leads into the servo bays and pull them
through the wing ribs. The servos can be installed using
the hardware included with the servos or they can be glued
in place. If gluing the servos in place, slit or puncture the
covering just beneath the servo mounting tabs where they
will contact the wing. This will ensure that the servo will be
glued to the plywood servo bay, not just the covering. Glue
the aileron servos into the servo bays using epoxy or CA glue
with the servo splines facing the LE of the wings. After the
glue has cured, confi rm that the servos are properly secured
to the wings and reinforce with extra glue if necessary.
❏
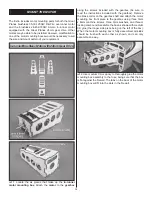
7. Locate two double-sided servo arms that fi t the output
splines of your aileron servos and four adjustable clevises.
❏
8. Temporarily connect your aileron servos and battery
pack to your radio and center the servos and trim levers on
the transmitter. Test fi t the double-sided servo arms parallel
to the aileron hinge line. If the servo arm does not fi t onto
the servo spline parallel to the hinge line, remove it from the
servo and rotate it 180°. Decide which way fi ts best (closest
to parallel) and cut off the arm that isn’t used. Be sure to
make a left and right servo arm.
❏
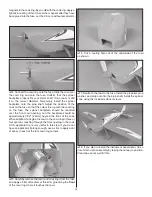
9. Fit two adjustable clevises onto both 2mm x 90mm
aileron pushrods. Push one of the clevises from each
pushrod into the outer holes of the servo arms.

