background image

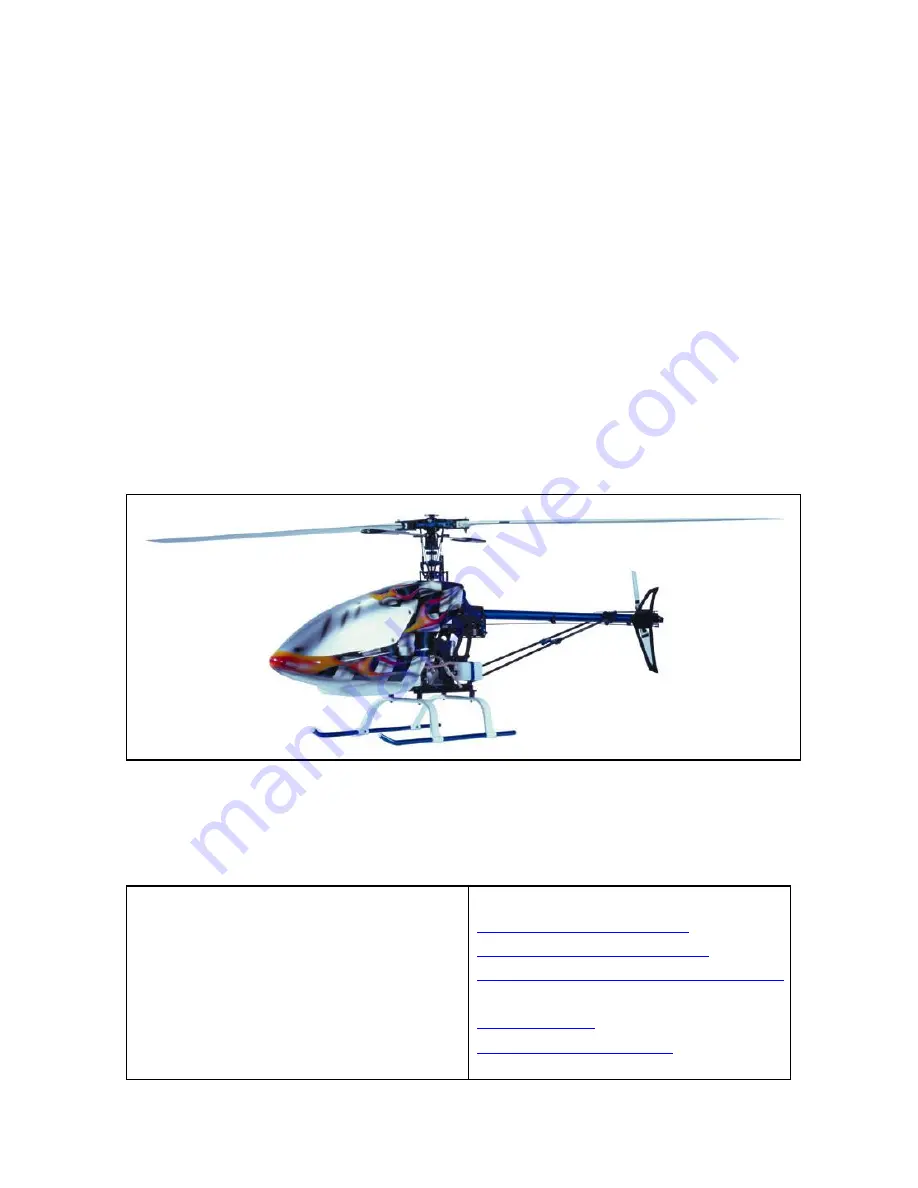
Quick 50 

Pro/Sport  

Assembly & Parts Listing 


Exclusively distributed by: 

Quickworldwide 

201 South 3

rd

. St. & 309 N. 

Coopersburg, PA 18036


Phone:

 (610)-282-4811 

Fax:

 (610)-282-4816 

Websites: 

http://www.hhiheli.com


http://www.quickheli.com


http://www.giantscaleplanes.com


E-mail: 

[email protected]


[email protected]

  (Tech. 

Support) 

Summary of Contents for Quick 50 Pro

Page 1: ...ively distributed by Quickworldwide 201 South 3rd St 309 N Coopersburg PA 18036 Phone 610 282 4811 Fax 610 282 4816 Websites http www hhiheli com http www quickheli com http www giantscaleplanes com E mail hhi fast net Stefan ewtech com Tech Support ...

Page 2: ...ision Radio controlled models such as this are capable of causing both property damage and or bodily harm to both the operator assembler and or spectator if not properly assembled and operated Hobbies Helis assumes no liability for damage that could occur from the assembly and or use misuse of this product AMA We strongly encourage all prospective and current R C aircraft pilots to join the Academ...

Page 3: ...arts EMS constitutes overall design simplicity and represents the future of helicopter technology 7 Heavy Duty Clutch System Based on the same design as our famous heavy duty clutch upgrade that fits most popular machines this clutch will give many years of problem free operation 8 Control Linkages The control linkages that are provided with the Quick Learner Kit are high quality 2 3mm stainless s...

Page 4: ...ll End Drivers HHI7050 Bubble Blade Balancer HHI7010 High Point Balancer DUB499 Piston Head Lock HHI7020 Composite Paddle Gauges HHI7000 HHI7320 6pc Nut Allen Driver Set Pitch Gauge HHI7001 Universal FlybarLock HHI7040 Ruler Hobby Knife Needle Nose Pliers Scissors ...

Page 5: ...ut others will work OS50SX All OS compatible 50 size engines will work with this helicopter Glues Thread Lockers Ca Glue GBG1 JB Weld JBW8265S Locktite PT40 Exhaust Systems HHI 30 Size Tuned Muffler HHI 50 Size Two piece Muffler Glow Plugs OS 8 Glow Plug OSMG2691 ...

Page 6: ...ck Straight TET4321 Fuel Tubing PRA7092 Triangle Joint TET4301 Radio Mounting Accessories Single Sided Foam Tape HHI2008 Receiver Hold Down Straps HHI55 4 99 2 Per Bag Colors Red White Purple Black Receiver Strong Box HHI2200 Spiral Wrap HHI2809 HHI2810 Wire Ties HHIWT01 ...

Page 7: ...ops HHI200 Available in many Colors See website or Call for Detail Quick 50Servo Arm Set 3mm Finishing Caps HHIM111 Available in Blue Silver Gold Purple 4mm Finishing Caps Available in Blue Silver Gold Purple Base Load Antenna HHI53 Available in Blue Gold Purple In 40 50 72mhz Throttle Extension OS50 60 ...

Page 8: ...our construction of the Quick 50 if there are any question or concerns regarding the assembly of the Quick 50 you can Call Hobbies Helis International 610 282 4811 or Email the any of the following techs Technical Support Personnel Stefan Stefan ewtech com ET ET ewtech com Jon Jon ewtech com Locktite Warning Very Important This is a general warning about the use of Locktite and it s importance Loc...

Page 9: ... Counter Gear Pulley 1 Pulley Gear Plate 1 Pulley Gear Lock Pin 1 Clutch Bell 1 Clutch Lining 1 Start Shaft Bearing Block 1 Start Shaft 1 Hex Start Coupler 1 Left Aileron 1 Right Aileron Lever 1 5 X 10 X 4 Flanged Bearing 2 M2 X 8 Shim Ball Screws 2 M3 X 8 Cap Head Bolts 24 M3 X 12 Cap Head Bolts 14 M3 Locknuts 12 Shim Balls 2 M3 X 3 Set Screws 2 M4 X 4 Set Screws 1 M3 X 4 Pivot Ball Studs 6 M3 X ...

Page 10: ...he flange of the bearing will be on the inside of the frames when they are complete Install 1 Inner Elevator Control Arm to 1 Elevator Control Shaft using 1 M3 3 Set Screw Install Elevator Control Shaft Assembly through the bearing on the Left frame half Install outer elevator control arm using 1 M3 3 Set Screw ...

Page 11: ...Pivot ball stud to the Inner Elevator control arm Install 2 Shim balls using 2 M2 6 Shim Ball Screws to the outer elevator Control Arm Install 1 Frame Support Bulk Head to Left upper Frame using 2 M3 8 Cap head bolts ...

Page 12: ...ng 3 M3 8 Cap Head Bolt Install 2 Main shaft bearing blocks to the left upper frames using 4 M3 8 Cap head bolts Install 1 Counter Gear to 1 Counter Gear shaft using 1 Counter Gear lock Pin and M4 E clip NOTE Make sure reduced portion of the shaft faces down ...

Page 13: ...ounter shaft assembly into 1 counter gear bearing block with bearing block flange facing up Install 1 pulley gear plate onto the counter gear shaft Assembly Install 1 pulley gear lock pin onto Counter gear shaft ...

Page 14: ...nd retain assembly with 1 M4 E clip Complete the tail transmission by inserting lower reduced portion of the shaft into the fully exposed side of the bearing block Install complete tail transmission onto left upper frames using 4 M3 8 cap head bolts ...

Page 15: ...lutch lining are JB Weld or 10 Min Epoxy Prepare the clutch bell by scuffing the interior with an x acto blade or sand paper Apply the adhesive thin and even and finish the installation by inserting and finishing the clutch lining Install the clutch bell assembly into 1 Clutch bell bearing block ...

Page 16: ... is installed and setscrew is tight Install complete clutch bell assembly onto left upper frame Install Rear Elevator Servo using 4 M3 12 Cap head bolts and 4 M3 Locknut Install the servo with the mounting flange to the inside of the frames and the spline towards the rear of the helicopter Note Be sure the use the rubber grommets that are provide by the servo manufacture ...

Page 17: ...e frames Note Be sure the use the rubber grommets that are provide by the servo manufacture Install Right front aileron servo using 4 M3 12 Cap head bolts and 4 M3 Locknuts The right front aileron servo is attached the servo hole closest to the front of the upper frames Note Be sure the use the rubber grommets that are provide by the servo manufacture Attach the right frame halve to the left frame...

Page 18: ...l complete left aileron lever to elevator control shaft using 1 M3 12 cap head bolt and 1 M3 5 3 Spacer Install 3 M3 4 Pivot ball studs to 1 right aileron control lever Install complete right Aileron control lever to the elevator control shaft using 1 M3 12 cap head bolt ...

Page 19: ...Install complete right aileron lever to elevator control shaft using 1 M3 12 cap head bolt ...

Page 20: ...member 1 32mm Cross Member 3 Fuel Tank Cross Member 1 Rear One Piece Cross Member 2 M3 x 5 x 3 Black Spacer 10 M3 x 8 Cap Head Bolt 6 M3 x 10 Cap Head Bolt 10 M3 x 12 Cap Head Bolt 4 M3 x 20 Cap Head Bolt 6 M3 Locknut 4 Bag 6 Fuel Tank w Accessories ...

Page 21: ...Frame Assembly Install 1 Radio Bed to 1 Left lower front frames using 2 M3 5 3 spacers and 2 M3 10 cap head bolts Attach left frame assembly to 1 right lower front frame using 2 M3 5 3 spacer and 2 M3 10 cap head bolts ...

Page 22: ... 4 M3 8 Cap head bolts Install 1 60m Cross member using 2 M3 8 cap head bolts Install fuel tank using 1 Fuel Tank cross member 2 M3 5 3 Spacers and 2 M3 10 Cap head bolts Note Add a couple layers of double stick tape to the cross member to help retain the fuel tank ...

Page 23: ...re line which should be bent to reach the top of the tank on the inside The third line will generally be plugged Tighten rubber stopper screw but do not over tighten or you will ruin rubber stopper Install throttle servo on right front lower frame half with the spline towards the rear of the helicopter Using 4 M3 12 cap head bolts and 4 M3 Locknuts Note Be sure the use the rubber grommets that are...

Page 24: ...Install 1 gyro plate using 4 M3 5 3 spacers 4 M3 10 Cap head bolts ...

Page 25: ... M3x3 Set Screws 4 M3x6 Phillips Screw 4 M2 6x6 Self Taping Screws Lower Main Gear 88T 1 Lower Main Gear Hub 1 Upper Main Gear 97T 1 Auto Rotation Clutch Plastic 1 Main Shaft 1 Main Shaft Collar 1 Motor Mount 1 Q 50 Fan Plastic 1 Fan Hub 1 Lower Fan Collet Spacer 1 Lower Fan Collet Tapered 1 Upper Fan Collet Tapered 1 Clutch 1 60mm Cross member M3x6 Cap Head Bolt 8 M3x8 Cap Head Bolt 12 M3x10 Cap ...

Page 26: ...6 cap head bolts Install 1 Upper Main Gear to 1 Auto rotation clutch using 4 M3 6 Phillips Screws Slide lower main gear hub onto the auto rotation clutch sleeve making sure to line up the holes Slide 1 main shaft down through main shaft bearing blocks with reduced portion of the shaft down ...

Page 27: ...uts Install 1 main shaft collar using 4 M3 3 Set screws Tighten set screws while you pull up on the main shaft and push down on the main shaft collar making sure when you are finished that there is no up or down play Note Be sure the ridge on the main shaft collar goes down Install 1 motor mount to the motor using 4 M3 10 Cap head bolts Note pay close attention to the offset of the engine on the e...

Page 28: ...to 1 Fan hub using 4 M3 6 Cap head bolts Note Fan will be metal in the pro kit and plastic in the sport kit Install 1 lower fan collet spacer onto the crankshaft Install 1 Lower tapered fan collet onto the crankshaft ...

Page 29: ...t that was provided with the engine and check for run out Note The run out should be no more than 002 004 This should be checked with a dial indicator There are many techniques to get the fan hub and associated components with in the allotted tolerance The most popular is to loosen the prop nut and collets fan hub and clutch ...

Page 30: ...Install 1 Clutch using 2 M3 8 Cap head bolts Install 1 Fan Shroud using 4 M2 6 6 self taping screws Install engine into frames using 4 M3 10 Cap Head Bolts ...

Page 31: ...ng 10 M3 8 Cap Head Bolts and 6 M3 Locknuts Drill 2 Landing Gear struts at a spacing of 75mm Note For good cosmetics as well as proper spacing make sure you center the measurement on the strut Install Drilled struts using 4 M3 12 Cap Head Bolts and 4 M3 Locknuts ...

Page 32: ...Install 4 White skid pipe end caps using CA Glue Install Skid Pipes into struts and secure with 4 M3 3 Set Screws ...

Page 33: ...h Lever Mount 1 Tail Pulley Gear w shoulder Tail Pulley Gear Side Plate 1 Tail Pulley Gear Lock Pin 1 Tail Output Shaft 1 Tail Case Cross member 1 Tail Pitch Slider 1 Dual Bearing Tail Rotor Assembly 1 Tail Blades 2 Tail Blade Spacers 4 Tail Boom ClampPlastic 2 Plastic Boom Support Ends 4 5x10x4 Flanged Bearings 2 M2x8 Phillips Screws 4 M3x6 Cap Head Bolts 6 M3x12 Cap Head Bolts 4 M3x16 Cap Head B...

Page 34: ...illips screws Note The Pro kit comes with carbon tail case side plates and the sport kit comes with G 10 Install 2 5X10X4Flanged bearings into 2 Tail case side plates Install Tail case plate w Pitch lever mount to 1 Tail Boom with tail case holder Install 1 Tail gear lock pin into 1 Tail output shaft ...

Page 35: ...ut shaft and inter locking pin into the pulley gear Install 1 Pulley Gear side plate onto the pulley gear shaft assembly with reduced portion of the plate away from the gear Install 1 Tail Drive Belt around the pulley gear and through the boom ...

Page 36: ... Head Bolts Note Both Flanged bearings should have the flange towards the inside of the tail case when complete Install 1 Tail Case cross member using 2 M3 6 Cap Head Bolts Install 1 M3 4 Pivot Ball Stud and 2 2 3 short Ball Links to 1 Tail Pitch Slider ...

Page 37: ...cer 1 M3 16 Cap Head Bolt and 1 M3 Locknut Couple the pivot ball from the tail pitch slide in the brass cup from tail pitch control lever and attach the lever using the above hardware with the spacer between the lever and the mount Note Be sure not to over tighten the bolt for the tail pitch lever Use the supplied nut to lock the bolt in place The lever should rotate freely ...

Page 38: ... 6 Phillips Screws Carefully note the holes the shim balls are installed in Install 1 Double Bearing Tail Rotor Assembly using 1 M3 5 Set screw Install 2 Tail Blades using 4 Tail Blade Spacers 2 M3 22 Cap Head Bolts and 2 M3 Locknuts ...

Page 39: ...the use the rubber grommets that are provide by the servo manufacture Install completed tail boom assembly into frames using 2 Tail Boom Clamps 4 M3 40 Cap Head Bolts and 4 M3 Lock Nuts Note When installing the boom into the clamps keep tail rotor assembly pointing up Slide the straight belt over the front pulley Pull belt tight rotate boom right till the tail shaft is perpendicular to the main sh...

Page 40: ...nstall 4 Boom support ends to 2 Boom Support rods using 5 minute epoxy Make sure that the ends are parallel to one another Install 1 horizontal Fin Mount and 1 horizontal fin using 2 M3 6 Cap Head Bolts ...

Page 41: ...o the fin mount using 2 M3 8 Cap Head Bolts Install the boom supports to the frames using 2 M3 10 Cap head bolts and 2 M3 Locknuts Install 1 Vertical fin using 1 Vertical fin mount half A 1 Vertical Fin half B 2 M3 30 Cap Head Bolts and 2 M3 Locknuts ...

Page 42: ...Anti rotation Guide B 1 M3x6 Cap Head Bolt 2 M3x10 Cap Head Bolt 4 M3x5x3 Spacers Black 4 M3x8 Pivot Ball Studs 2 M3x3 Set Screws 6 Bag 7 Sport Swashplate Complete 1 Washout Unit 1 Washout Link 2 Washout Link Pin 2 Washout Anti rotation Guide 2 Pin 1 Swashplate Anti rotation Plastic 1 M3x10 Cap Head Bolt 4 M3x40 Cap Head Bolt 2 M3x5x3 Spacers Black 4 M3x8 Pivot Ball Studs 2 M3x3 Set Screws 6 ...

Page 43: ...M3 6 Pivot ball studs and 2 M3 4 Pivot ball studs to 1 Swashplate us 4 M3 washers for the studs on the inner ring of the swashplate Install 1 Swash anti rotation pin to the swashplate assembly using 1 M2 15 Cap head bolts Install completed swashplate onto the main shaft ...

Page 44: ...ot ball studs to the washout assembly Install complete washout assembly onto the main shaft and connect the washout links to the M3 6 pivot ball studs on the swashplate Install 1 Double pin washout anti rotation guide using 4 M3 3 Set screws Note The final adjustments will be made in the linkage setup section later ...

Page 45: ...Swash anti rotation guide part B using 2 M3 6 Cap head bolts Note This step is not necessary for the sport kit as the anti rotation guide is one piece plastic Install the swashplate anti rotation guide using 4 M3 5 3 spacers and 4 M3 10 Cap head bolts ...

Page 46: ...s 2 M3 5 1 Spacers 4 M4 10 Cap Head Bolts 2 M3 8 Cap Head Bolts 4 M3 3 Sets Screws 2 M3 20 Cap Head Bolt 1 M3 Locknuts 1 Bag 8 Sport Main Blade Grips Plastic 2 Hiller Arms 2 Dampener O rings 2 Head Spindle Thrust Bearing Type 1 Center Hub 1 Blade Grip Spacers 2 Thrust Bearing Spacer 2 Thrust Bearings 8 X 16 X 5 2 M4 Blade Grip Retainers 2 Sea saw 3mm Bearings 1 Sea saw collars 2 Fly bar Control Ar...

Page 47: ...on 6 Rotor Head Assembly Install 2 pitch arms to 2 blade grips using 4 M3 10 cap head bolts Install 2 M3 4 pivot ball studs in each 2 hiller arm base Install 2 M3 6 pivot ball studs in each 2 hiller arm base ...

Page 48: ...Install 2 complete hiller arms to 2 complete blade grips using 2 M3 5 1 spacers and 2 M3 10 cap head bolts Install 2 dampener O rings into 1 center hub Install 1 spindle into 1 center hub ...

Page 49: ...of the spindle Install 2 thrust bearings spacers 2 thrust bearings 2 M4 blade grip retainers and 2 M4 10 cap head bolt Install 1 sea saw using 2 sea saw collars and 2 M3 8 cap head bolts Install 2 M3 8 pivot ball studs to the installed sea saw unit Note Their extra 3mm holes on the sea saw and are unused The fly bar should move freely once installed ...

Page 50: ... it using a ruler Install 2 M3 5 1 Spacer onto each end of the fly bar Install 2 complete fly bar control arms using 2 M3 3 set screws Note The fly bar control arms must be parallel to each other when the installation is complete and the setscrews are tight Install 2 M3 fly bar paddles at an equal distance of 25mm from the end of the fly bar ...

Page 51: ...Install the complete rotor head Assembly to the main shaft using 1 M3 20 Cap Head Bolt and 1 M3 Locknut ...

Page 52: ...e Rod 2 2 3x70mm Linkage Rod 2 2 3x90mm Linkage Rod 2 2 3x110mm Linkage Rod 3 2 3 Rudder Push Rod Ends 2 Rudder Push Rod Guide 2 Hole 3 Rudder Push Rod Guide Insert 3 M2x10 Shim Ball Screw 10 Shim Ball 8 Short Canopy Standoff 2 Long Canopy Standoff 2 Canopy Grommets 4 M3x8 Cap Head Bolts 4 M3x16 Cap Head Bolts 4 ...

Page 53: ...licopter All Linkages available individually just know the size Install 8 Shim Balls using 8 M2 8 Phillips Screws Install each Shim ball as close to the recommended distance for the center of the servo splice and the center of the shim balls Carburetor 11 75 13mm Throttle Servo 11 75 13mm Swashplate Servos 18 20mm Rudder Servo 11 75 13mm Rod Use Linkage ID Letter A of Rods 1 Rod Size 2 3 110 Ball ...

Page 54: ...ll Link 2 Long Center to Center 131 10mm Rod Use Linkage ID Letter D of Rods 2 Rod Size 2 3 90 Ball Link 1 Long Ball Link 2 Long Center to Center 106 25mm Rod Use Linkage ID Letter E of Rods 1 Rod Size 2mm Carbon Rod Ball Link 1 Long Ball Link 2 Long Center to Center 711 20mm ...

Page 55: ...age ID Letter G of Rods 1 Rod Size 2 3 40 Ball Link 1 Long Ball Link 2 Long Center to Center 60 00mm Rod Use Linkage ID Letter H of Rods 1 Rod Size 2 3 40 Ball Link 1 Long Ball Link 2 Long Center to Center 60 00mm Rod Use Linkage ID Letter I of Rods 2 Rod Size 2 3 70 Ball Link 1 Long Ball Link 2 Long Center to Center 96 00mm ...

Page 56: ...of Rods N A Rod Size No Rod Ball Link 1 Double Link Ball Link 2 Double Link Center to Center Double Link Fixed Length Rod Use Linkage ID Letter K of Rods 2 Rod Size 2 3 35 Ball Link 1 Long Ball Link 2 Long Center to Center 52 00mm ...

Page 57: ...uides 3 Tail Control Rod Guides inserts 3 Tail Control Rod Guides inserts B The three tail control rod guides are epoxies together to make complete assemblies Space the assemblies evenly about the boom and use CA Glue to attach them Note The Carbon Rod will have to be cut to length The second end will have to attached after the rod is installed into the Guides Replacement Part Tail Control Rod HHI...

Page 58: ...rmal Mode Bottom Stick 20 Percent throttle Mid Stick 50 Percent Throttle Top Stick 100 Percent Throttle Stunt 1 2 Bottom Stick 100 Percent Mid Stick 35 Percent Top Stick 100 Percent Tail Rotor Setup the Tail rotor limits so the throws that the tail pitch slider does not exceed a 5mm gap between the tail case and the tail pitch slider Mechanical Setup Servo Arm Length Servo arm Length should be as ...

Page 59: ...line it up with the anti rotation guide Rotate the head so that the main blades are parallel with the tail boom while the link is lined up This is where the pin should be rotation wise Next Cycle you swashplate all the way to the top and tip it all the way in one direction Rotate the head and make sure the pin does not touch the swashplate at any point in the rotation You should have the pin so th...

Page 60: ...Finalizing Everything before Flight These pictures illustrate how every thing should be neatly wired up and strapped down before your helicopters first flights ...

Reviews: