9
❏
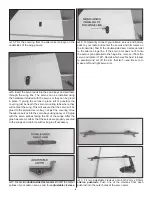
10. Locate the aileron double rib that has a rectangular
mounting block at the LE. Using the position of the pushrods
as a guide, cut a slot 3/8" [9.5mm] long perpendicular to the
hinge line just behind the bevel of the LE of aileron for each
control horn in the center of the mounting block. The slot
only needs to be wide enough to accommodate the thickness
of the control horn tab on the control horn (approximately
1/16" [1.6mm] thick). Do not cut all the way through the
ailerons! 3/16" to 1/4" [5mm to 6mm] deep is suffi cient. Trim
the control horn backplate tabs shorter so that the control
horns sit fl at in the slots you made.
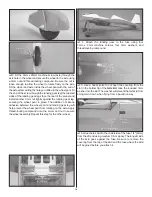
❏
11. Confi rm that the holes in the control horn are centered
over the hinge line. When satisfi ed, coat the backplate tabs
with medium CA and press them into the slots.
❏
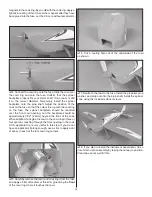
12. Use the position of the control horn to adjust the length
of the pushrods as needed. Remove the servo arms from
the aileron servos. Connect the other adjustable clevises on
the aileron pushrods to the control horns and reattach the
servo arms. Fine tune the length of the pushrods inside the
clevises so that the ailerons are in the neutral position. Lock
the clevises onto the pushrods by threading a 2mm x 4mm
screw into each clevis screw hole. The screw head should fi t
into the recessed hole in the adjustable clevises as shown
(installing the screws in the wrong direction may not properly
tighten the clevises onto the pushrods). The excess rod ends
can be cut away.
INSTALL THE WING PANELS
❏
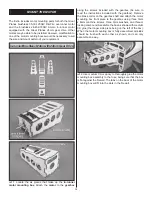
1. Trim the covering from the wing pockets in the fuse.
For the best results, work slowly and use a new hobby knife
blade for this step. Be careful not to cut into the fuse sides. On
the wing panels, trim the covering that overlaps onto the wing
panel root ribs.

