12
❏
6. Trim the covering from the tail of the fuse for the
horizontal stabilizer. Insert the elevator joiner wire into the
back of the stab slot.
❏
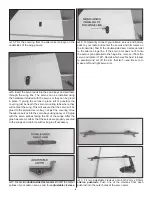
7. Position the stab into the stab saddle, centering it left
and right and making it square to the wings. Mark the outline
where the stab meets the fuse as you did with the vertical fi n
and remove the covering inside your marks. Reposition the
stab into the fuse, stand back several feet behind the model
and view it from the rear. Confi rm that the stab is parallel with
the wing panels. If not, use tape or a weight to straighten it.
CA glue or epoxy can be used to glue the stab in place.
❏
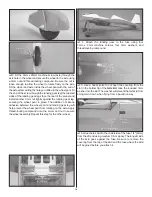
8. If necessary, use a hobby knife to cut open the hinge
slots in the elevators and stab. Before gluing, roughen the
elevator joiner wire with sandpaper and clean it off with
alcohol. Prepare the elevators by inserting a CA hinge into
each hinge slot. Use T-pins to keep the hinges centered. Put
a light coating of epoxy onto the ends of the elevator joiner
wire. Install the elevators onto the joiner wire while fi tting the
CA hinges into their mating slots in the stab. As you did with
the ailerons, use thin CA to glue the hinges.
❏
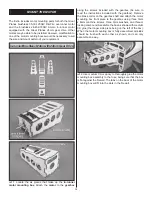
9. Cut a slot for the rudder control horn 5/8" [16mm] from the
bottom of the rudder. Test fi t a control horn into the slot, being
sure that the control horn holes are positioned over the hinge
line. Attach the rudder to fuse using three CA hinges.
❏
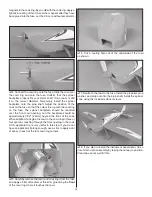
10. Insert a control horn into the slot on the underside of the
left elevator. Press a control horn backplate onto the control
horn tab on top of the elevator. Apply a few drops of CA glue
to the control horn and backplate to secure them in place. The
control horn tab can be trimmed fl ush with the backplate.

