27
Cabling and Connections
Comms Cables for the MAV Modules
Once the MAVRow frame or frames are mounted into the desk the next step is to place the
Comms cables ready to connect up the MAV- GUI and the other MAV modules.
For each MAV-GUI that is purchased, there are 16x RJ45 Comms cables supplied, these will in
turn, support up to 16 MAV modules. The different lengths of cables are as follows:
•
4x 0.5 meters ~ 1 foot 7.68 inches
•
8x 1 meters ~ 3 foot 3.37 inches
•
4x 2 meters ~ 6 foot 6.74 inches
The layout of the control surface and the position of the MAV-GUI or MAV-GUI’s will decide how
the Comms cables are laid out.
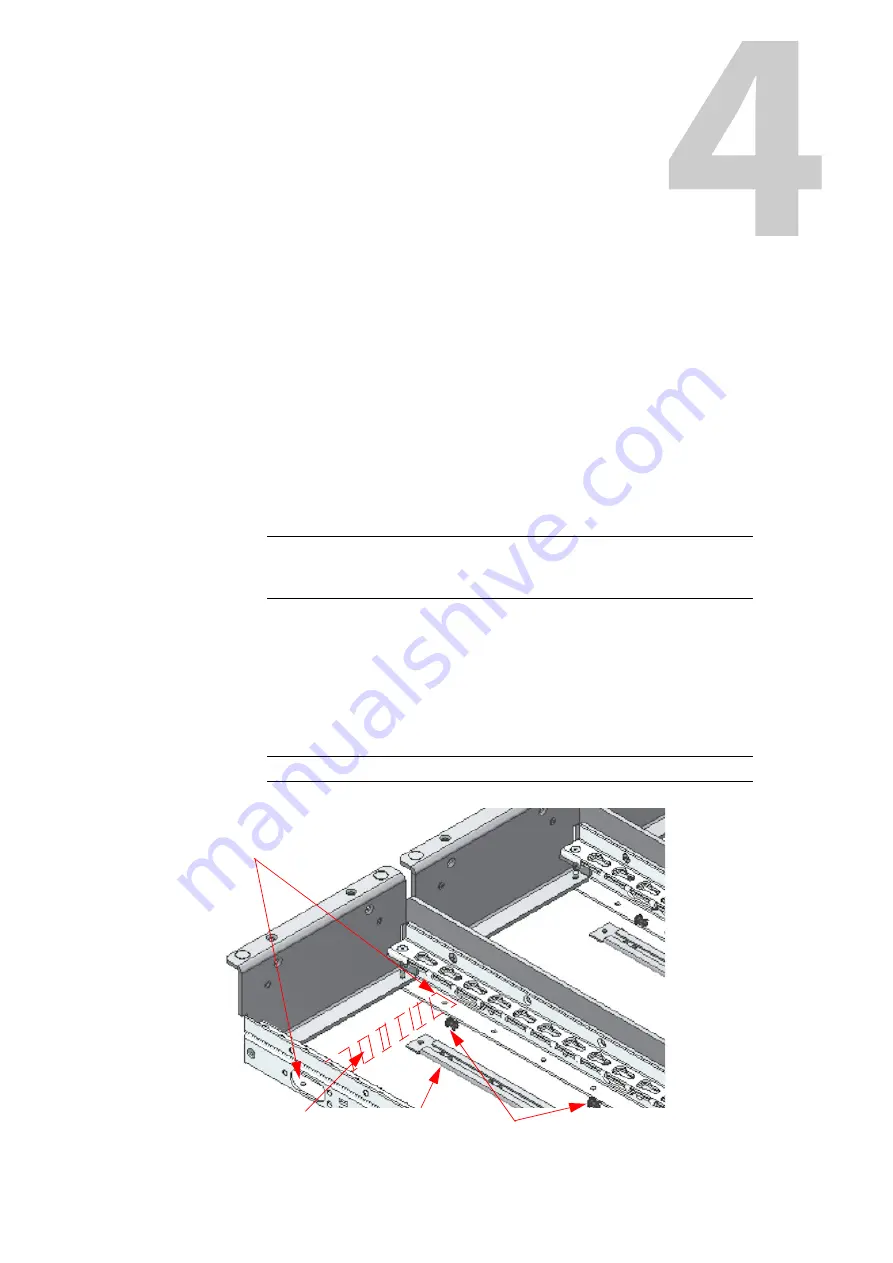
Cable Tie Brackets are supplied with each MAVRow, they can be fastened to the bottom of the
MAVRow, under the rail where the MAV modules are fitted. The brackets are fastened to the rail
with plastic fasteners as shown below.
Cable Tie Brackets can be repositioned as required. The plastic fasteners are reusable, the head
of the plastic fastener can be lifted up allowing removal.
Note:
Due to the unknown distance between the Kahuna Maverik Control
Surface and the Switcher Mainframe, the customer has to provide their own
Network cables from the MAV-GUI/s to the Switcher Mainframe.
Note:
Cable tie brackets should not be fitted under the MAV-GUI
Cable Tie Bracket
Mounting Holes
Mounting position of
the brackets
Plastic Fasteners
Cable Tie
Bracket


