1. Copy the Aurora Playout software installation file,
SetupAuroraPlayout.exe
, from
the CD onto your network.
2. Using a text editor such as Notepad, create a file called setup.ini similar to this
example:
[AssignmentListPlugin]
DatabaseServer=localhost
BackupDatabaseServer=
MosID=gvg.nqp.mos
ThumbnailPath=C:\AuroraPlayout\thumbnails
XMOSServer=localhost
DisplayMode=2
AddTypeToObjSlug=0
UnicodeDragDrop=1
EnablePlayerTrim=0
EnableDelete=1
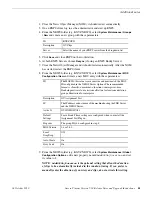
Description
Name
The name of the server hosting the Aurora Playout database
(primary SDB Server).
DatabaseServer
The name of the server hosting the hot standby Aurora Playout
database (backup SDB Server).
BackupDatabaseServer
Your MOS ID.
MOSID
The full path to the shared thumbnail directory on the computer
where thumbnails are stored, in the format \\server\foldername;
Thumbnail Path
e.g., if you have a shared folder named “thumbnails” on your
playout system named “Playout1”, the path would be
\\Playout1\thumbnails.This path needs to match the path set
in Aurora Edit—Tools | Options | Aurora Playout | Thumbnails
Path.
The name of the computer hosting the XMOS Server.
XMOS Server
Determines the display mode of the Assignment List Plug-in:
0 for Placeholder List only, 1 for Rundown View only, 2 for
both Rundown View and Placeholder List display.
Display Mode
Determines whether to insert the placeholder type to the MOS
name when the placeholder is dragged and dropped into a
script: 0 for off, 1 for on.
AddTypeToObjSlug
Your Newsroom Computer System: 0 for iNEWS or 1 for
ENPS/Octopus.
UnicodeDragDrop
Determines whether placeholder can be trimmed in the
MediaFrame clip player: 0 for off, 1 for on.
EnablePlayerTrim
Determines whether placeholder deletion is allowed in ALP:
0 for off, 1 for on.
EnableDelete
3. Save the file in the directory with the SetupAuroraPlayout.exe file.
18 October 2010
Aurora Playout Version 7.1.0 Release Notes and Upgrade Instructions
31
Additional notes


