


24
CHECKING CHAIN LUBRICATION
Check lubrication of the chain and oil level in the tank before starting to work. Switch on the saw and hold it above ground.
If you see enlarging oil marks, the chain lubrication works well (
fig. E
). If there are no oil marks or they are very small, use
oil feed adjustment screw (
9
) to make appropriate adjustments. In case the adjustment brings no effects, clean oil outlet,
upper hole of chain tension and oilway, or contact service.
Make adjustments when the saw is switched off, observe precaution measures and do not allow the guide bar to
touch ground. Operate the tool safely and maintain at least 20 cm distance from ground.
Use oil feed adjustment screw (
9
) to set amount of supplied oil accordingly to respective operating conditions.
MIN position – oil flow decreases.
●
MAX position – oil flow increases (
●
fig. F
).
When cutting hard and dry wood and using whole length of the guide bar when making a cut, set the oil feed adjustment
screw (
9
) to the MAX position.
You can reduce amount of oil supplied by turning oil feed adjustment screw (
9
) to MIN position, when cutting soft and damp
wood, or when only part of the working length of the guide bar is used.
Depending on ambient temperature and amount of oil supplied, you can operate the chain saw for 15 to 40 minutes per
one filling the oil tank (tank capacity is 260 ml).
Oil tank should be almost empty when the fuel tank is emptied. When filling the fuel remember about filling oil
tank as well.
CHAIN LUBRICANTS
Durability of chain and guide bar depends heavily on quality of lubricant. Use only lubricants, which are designed for chain saws.
Never use regenerated or previously used oil for chain lubrication.
CHAIN GUIDE BAR
Guide bar (
20
) is exposed to heavy wear especially in tip and bottom part. To prevent side wear due to friction, it is recommended
to turn over the guide bar every time the chain is sharpened. Clean the guide bar groove and oil holes on that occasion. Guide
bar groove is rectangular. Check the groove against wear. Put rule to guiding strip and outer surface of a chain tooth. If you
observe distance between, the groove is correct. Otherwise the guide bar is worn out and needs to be replaced.
CHAIN WHEEL
Driving chain wheel is subject to especially heavy wear. Replace the chain wheel when you observe clear signs of wear
of wheel teeth. Worn chain wheel additionally reduces durability of chain. Chain wheel should be replaced by authorised
service workshop.
ADJUSTMENT OF CARBURETTOR
Chain saw carburettor is factory set, however it may require precise adjustment when operating conditions change. Before
starting to adjust the carburettor ensure new air filter and fuel filter are installed and tank is filled with appropriate fuel blend.
Adjust the carburettor with guide bar and chain installed.
Screw in both adjustment screws (L and H) (
●
16
) until stop (do not overtighten) (
fig. G
).
First, unscrew two adjustment screws (
●
16
) as specified below:
L screw: by 1 1/4 of a turn
-
H screw: by 1 3/8 of a turn
-
Start up the engine and allow it to heat up while holding throttle lever (
●
11
) pressed in half.
After the engine has been heated, release pressure on the throttle lever (
●
11
) and allow the engine to run slowly.
Turn the screw (L) slowly clockwise until idle run achieves its maximum speed, then turn the screw counter-clockwise
●
by 1/4 of a turn.
Turn low speed adjustment screw (T) (
●
17
) counter-clockwise until the chain stops moving. When slow speed appears to
be too low, turn the screw clockwise (
fig. G
).
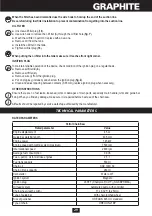
Summary of Contents for 58G945
Page 2: ......
Page 31: ...31 58G945 a b a b c a b c d a...
Page 32: ...32 90...
Page 33: ...33 1 2 3 4 5 6 7 8 9 10 1 2 3 4 5 6 7 8 9 10 11 12 13 14...
Page 36: ...36 2 11 14 STOP E 9 20 9 MIN MAX F 9 MAX 9 MIN 260 15 40 20...
Page 38: ...38 J 1 11 K 11 L...
Page 39: ...39 45 0 M 1 3 N 2 5 M 19 O 12 19 12 1 3...
Page 40: ...40 1 3 P R S 5 4 3 4 d T 4 4...
Page 41: ...41 5 14 7 10 20 21 e 20 U 22 f W 21 15 g X 15 18 h Y 18 4 d i Z 0 65...
Page 43: ...43 58G945 a b a b c a b c d a...
Page 44: ...44 90...
Page 45: ...45 1 2 3 4 5 6 7 8 9 10 1 2 3 4...
Page 46: ...46 5 6 7 8 9 10 11 12 13 14 15 L H 16 T 17 18 19 20 21 22 1 1 1 2 1 3 1 4 6 A...
Page 48: ...48 6 2 14 C 13 D 1 11 11 6 2 11 14 STOP E 9 20 9 MIN MAX F 9 MAX 9 MIN 15 40 260...
Page 49: ...49 20 L i H 16 G 16 L 1 1 4 H 1 3 8 11 11 L 1 4 T 17 G 6 20 0 12 1 2 6 6 12...
Page 50: ...50 5 12 35 5 H 6 7 21 20 8 3 4 I 7 J 1 11 K 11...
Page 51: ...51 L 45 0 M N 2 5 M...
Page 52: ...52 19 O 12 19 12 1 3 P R S...
Page 53: ...53 5 4 3 4 d T 4 4 5 14 7 10 20 21 e 20 U 22 f W 21...


