


RP6 ROBOT SYSTEM - 3. Hardware and Software Setup
RobotLoader before you can open it again).
The Virtual Comports will be labelled “/dev/ttyUSBx”, in which x represents a number,
e.g. “/dev/ttyUSB0” or “/dev/ttyUSB1”. Also the standard comports labelled
“/dev/ttyS0”, “/dev/ttyS1” will be shown as well.
The RobotLoader remembers the previously selected port and will automatically pre-
select this port at program start (most of the presets and selections are remembered).
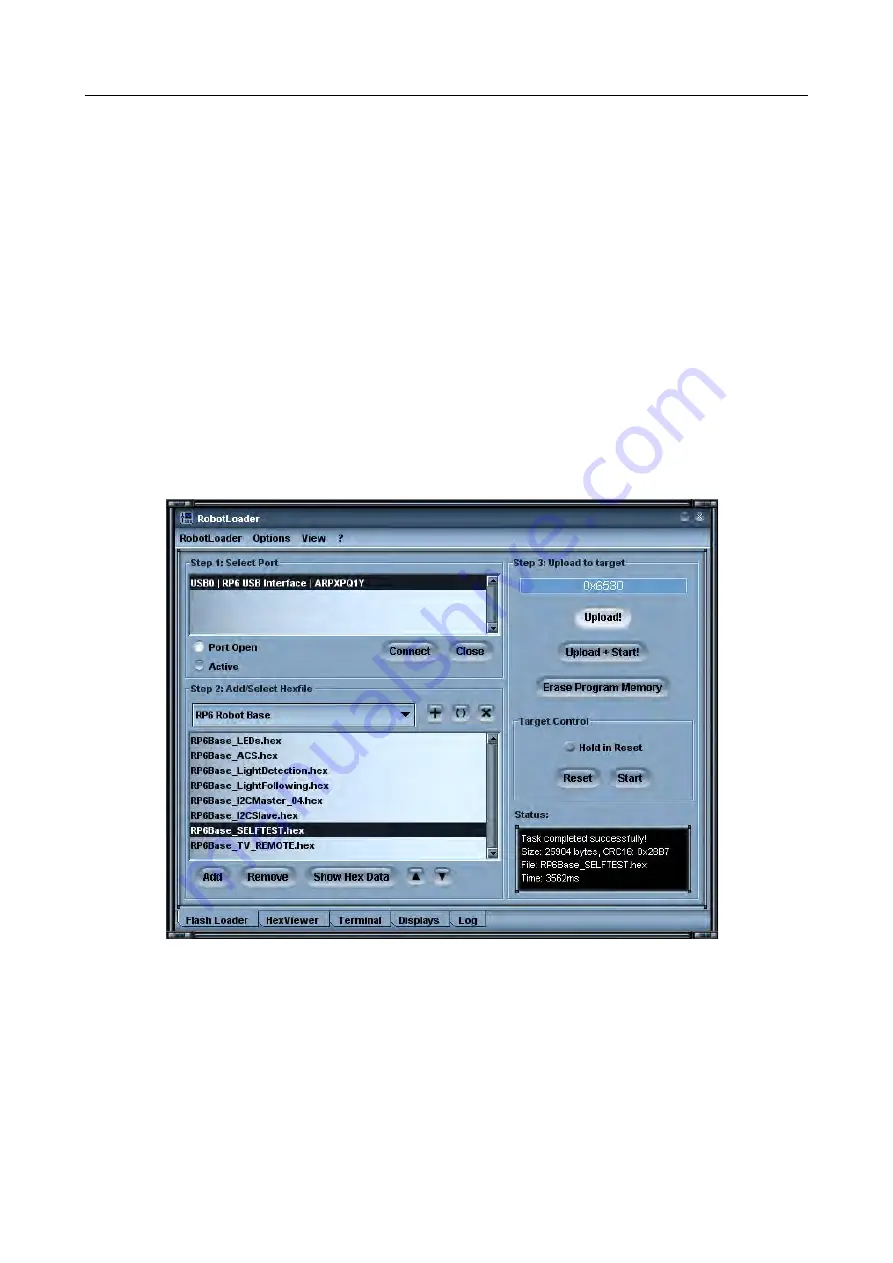
Now click on the “Connect”-button! The RobotLoader will try to open the port and
check communication with the robot's Bootloader. If everything works OK, the black
“Status” field will show “Connected to: RP6 Robot Base ...”, accompanied the meas-
ured battery voltage. If this fails, please wait a second,and retry it! If the retry fails, a
more serious error occurred! In this case immediately switch off the robot and pro-
ceed by reading the chapter “Troubleshooting” in the appendix!
At low battery voltage the program will show a warning message. Whenever you see
this message, you have to recharge batteries. We advise recharging as soon as bat-
tery voltage drops below 5.9V!
Having passed this initial check, you may now start a simple self test program in order
to verify that the robot's subsystems are working properly. First you have to add the
Selftest program to the Hexfile list. This can be done by pressing the “Add” Button and
selecting file “RP6Base_SELFTEST\RP6Base_SELFTEST.hex” in the example directory.
The selected file contains the self test program in a hexadecimal format – that's why
such files are called “Hexfiles”.
The selected file will now appear in the list. This way you may select other Hexfiles
- 45 -