9
2.1.1 Assigning an IP Address
When the DHCP server on your network is unavailable or disabled, the camera can be
accessed by the default IP
192.168.0.10
. To modify the static IP address, log on to the Web
interface and access the network setting page.
1. Open your Web browser and type the default IP address
http://192.168.0.10
.
2. Type the default account and password
admin
and click
Apply
.
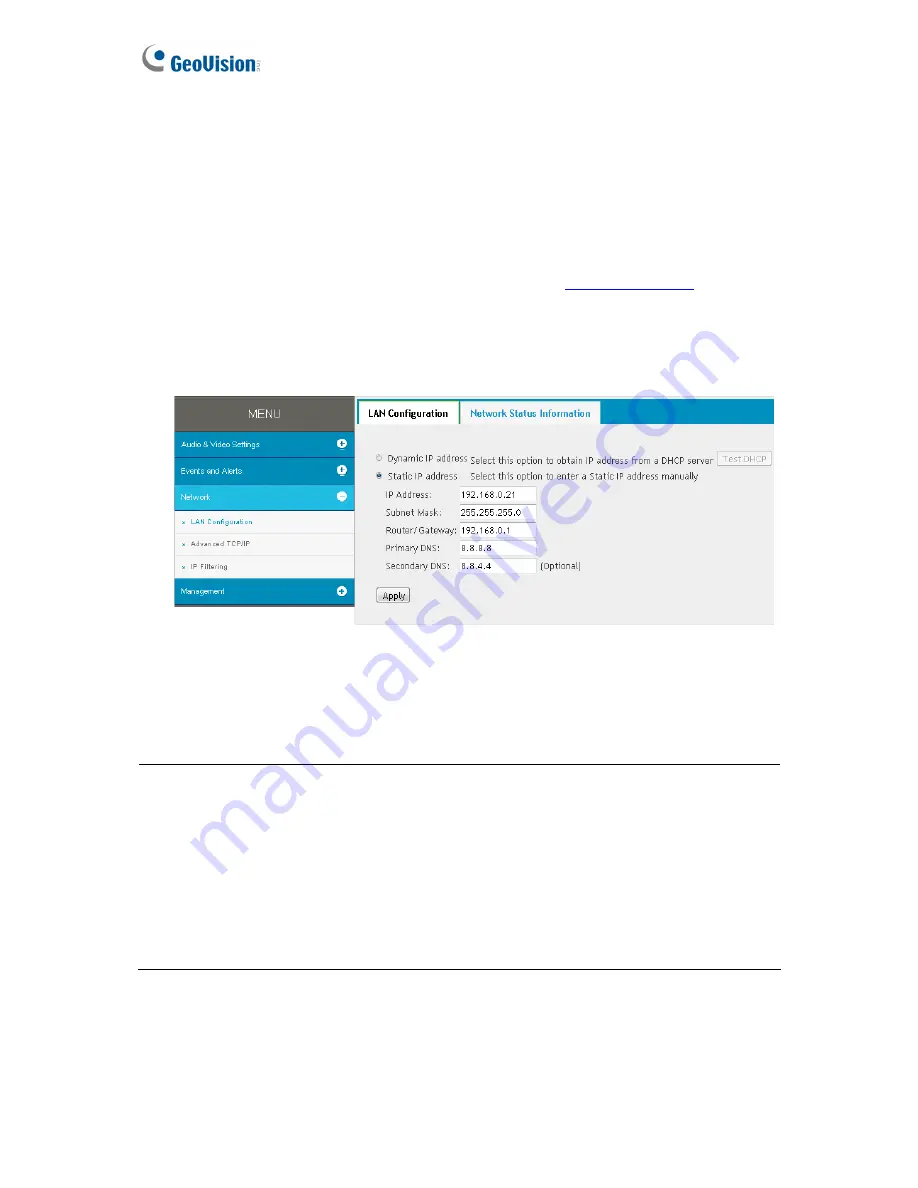
3. Click
System Settings
at the top, select
Network
and click
LAN Configuration
. This
page appears.
Figure 2-2
4. Select
Static IP address
and type the required network information.
5. Click
Apply
. The camera is now accessible through the assigned IP address.
IMPORTANT:
1.
Use the dynamic DNS Service to obtain a domain name linked to the camera’s changing
IP address before you start using the dynamic IP address. For details on Dynamic IP
Address, see
3.3.2 Advanced TCP/IP
and
3.3.1 LAN Configuration
.
2.
If
Dynamic IP Address
is enabled and you cannot access the camera, you may have to
reset it to its factory default settings and perform the network settings again.
To restore
to factory settings, see
6.2 Restoring to Factory Default Settings.


