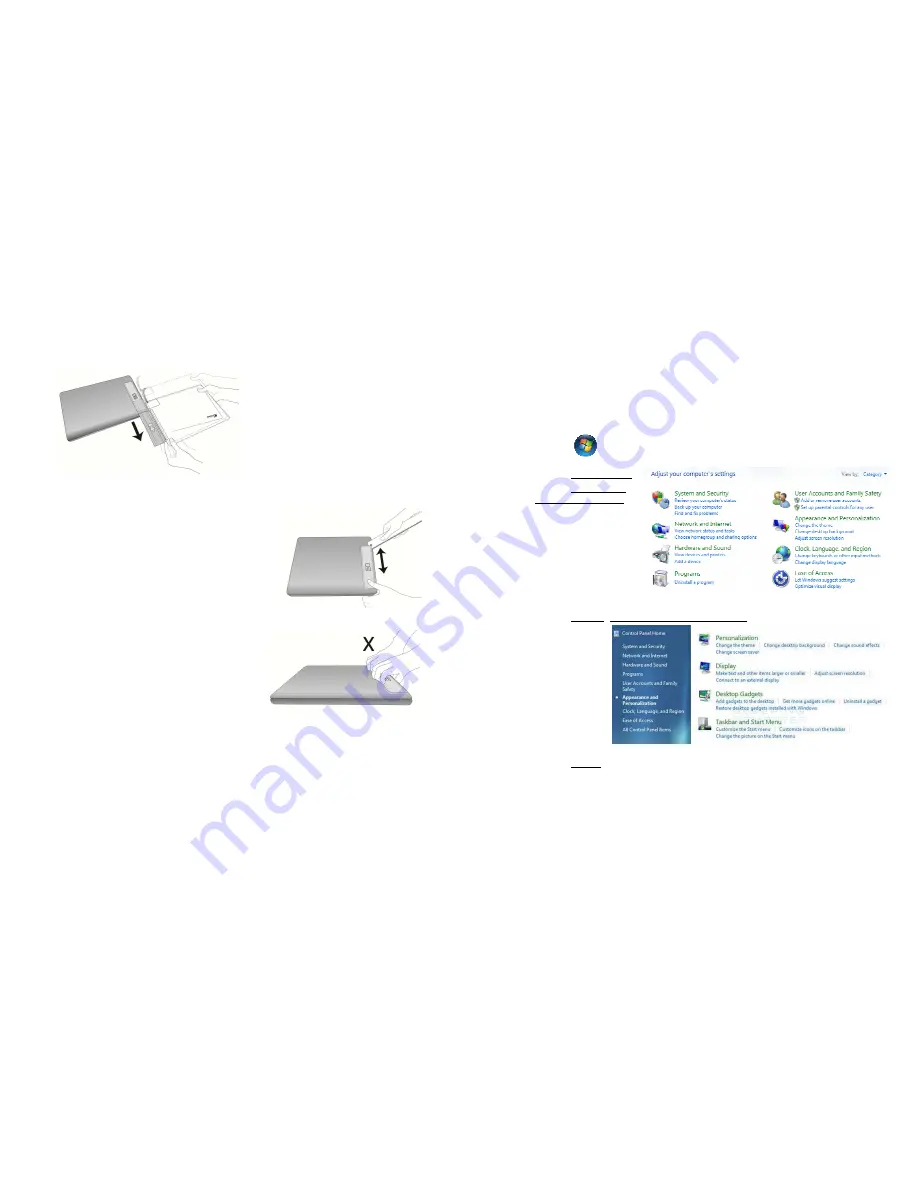
Step5.Remove On-Lap Monitor from the laptop
1.
Remove the On-Lap Monitor from the laptop.
As illustrated, rotate clockwise and open the On-Lap Monitor, press down on the
posioning clip, and pull forward the On-Lap Monitor along the Holder Plate to
slide out the shaE’s Hinge Plate.
Fig.: Press down on the posioning clip to
slide out the shaE’s Hinge Plate from the
Holder Plate.
Section 5 Remove On-Lap Monitor
’
s Holder Plate
1. Remove the On-Lap Monitor first
2. Insert a ruler or rigid flat arcle into the gap at
boDom of the Holder Plate; gently and evenly
apply force back and forth to make the double-
sided adhesive tape lose its viscosity. Do not use
metal objects that can easily scratch the surface.
[Note: Do not try to liE up the Holder
Plate directly with hands as it may result
in deformaon of the Holder Plate for
reuse.]
10
Chapter 3 Power On and Off the On-Lap Monitor
Section 1 Operating Instructions
1. Inial use: when the On-Lap’s USB power cable is connected to a 5V DC power
source, On-Lap will automacally switch on.
2. Switching on the On-Lap Monitor from an off mode: press “Power” to switch on the
On-Lap Monitor.
3. Follow the steps below to proceed with the monitor display se,ng.
4. When On-Lap is on, you may press the “power” buDon to switch off On-Lap.
Section 2 Monitor Display Setting
1. Set resoluon –
Windows 7 system
●
Click on
icon at the boDom leE of the screen, and a menu will be display.
●
Click on
Control Panel
●
Click on
Appearance
and Personalizaon
●
Click on
Display
>
Connect to an external display
●
Normally Display 1 is the laptop’s monitor, Display 2 is the external monitor.
Click on
Detect
if you are unsure.
11


