


Component/FRU Removal and Replacement
142
T2100-ST1 Treadmill, 110V / T2100-ST2 Treadmill, 220V
2097937-002 Rev G
11 March 2019
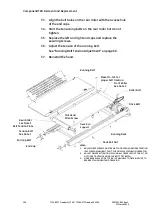
Replacing/Adjusting the Elevation Actuator
Tools Required
o
2 - 9/16” Wrenches or Sockets
o
3/8” Wide Flat Blade Screwdriver
o
Shipping blanket, carpet, or cardboard
o
1/4” Hex Nut Driver or Flat Blade Screw Driver
o
Grounding Wrist Strap
o
Tape measure
o
Service grease (Part Number 2097829-072)
Approximate time to complete: 1 hr 30 min
1.
Turn the treadmill main power switch to the OFF position.
2.
Unplug the treadmill plug from the wall receptacle.
3.
Allow the treadmill to discharge for 1 minute.
4.
Move the treadmill to an area large enough to lay it on its
side.
5.
Remove the (5) hood securing bolts.
6.
Remove the hood and set it aside.
CAUTION:
Use ESD precautions, including wearing a grounding
wrist strap that is connected to an exposed metal
connection point on the treadmill chassis.
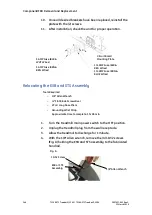
7.
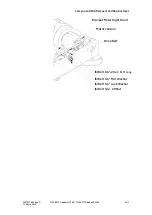
Unplug the treadmill actuator harness.
The harness is a six-conductor connector attached to the
actuator.
8.
Cut the zip tie that holds the wire to the motor pan gusset.
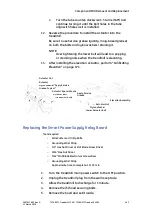
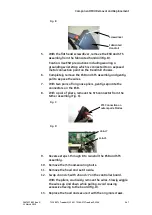
9.
With the shipping blanket in suitable spot, place a foot on
the treadmill side channel, grasp the handrail; pull the
treadmill towards you, and allow it to gently come to rest
on its side.
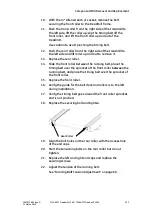
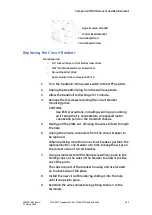
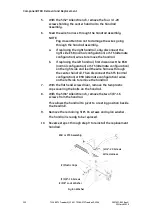
10.
With the 9/16” wrench and socket, remove the top and
lower bolts from the actuator.
When removing the bolts from the actuator, watch out for
nylon washers on each side of the actuator.
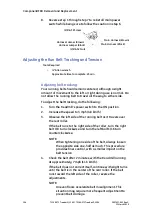
11.
Prior to installing the new actuator, use the following
procedure to preset the zero position.
a.
Looking from the bottom (tube end), lightly turn the
tube clockwise until it bottoms the threads or stops.
b.
Ensure that the motor shaft does not turn.


