2-9
6.
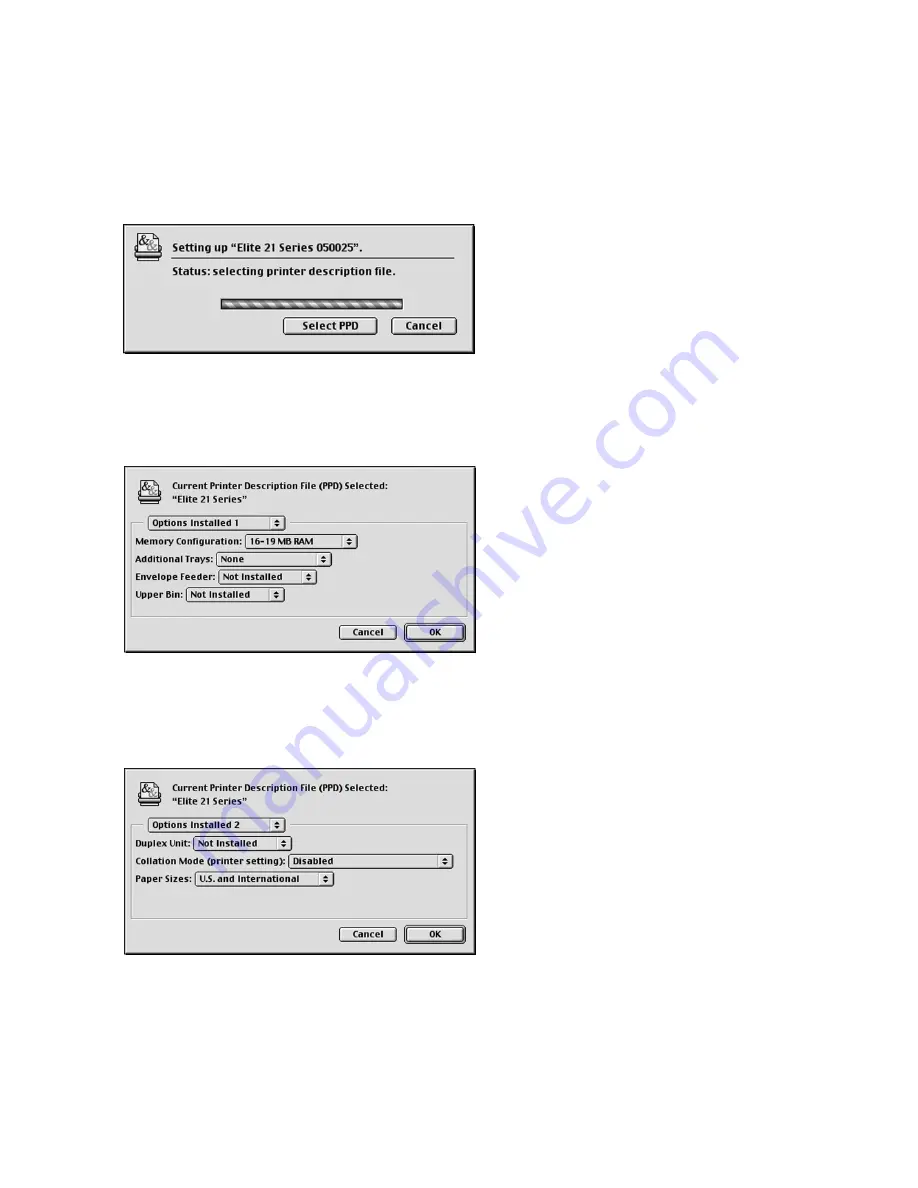
The Setup process will continue. A status
bar will show the progress of the setup.
7.
A window will appear asking for any
options on the printer to be configured.
The first page of options sets the Memory
Configuration, Additional Trays, Envelope
Feeder and Upper Bin status. Set these
items using the pull-down menus and then
click on the “Options Installed 1” pull-
down menu. Pull down to “Options
Installed 2.”
8.
The second window of options contains
settings for Duplex Unit, Collation Mode
and Paper Sizes. Set these items using the
pull-down menus, then click OK to
continue.
Summary of Contents for Elite 21DN
Page 1: ...GCC Elite 21 Series User s Manual Elite 21N Elite 21DN...
Page 14: ...1 6 Step 4 Remove Tape 1 Remove packaging tape from the front and rear covers of the printer...
Page 143: ...5 20 Clicking on Device Settings brings up the following window...
Page 159: ...6 13...
Page 163: ...6 17 Clicking on Device Settings brings up the following window...


