- 48 -
There is only one view for viewing all clips.
Navigate to the location where all the video files are located
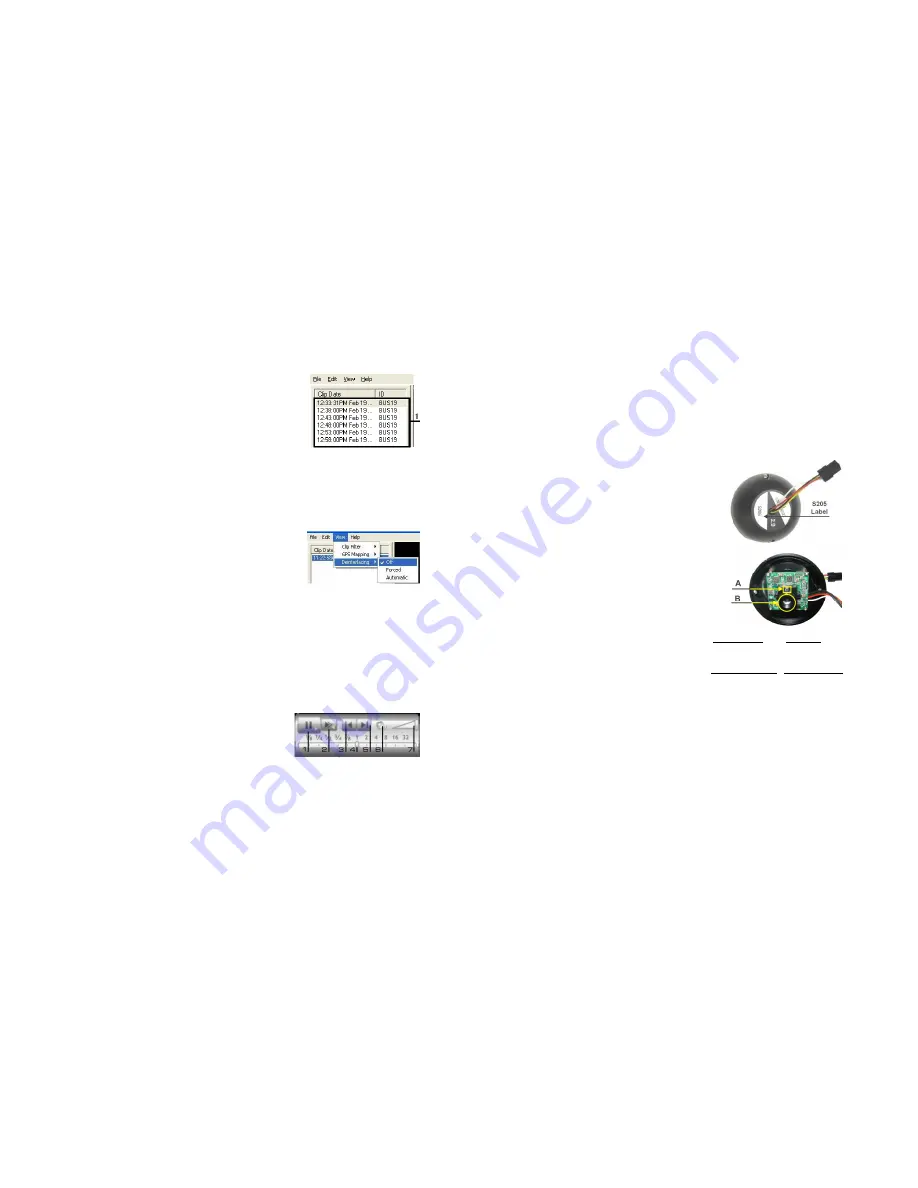
and select all. The files will now be listed (1), By Clip Date, in
the status window below the file menu bar in MaxVIEW
400.
Figure 35 : Clips Definition.
To navigate the list of available clips in Video Clips view use the Next (5) Button or the Previous
(3) Button, Figure 35. Accessing clips using either of these buttons the main Playback
Window and the Thumbnails will change reflecting the changing video being accessed.
Deinterlacing
Deinterlacing
Deinterlacing
Deinterlacing....
MaxVIEW
400 supports three modes of deinterlacing; Off (Default); Forced and Automatic.
•
OFF
OFF
OFF
OFF: Default value and should only be altered if
directed by a Gatekeeper Systems technical
support representative.
•
Forced
Forced
Forced
Forced: Forces deinterlation irrespective of
internal flag setting.
•
Automatic
Automatic
Automatic
Automatic: Automatically checks to determine the current state of the internal
deinterlacing flags.
Playback Controls
Playback Controls
Playback Controls
Playback Controls and File Management.
and File Management.
and File Management.
and File Management.
The Playback Controls enable video files to be played sequentially; forward at normal speed;
backward at normal speed, and, forward and backward at speed settings between 1/8
th
to
32X. The volume can also be muted and un-muted using this control.
NOTE:
NOTE:
NOTE:
NOTE: Due to complexities of H.264 compression playback in reverse will have variable video
quality.
1.
Play
Play
Play
Play. Plays current selection and becomes the Pause button during active playback.
2.
Direction
Direction
Direction
Direction. Acts as a toggle for Forward playback and Reverse.
3.
3.
3.
3.
Previous
Previous
Previous
Previous. Selects the Previous video file in the Clip List if multiple files have been opened.
4.
Speed Slider
Speed Slider
Speed Slider
Speed Slider. Determines the playback speed of the
selected video file. Ranges from 1/8
th
normal speed
to 32X normal speed.
5.
Next
Next
Next
Next. Selects the Next video file in the Clip List if
multiple files have been opened.
6.
Volume
Volume
Volume
Volume. This is a toggle control and sets the audio to be audible or muted.
7.
7.
7.
7.
Volume Level
Volume Level
Volume Level
Volume Level. Adjusts loudness of audio.
Figure 36 : Playback Controls
- 21 -
10.
Tighten all accessible set screws on the Retainer Ring (E) and Camera Collar (D). In some installations
several of the set screws will not be accessible due to close proximity of the camera to the vehicles
bodywork. In this situation tighten down the set screws that are accessible
.
S205
S205
S205
S205 Camera
Camera
Camera
Camera Lens Changing.
Lens Changing.
Lens Changing.
Lens Changing.
Please note that this section only relates to the S205 camera range only.
DO NOT
DO NOT
DO NOT
DO NOT
disassemble the S1 or S250 WDR Camera Ball unless directed to, and under the direction of, a
Gatekeeper Systems support technician
1.
Uninstall the S205 camera from the bus.
2.
The Camera ball should have a Label on the
reverse side
3.
Remove the two retaining screws. You will now
have two hemispheres joined by a short length of
cabling. Be careful not to disconnect or damage
this cabling.
4.
With the two halves of the camera laid carefully
on a clean work area, remove the Camera
Screw (A) and retain for re-use.
5.
Next Remove the camera lens (B) by un-
screwing counter-clockwise.
6.
Install the replacement lens.
7.
Power up the camera and check the live video.
Fine tune the focus of the camera lens and then
tighten the camera screw (B) to permanently
secure the camera lens.
8.
NOTE:
NOTE:
NOTE:
NOTE: If the video displays “Cutting-Edge” at the
corner, it indicates that the installed camera
lens is not suitable for this particular camera.
9.
Re-Assemble the camera and re-install on the
bus.
Part Number
Part Number
Part Number
Part Number
CAMILEGSLB2.9
CAMILEGSLB3.6
CAMILEGSLB4.3
CAMILEGSLB6
CAMILEGSLB8
CAMILEGSLB12
Lens Size
Lens Size
Lens Size
Lens Size
2.9mm
3.6mm
4.3mm
6.0mm
8.0mm
12.0mm
Restriction
Restriction
Restriction
Restriction Regarding In
Regarding In
Regarding In
Regarding In----Field Lens Replacement
Field Lens Replacement
Field Lens Replacement
Field Lens Replacements.
s.
s.
s.....
Cameras which originally shipped with a 2.9mm or 3.6mm lens can only utilize 2.9mm or
3.6mm lenses. This is due to the size of the internal stand-offs.
Cameras which shipped with 4.3mm; 6.0mm; 8.2mm or 12.0mm lens’ can only be replaced
by either one of these lens’ 4.3mm; 6.0mm; 8.2mm or 12.0mm. This is due to the size of the
internal stand-offs.


