3
Press and hold switch 2 for 5 seconds.
The switch stops flashing, and a message confirms the
newly selected wiring option.
4
Repeat the previous two steps until the device is
configured for the wiring option that applies to your
installation type.
NOTE:
After selecting option C, the next configuration
option in the cycle deactivates the interlocks so that
channels 1, 2, and 3 operate independently as normal
latching switches.
Using the Bilge Pump Switches
You can manually operate connected bilge pumps by
using switches 12 and 13 on the Garmin chartplotter.
1
From a Garmin chartplotter connected to the same
NMEA 2000 network as the Garmin Boat Switch
device, select
Vessel
>
Switching
.
2
Select an option:
• Press and hold the bilge pump switch for one
second to run the bilge pump for 2 minutes.
• Press and hold the bilge pump switch for three
seconds to run the bilge pump continuously.
NOTE:
Your Garmin chartplotter notifies you every 5
minutes while continuous mode is active.
Using Dimmable Lights
You can operate connected dimmable lights by using
switches 17 through 21 on the Garmin chartplotter.
1
From a Garmin chartplotter connected to the same
NMEA 2000 network as the Garmin Boat Switch
device, select
Vessel
>
Switching
.
2
Select an option:
• Press a dimmable light switch to turn a light on or
off.
NOTE:
The light turns on at the dim level set when
the light was last turned off.
• With a light on, press and hold a dimmable light
switch dim the light, and release to stop dimming.
• With a light off, press and hold a dimmable light
switch to turn on the light at 100% brightness.
Controlling Third-Party Equipment
Installed on Your Boat
Dometic
®
Optimus
®
Features
When connected to a compatible Optimus system, the
chartplotter allows you to access and control the system.
You can enable the Optimus overlay to control the
Optimus system (
Activating the Optimus Overlay Bar
).
When necessary, the Optimus system provides messages
with information, instructions, and alerts about faults and
hazards.
A no swimming icon
indicates that you should not
swim when certain Optimus modes are active. In these
modes, propeller control is automatic and could injure
someone in the water.
Activating the Optimus Overlay Bar
1
From a chart, select
Options
>
Edit Overlays
.
2
Select
Top Bar
or
Bottom Bar
.
3
Select
Optimus Bar
.
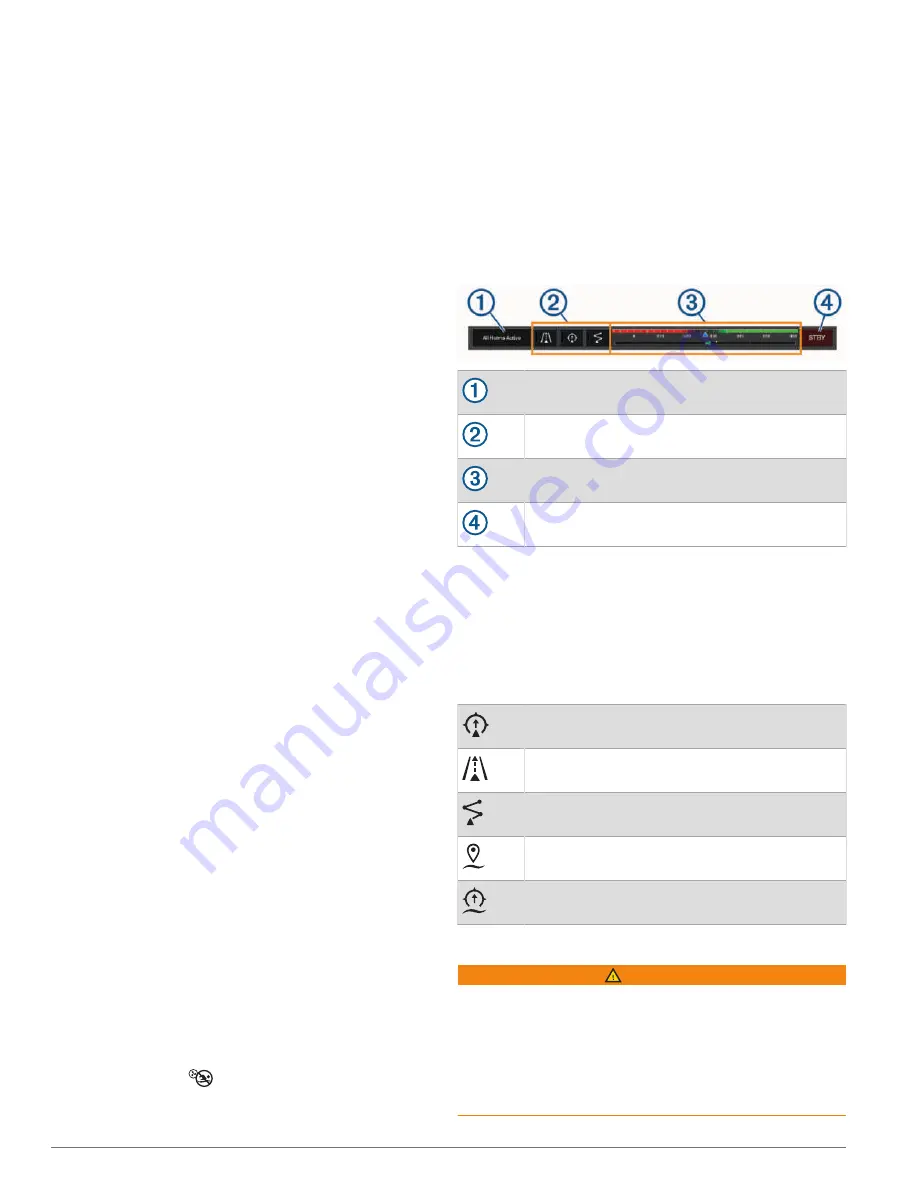
Optimus Overlay Bar Overview
To use the overlay bar, you must connect your Optimus
system to your chartplotter and add the overlay bar to the
necessary screens (
Activating the Optimus Overlay Bar
).
Control mode
Optimus control buttons
Rudder
Standby button
You must press a mode button on the overlay bar to
engage or disengage the mode. When the mode is
engaged, the button is illuminated.
The overlay bar configuration and buttons vary, based on
systems, modes, and equipment. Refer to your Optimus
documentation for more information.
Optimus Overlay Symbols
Autopilot heading hold
Autopilot track mode
Autopilot route mode
SeaStation
®
position hold
SeaStation heading hold
Optimus Limp Home Mode
WARNING
In the event of a steering failure, Optimus Limp Home
mode becomes available. Limp Home mode is a system
override that may severely limit your boat's control. It
should only be used in an emergency if you are unable
to call for assistance. Proceed with extreme caution. Read
the Optimus owner's manual and always wear a personal
flotation device (PFD).
Controlling Third-Party Equipment Installed on Your Boat
67


