background image

3

Bottom Row Keys

The

CDI key

 is used to toggle which navigation source (GPS or VLOC)

provides output to an external HSI or CDI.

The

OBS key

 is used to select manual or automatic sequencing of waypoints.

Pressing this key selects OBS mode, which will retain the current “active to”
waypoint as your navigation reference even after passing the waypoint (i.e.,
prevents sequencing to the next waypoint). Pressing the 

OBS key

 again will

return to normal operation, with automatic sequencing of waypoints. Whenever
OBS mode is selected, you may set the desired course to/from a waypoint using
the OBS Page, or an external OBS selector on your HSI or CDI.

The

message key

 is used to view system messages and to alert you to

important warnings and requirements.

The

flight plan key

 allows you to create, edit, activate and invert flight plans,

as well as access approaches, departures and arrivals. A closest point to flight plan
feature is also available from the flight plan key.

The

vertical navigation key

 allows you to create a three-dimensional

profile which guides you to a final (target) altitude at a specified location.

The

procedures key

 allows you to select approaches, departures and arrivals

from your flight plan. When using a flight plan, available procedures for your
departure and/or arrival airport are offered automatically. Otherwise, you may
select the desired airport, then the desired procedure.

C
O

M

F

P

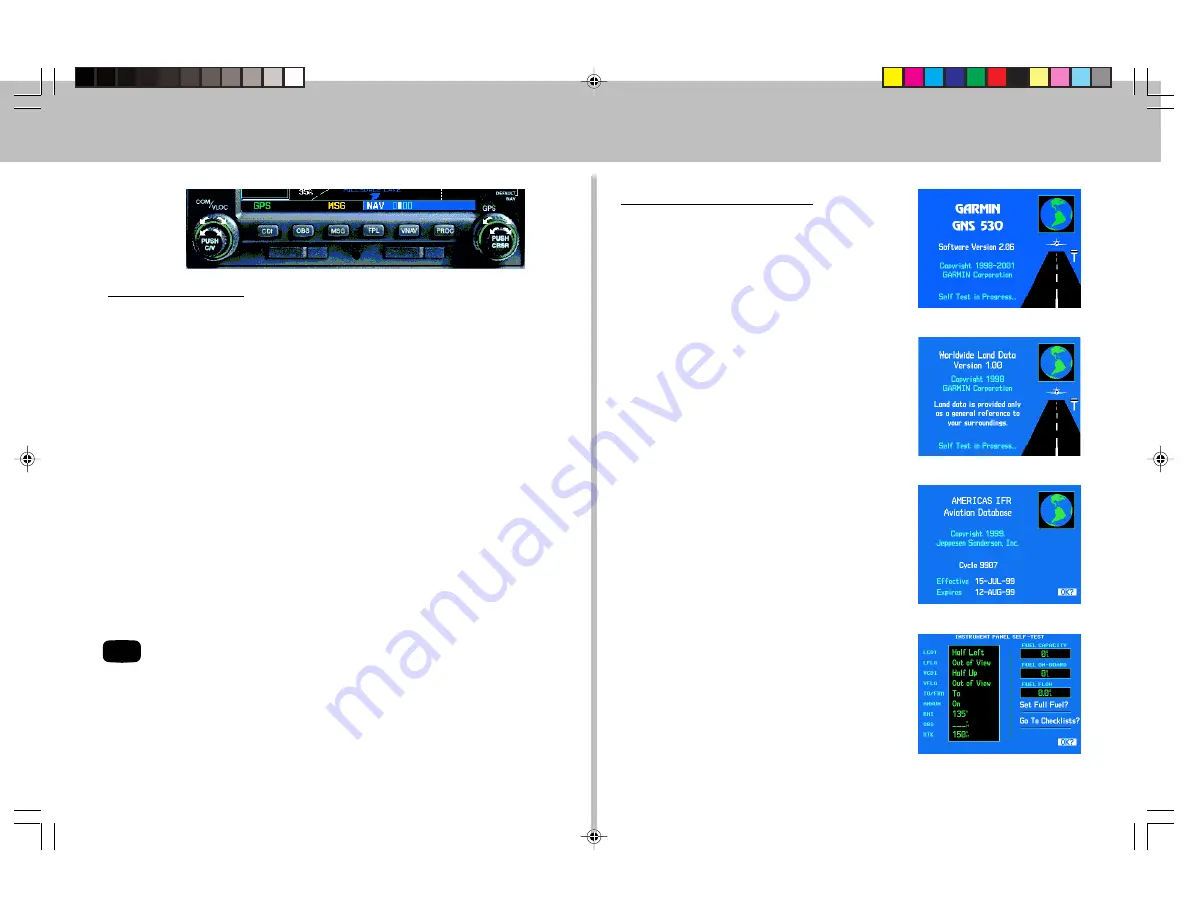
Powering up the GNS 530

1. Rotate the 

COM power/volume knob

clockwise to turn the unit on and set the
desired radio volume.

2. A Welcome Page appears briefly, followed

by the Land Data Page, as the unit conducts
a self-test to ensure proper operation.

3. Once the self-test concludes, the Database

Confirmation Page is displayed, showing
the effective and expiration dates of the
Jeppesen database on the NavData® card.
Press

ENT

 to acknowledge the Database

Confirmation Page and proceed to the
Instrument Panel Self-Test Page.

4. The Instrument Panel Self-Test Page allows

you to verify that the GNS 530 is
communicating properly with in-panel
instruments. Compare on-screen
indications with the information depicted
on connected instruments, such as CDI,
HSI, RMI and/or external annunciators.
Once you have verified proper operation,
press

ENT

 to display the Satellite Status

Page.

5. When the GNS 530 has acquired a

sufficient number of satellites to
determine a position, the Map Page will
automatically appear showing your present
position.

.H\63RZHU2Q

VNAV

Summary of Contents for GNS 530

Page 1: ...1 GNS 530 Quick Reference...

Page 2: ...hand Keys and Knobs The range key allows you to select the desiredmapscale Usetheuparrowtozoom out to a larger area or the down arrow to zoom in to a smaller area The direct to key provides access to...

Page 3: ...vals fromyourflightplan Whenusingaflightplan availableproceduresforyour departureand orarrivalairportareofferedautomatically Otherwise youmay selectthedesiredairport thenthedesiredprocedure C O M F P...

Page 4: ...activate the frequency Use the large right knob to move the GPS window cursor aroundthepage COM Window VLOC Tuning Window GPS Window Frequency Selection 1 If the tuning cursor is not currently in the...

Page 5: ...Map Airport Location Airport Approach AirportFrequency AirportRunway Airport Arrival NDBs Intersection AirportDeparture VOR User Waypoint FlightPlanning Setup Utility Nearest Airport Nearest VOR Near...

Page 6: ...ed 2 Rotate the large right knob to highlight the facility name second line or the city third line field 3 Use the small and large right knobs to enter the facility name or city location of the desire...

Page 7: ...ird line field 4 Use the small and large right knobs to enter the facility name or city location of the desired airport As you spell the facility name or city the GNS 530 s Spell N Find feature will s...

Page 8: ...ser selectable Data Fields all four corners Course Deviation Indicator CDI To From Flag To Select a Different Data Item for any Data Field 1 With the Default NAV Page displayed press the MENU key to d...

Page 9: ...he Data Fields On Along the Right hand Side of the Map Page 1 With the Map Page displayed press MENU to display an options menu 2 Rotate the large right knob to highlight Data Fields On then press ENT...

Page 10: ...en will indicate which part of the list is currently being displayed Frequency Category UsageRestriction Information Assigned Frequency Scroll Bar Auto Tuning a Frequency from the NAVCOM Page 1 Highli...

Page 11: ...iew additionalWPT pages for the selected airport including theAirport Runway andAirport Frequency Pages press the small right knob to remove the flashing cursor Rotate the small right knob to display...

Page 12: ...and press ENT To Stop Navigating a Flight Plan 1 Press FPL TheActive Flight Plan Page will appear 2 Press MENU to display theActive Flight PlanOptions 3 Rotate the large right knob to highlight Delet...

Page 13: ...es is strictly for monitor ing only use theVLOC receiver and external CDI or HSI for primary naviga tion To confirm this reminder highlight Yes and press ENT Notallapproachesinthedatabaseareapprovedfo...

Page 14: ...ortasthelastwaypointintheactive flight plan or using thedirect to key Doing so ensures that the desired waypointwillautomaticallyappearwhenchoosingthe SelectApproach optionfortheProceduresPage Otherwi...

Page 15: ...rwhichitwillreturntoautomatic waypointsequencing TheCDIwillguideyouthroughaDMEarc Justkeeptheneedlecenteredas youflyalongthearc Whenusinganautopilot thecourseselectontheCDI or HSI mustbeperiodicallyup...

Page 16: ...Inc 1200East151st Street Olathe Kansas 66062 U S A GARMIN Europe Ltd Unit5 TheQuadrangle AbbeyParkIndustrialEstate Romsey SO519AQ U K GARMINCorporation No 68 Jangshu2nd Road Shijr TaipeiCounty Taiwan...

Reviews: