background image

12

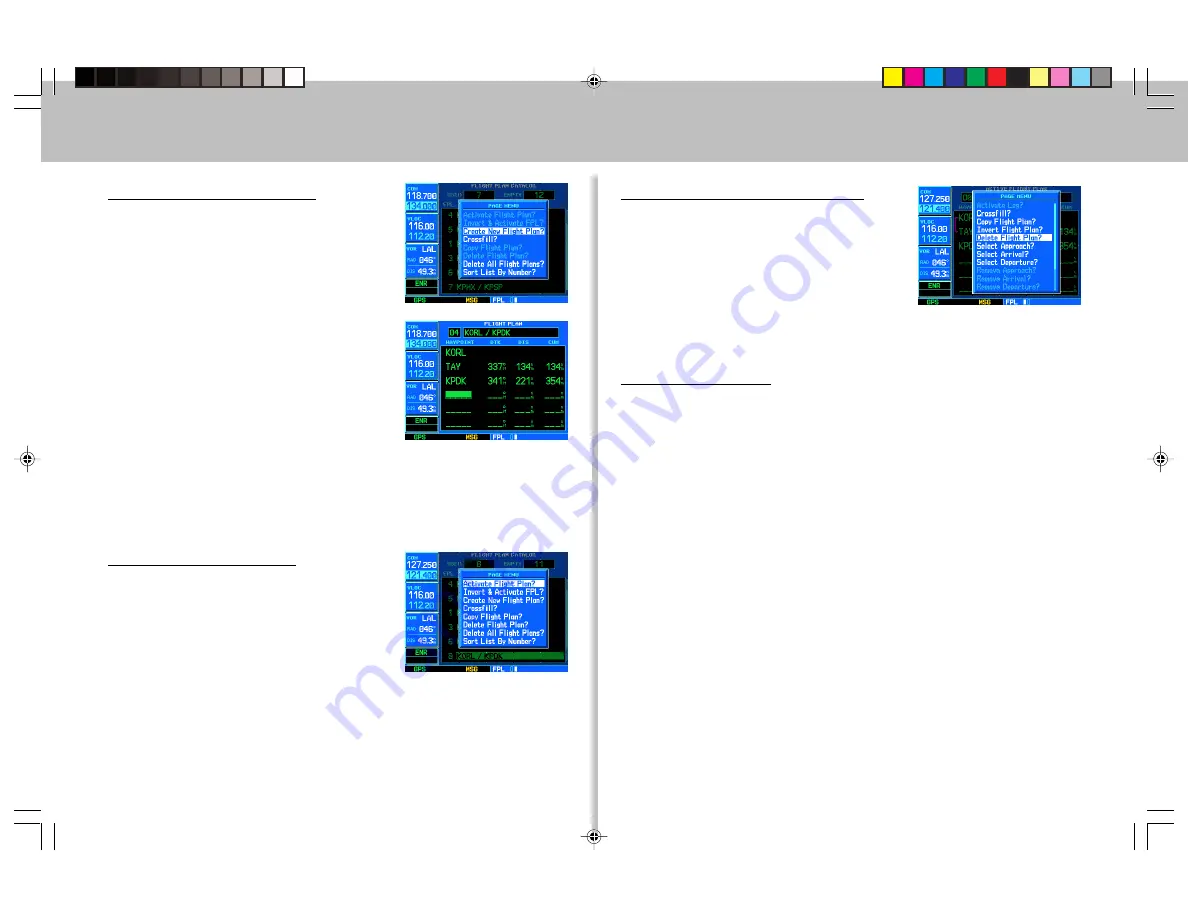
To Create a New Flight Plan

1. Press 

FPL

 and rotate the 

small right

knob

 to display the Flight Plan Catalog.

2. Press 

MENU

 to display the Flight Plan

Catalog Options.

3. Rotate the 

large right knob

 to

highlight “Create New Flight Plan?” and
press

ENT

.

4. A blank flight plan page will appear for the

first empty storage location. Use the

small

 and 

large right knobs

 to enter

the identifier of the departure waypoint
and press 

ENT

.

5. Repeat step #4 above to enter the identifier for each additional flight plan

waypoint.

6. Once all waypoints have been entered, press the 

small right knob

 to

return to the Flight Plan Catalog.

To Navigate a Flight Plan

1. Press 

FPL

 and rotate the 

small right

knob

 to display the Flight Plan Catalog.

2. Press the 

small right knob

 to activate

the cursor.

3. Rotate the 

large right knob

 to highlight

the desired flight plan and press 

MENU

 to display the Flight Plan Catalog

Options.

4. Rotate the 

large right knob

 to highlight “Activate Flight Plan?” and

press

ENT

.

To Stop Navigating a Flight Plan

1. Press 

FPL

. The Active Flight Plan Page will

appear.

2. Press 

MENU

 to display the Active Flight

Plan Options.

3. Rotate the 

large right knob

 to highlight

“Delete Flight Plan?” and press 

ENT

.

4. Press 

ENT

again to confirm.

To Edit a Flight Plan

1. Press 

FPL

 and rotate the 

small right knob

 to display the Flight Plan

Catalog.

2. Press the 

small right knob

 to activate the cursor.

3. Rotate the 

large right knob

 to highlight the desired flight plan and

press

ENT

.

4. To add a waypoint to the flight plan: Rotate the 

large right knob

 to

select the point where you wish to add the new waypoint. (If an existing
waypoint is highlighted, the new waypoint will be placed directly in front of
this waypoint.) Use the 

small

 and 

large right knobs

 to enter the

identifier of the new waypoint and press 

ENT

.

5. To delete a waypoint from the flight plan: Rotate the 

large right knob

 to

select the waypoint you wish to delete and press 

CLR

 to display a “remove

waypoint” confirmation window. With “Yes?” highlighted, press 

ENT

 to

remove the waypoint.

6. Once all changes have been made, press the 

small right knob

 to return

to the Flight Plan Catalog.

)OLJKW3ODQV

Summary of Contents for GNS 530

Page 1: ...1 GNS 530 Quick Reference...

Page 2: ...hand Keys and Knobs The range key allows you to select the desiredmapscale Usetheuparrowtozoom out to a larger area or the down arrow to zoom in to a smaller area The direct to key provides access to...

Page 3: ...vals fromyourflightplan Whenusingaflightplan availableproceduresforyour departureand orarrivalairportareofferedautomatically Otherwise youmay selectthedesiredairport thenthedesiredprocedure C O M F P...

Page 4: ...activate the frequency Use the large right knob to move the GPS window cursor aroundthepage COM Window VLOC Tuning Window GPS Window Frequency Selection 1 If the tuning cursor is not currently in the...

Page 5: ...Map Airport Location Airport Approach AirportFrequency AirportRunway Airport Arrival NDBs Intersection AirportDeparture VOR User Waypoint FlightPlanning Setup Utility Nearest Airport Nearest VOR Near...

Page 6: ...ed 2 Rotate the large right knob to highlight the facility name second line or the city third line field 3 Use the small and large right knobs to enter the facility name or city location of the desire...

Page 7: ...ird line field 4 Use the small and large right knobs to enter the facility name or city location of the desired airport As you spell the facility name or city the GNS 530 s Spell N Find feature will s...

Page 8: ...ser selectable Data Fields all four corners Course Deviation Indicator CDI To From Flag To Select a Different Data Item for any Data Field 1 With the Default NAV Page displayed press the MENU key to d...

Page 9: ...he Data Fields On Along the Right hand Side of the Map Page 1 With the Map Page displayed press MENU to display an options menu 2 Rotate the large right knob to highlight Data Fields On then press ENT...

Page 10: ...en will indicate which part of the list is currently being displayed Frequency Category UsageRestriction Information Assigned Frequency Scroll Bar Auto Tuning a Frequency from the NAVCOM Page 1 Highli...

Page 11: ...iew additionalWPT pages for the selected airport including theAirport Runway andAirport Frequency Pages press the small right knob to remove the flashing cursor Rotate the small right knob to display...

Page 12: ...and press ENT To Stop Navigating a Flight Plan 1 Press FPL TheActive Flight Plan Page will appear 2 Press MENU to display theActive Flight PlanOptions 3 Rotate the large right knob to highlight Delet...

Page 13: ...es is strictly for monitor ing only use theVLOC receiver and external CDI or HSI for primary naviga tion To confirm this reminder highlight Yes and press ENT Notallapproachesinthedatabaseareapprovedfo...

Page 14: ...ortasthelastwaypointintheactive flight plan or using thedirect to key Doing so ensures that the desired waypointwillautomaticallyappearwhenchoosingthe SelectApproach optionfortheProceduresPage Otherwi...

Page 15: ...rwhichitwillreturntoautomatic waypointsequencing TheCDIwillguideyouthroughaDMEarc Justkeeptheneedlecenteredas youflyalongthearc Whenusinganautopilot thecourseselectontheCDI or HSI mustbeperiodicallyup...

Page 16: ...Inc 1200East151st Street Olathe Kansas 66062 U S A GARMIN Europe Ltd Unit5 TheQuadrangle AbbeyParkIndustrialEstate Romsey SO519AQ U K GARMINCorporation No 68 Jangshu2nd Road Shijr TaipeiCounty Taiwan...

Reviews: