2
Select
Start
to start the timer.
3
Go for a run.
When GPS is off, speed and distance are calculated using
the accelerometer in the device. The accelerometer is self-
calibrating. The accuracy of the speed and distance data
improves after a few outdoor runs using GPS. The next time
you turn on or unlock the device, it searches for satellite
signals.
Marking Laps
You can set your device to use the Auto Lap
®
feature, which
marks a lap automatically at every kilometer or mile. You can
also mark laps manually. This feature is helpful for comparing
your performance over different parts of an activity.
1
Select >
Settings
>
Run Settings
>
Laps
.
2
Select an option:
• Select
Auto Lap
>
Turn On
to turn on the Auto Lap
feature.
NOTE:
This is the default run setting.
• Select
Lap Key
>
Turn On
to use to mark a lap during
an activity.
3
Go for a run (
).
Pausing Your Run Automatically
You can use the Auto Pause
®
feature to pause the timer
automatically when you stop moving. This feature is helpful if
your run includes stop lights or other places where you need to
stop.
NOTE:
The paused time is not saved with your history data.
Select >
Settings
>
Run Settings
>
Auto Pause
>
Turn
On
.
Changing Your Data Fields
You can change the data field combinations for the pages that
appear while the timer is running.
1
Select >
Settings
>
Run Settings
>
Data Fields
.
2
Select
Page 1
.
3
Select the data field combination to display on the first page.
4
Select .
5
Select
Page 2
.
6
Select the data field combination to display on the second
page.
Displaying Pace or Speed
You can change the type of information that appears in the pace
or speed data field.
1
Select >
Settings
>
Run Settings
>
Pace/Speed
.
2
Select an option:
• Select
Pace
to display your run pace.
• Select
Speed
to display your run speed.
Activity Tracking
Turning on Activity Tracker
The activity tracking feature records your daily step count, step
goal, distance traveled, calories burned for each recorded day,
and sleep statistics.
Your calories burned includes your base metabolism plus
activity calories.
Activity tracking can be enabled during the initial device setup,
or at any time.
Select >
Settings
>
Activity Tracking
>
Turn On
.
Your step count does not appear until the device acquires
GPS signals and sets the time automatically. The device may
need a clear view of the sky to acquire GPS signals.
Your total number of steps taken during the day appears
beneath the time of day. The step count is updated periodically.
TIP:
From the time screen, you can select
to scroll through
your activity tracking data.
About the Step Goal
You must turn on activity tracking before you can use the step
goal.
Your device creates a daily step goal automatically, based on
the previous day's step count. You can set a personalized step
goal at Garmin Connect. As you move during the day, the
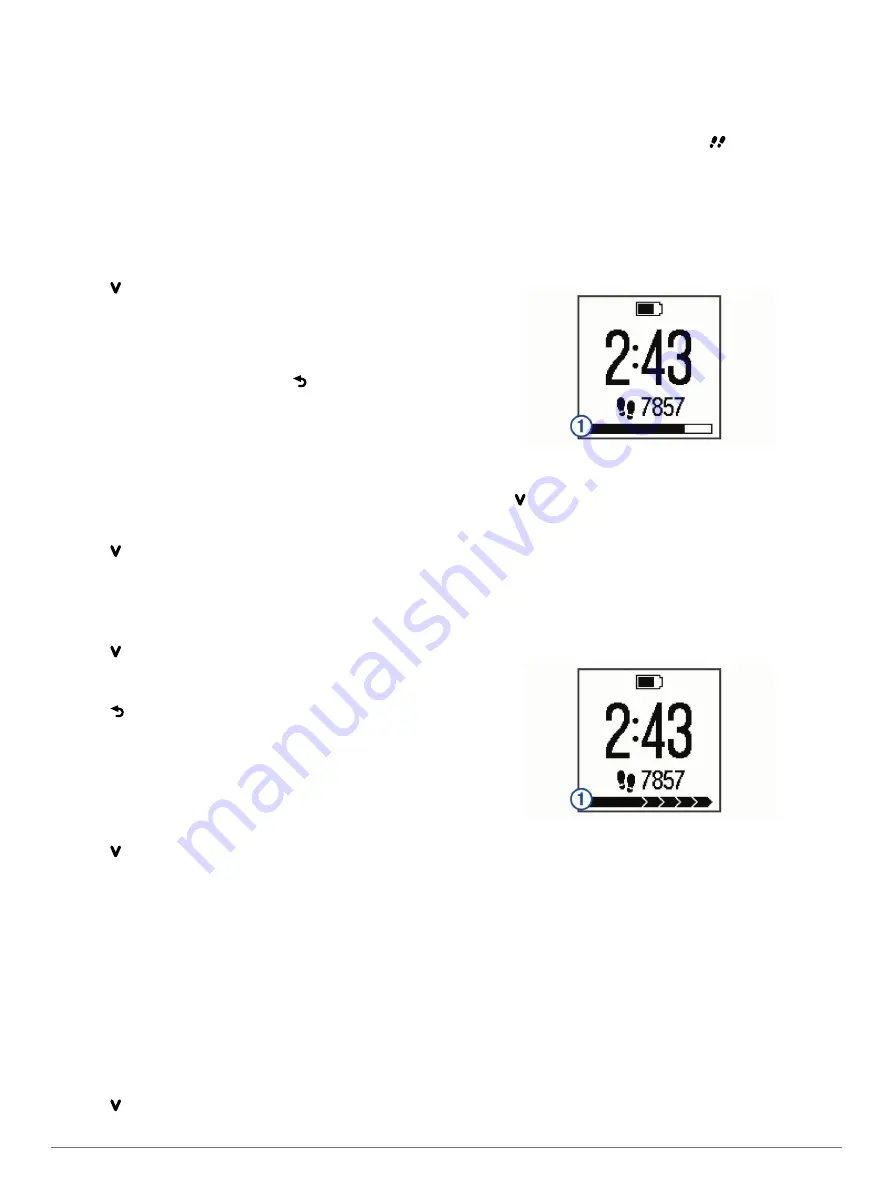
device shows your progress toward your daily goal
À
.
Hiding the Step Goal
You can hide the step goal from the screen.
Select >
Settings
>
Activity Tracking
>
Goal
>
Hide
.
Using the Move Alert
Before you can use the move alert, you must turn on activity
tracking (
).
Sitting for prolonged periods of time can trigger harmful
metabolic state changes. The move alert reminds you to keep
moving. After one hour of inactivity, Move! and the move bar
À
appear. The device also beeps if alert tones are turned on
(
). Additional segments
appear on the move bar after every 15 minutes of inactivity.
Go for a short walk (at least a couple of minutes) to reset the
move alert.
Sleep Tracking
During sleep mode, the device monitors your rest. Sleep
statistics include total hours of sleep, periods of movement, and
periods of restful sleep.
Using Sleep Tracking
Before you can use sleep tracking, you must be wearing the
device.
1
Wear the device while sleeping.
2
Upload your sleep tracking data to the Garmin Connect site
(
).
You can view your sleep statistics on your Garmin Connect
account.
Training
3
Summary of Contents for Forerunner 25
Page 1: ...Forerunner 25 Owner s Manual July 2015 Printed in Taiwan 190 01902 00_0A...
Page 4: ......
Page 13: ......


