9 - AUX PAGES
157
190-00356-00 Rev B
Flight Planning
Scheduler
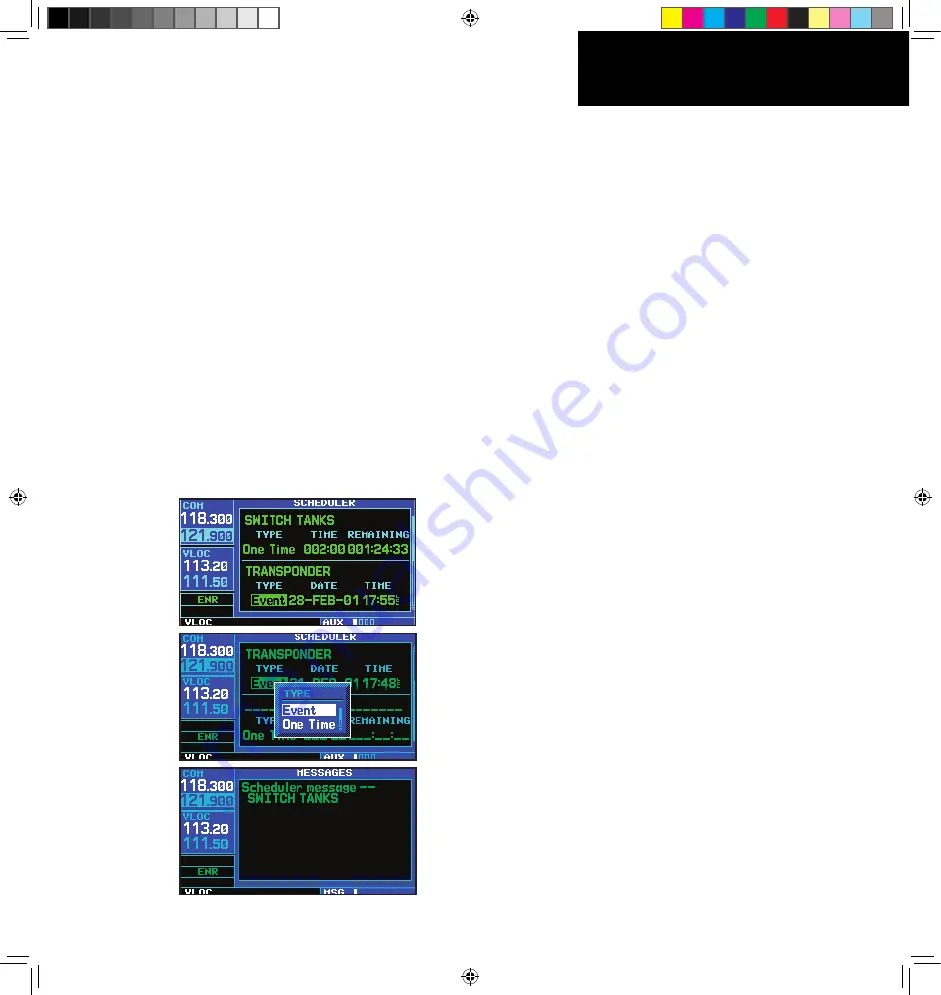
To enter a scheduled message:
1. Select “Scheduler” from the flght plannng
page.
2. The flashng cursor hghlghts the first message
field. If necessary, turn the
large right
knob
to hghlght the first blank message field.
3. Use the
small
and
large
right
knobs to enter
the message text. Press
ENT
when finshed.
(The 400W-seres unt wll store up to nne
scheduled messages holdng 20 characters
each.)
4. The flashng cursor moves to the type field
under the new message. Turn the
small right
knob to dsplay a wndow of avalable optons:
(Event, One Tme, Perodc). Press
ENT
to
select.
5. The flashng cursor moves to the tme/date
field. Use the
small
and
large
right
knobs to
set the tme or date requred before the mes-
sage s dsplayed. Tme s entered as hours/mn-
utes (hhh:mm). Event-based messages expre
at a specfic date and tme. Press
ENT
, when
finshed.
To edit a scheduled message:
1. Select “Scheduler” from the flght plannng
page.
2. The flashng cursor hghlghts the first message
field.
3. To edt the message text, turn the
large right
knob to hghlght the desred message field. Use
the
small
and
large
right
knobs to edt the
message text—enterng the new text drectly over
the old message. Press
ENT
when finshed.
4. To edt the tme field, turn the
large right
knob to hghlght the field. Use the
small
and
large
right
knobs to edt the new date
or tme—enterng the new value drectly over
the old figure. Press
ENT
when finshed.
To delete a scheduled message:
1. Select “Scheduler” from the flght plannng
page.
2. The flashng cursor hghlghts the first message
field. Turn the
large right
knob to hghlght
the desred message field.
3. Press
CLR
to delete the message text, followed
by
ENT
to confirm the deleton.
190-00356-00_0B.indd 157
9/7/2007 2:49:58 PM


