Familiarizing yourself with your appliance
en-us
11
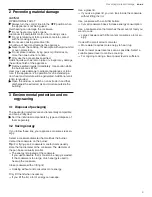
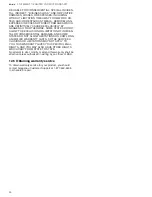
Note: The image of the control knob is representative. De-
pending on the available settings, the individual control
knobs may have some but not all functions described in
the following chart.
Knob position
0
Burner turned off
Electronic ignition
Power levels
9
Highest power level
1
Lowest power level
Burner positions
The markings next to each of the control knobs show
which burner they control.
Burner posi-
tions
Front left burner
Front right burner
Middle burner
Back left burner
Back right burner
Indicator on the illuminated ring
Each control knob is encircled by an illuminated ring with
various display functions.
Display
Meaning
No light
Burner turned OFF
Lights up: Orange
Burner turned ON
Flashing: Orange
Appliance fault
Call Customer Service
Slowly flashing: orange
Appliance OFF
Residual heat indicator
Dual flame burner control
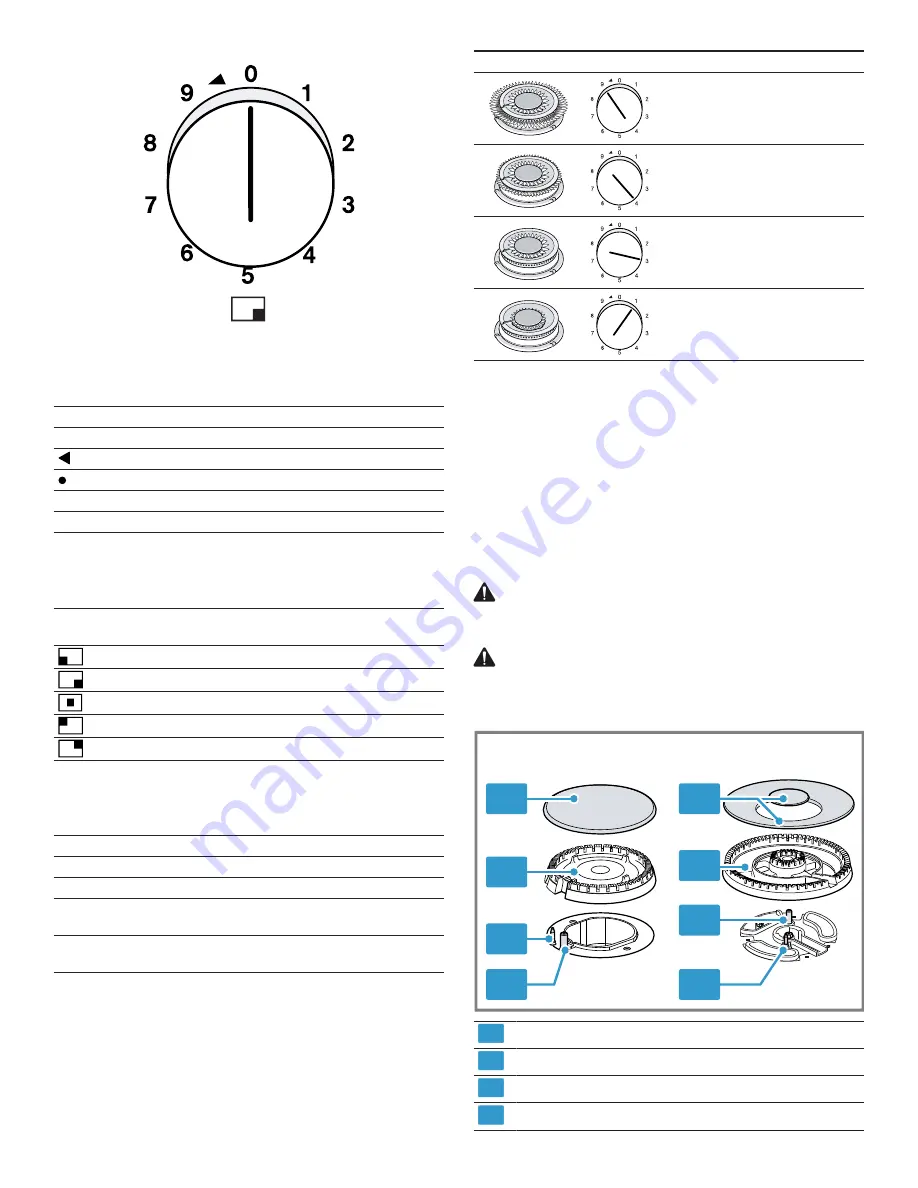
For dual-flame burners, the inner and outer flames can be
controlled separately.
Power level
Meaning
Inner and outer flame on
full power
Outer flame on low power,
inner flame on full power
Inner flame on full power
Inner flame on low power
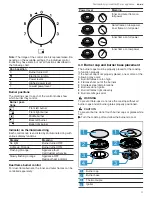
4.3 Burner cap and burner base placement
The burner caps must be properly placed for the cooktop
to function properly.
If the burner cap is not properly placed, one or more of the
following may occur:
¡
Burner flames are too high
¡
Flames shoot out of the burners
¡
Stainless steel discolorations
¡
Burners do not ignite
¡
Burner flames light unevenly
¡
Burner emits gas odor
WARNING
To prevent flare-ups do not use the cooktop without all
burner caps and all burner grates properly positioned.
CAUTION
To prevent burns, do not touch burner caps or grates while
hot.
▶
Turn the cooktop off and allow the burners to cool.
1
2
3
4
4
3
2
1
1
Burner cap
2
Burner base
3
Thermocouple
4
Igniter


