5-2
Entering waypoints by the cursor
1. Press [MENU], [1], [1], [4], [4].
2. If you want to register the waypoint under
a number different from what is shown be-
low “WPT No.,” press the [5] key. Key in
waypoint number in two digits. If you do
not care to change the waypoint number,
go to step 4; the waypoint will be regis-
tered under the number shown below
WPT No.
3. Press the [ENTER/SELECT] key.
4. Place the cursor on the location desired
for a waypoint.
5. Press the [2] key twice to select Cursor,
and a waypoint mark with waypoint num-
ber inside is inscribed at the cursor loca-
tion.
6. Press the [ENTER/SELECT] key to reg-
ister your selection.
7. Press the [MENU] key to finish.
Entering waypoints by manual entry
of latitude and longitude
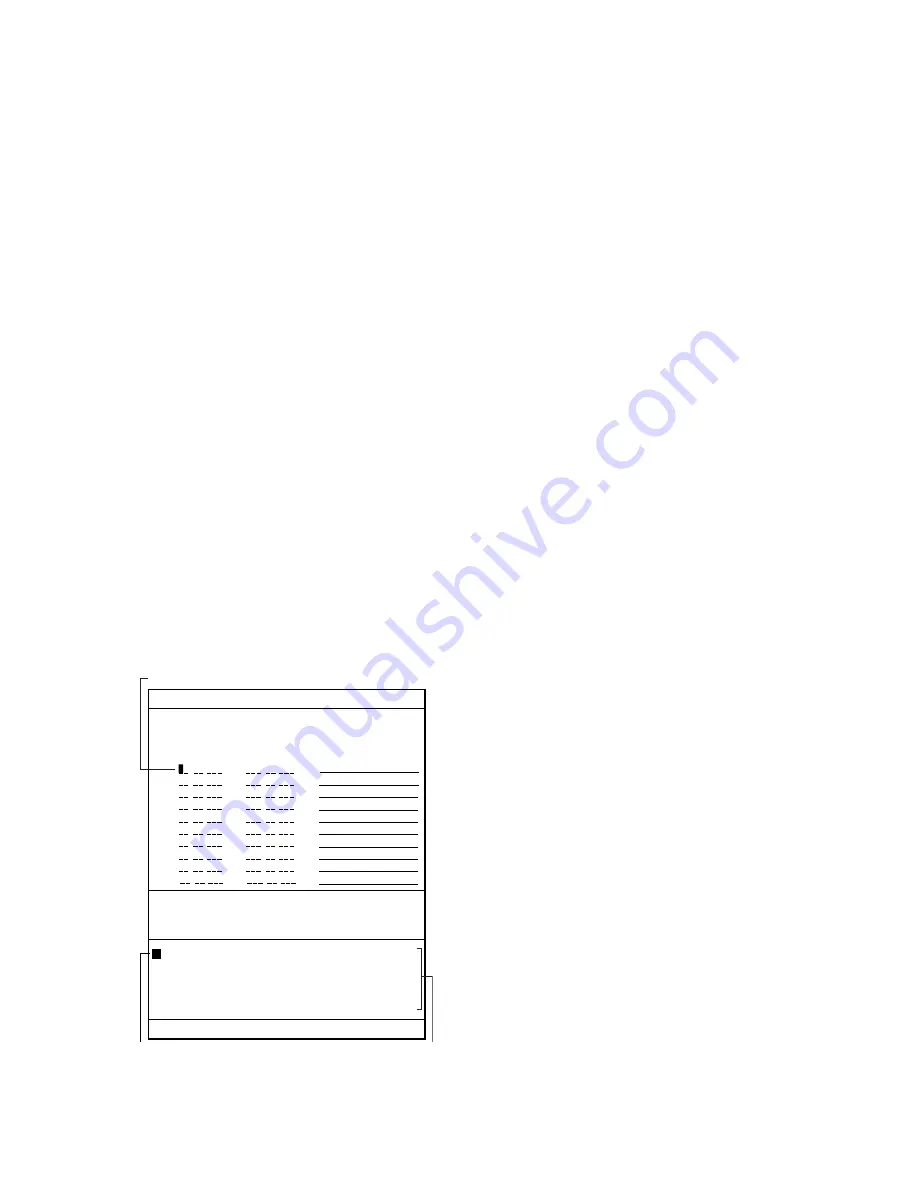
1. Press [MENU], [1], [1], [4], [4].
2. Press the [4] key twice to select List.
(Waypoint List)
No.
Comment
1 0000.000’N
00000.000’E
ABCDEFGHJK
2 0000.000’N
00000.000’E
9876543210
3 . ’N
. ’E
4 . ’N
. ’E
5 . ’N
. ’E
6 . ’N
. ’E
7 . ’N
. ’E
8 . ’N
. ’E
9 . ’N
. ’E
10
. ’N
. ’E
20 . ’N
. ’E
99
. ’N
. ’E
Enter Lat/Long.
N, E: + S,W: — Delete: CLR Enter: ENT
Escape: MENU
Data input cursor
Move cursor by using trackball and press ENT.
Z , - ! ? / & = # _ 1 2 3 4 5 6 7 8 9 0
a b c d e f g h i j k l m n o p q r s t u v w x y
z
›
.
A B C D E F G H I J K L M N O P Q R S T U V W X Y
Figure 5-2 Waypoint list
3. Operate the trackball to place the cursor
on an empty waypoint. You can scroll the
list by placing the cursor at the bottom of
the page.
4. Key in latitude with numeric keys. (You
can switch from North to South and vice
versa with the [-] key. An entire line of data
can be cleared with the [CANCEL/
CLEAR] key.)
5. Key in longitude with numeric keys. (You
can switch from East to West and vice
versa with the [+] key.)
6. Confirm that the cursor is located in the
Comments column. Enter a comment as
follows:
a) Select alphanumeric character with
the cursor. (Numerics can be directly
entered with the numeric keys. A
wrong character can be erased with
the [CANCEL/CLEAR] key.)
b) Press the [ENTER/SELECT] key.
c) Repeat b) and c) to complete the
comment.
d) Select OK.
e) Press the [ENTER/SELECT] key.
7. Press the [ENTER/SELECT] key.
8. Press the [MENU] key to finish.
Waypoint number is marked on the screen.
Entering waypoints with the user
keys (FR-1700 series only)
The user keys ([F1], [F2], [F3], depending on
which waypoint registration function is as-
signed) may be used to register waypoints.
For how to program the user keys see the
operator’s manual for the FR-1700 series
radar.
1. Use the trackball to place the cursor where
you want to make a waypoint.
2. Press the appropriate user key. Next con-
secutive waypoint number is inscribed at
the waypoint location.
Summary of Contents for RP-17
Page 1: ...VIDEO PLOTTER RP 17...
Page 3: ...i i i i i i i i i i i i i i SAFETY INSTRUCTIONS...
Page 39: ...A 1 CHART ICONS The figure below shows all the icons which appear on the radar display...
Page 40: ...A 2 MENU TREE...
Page 41: ...A 3...
Page 43: ...A 5 DATA SENTENCES...
Page 44: ...A 6...
Page 48: ......


