


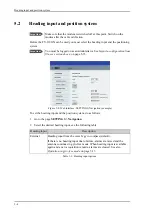


Calibration
5-8
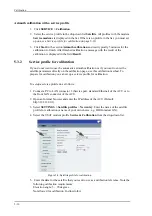
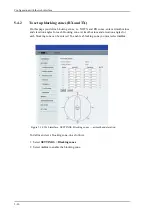
2. Type in the longitude of the satellite.
3. Type in its tracking frequency, 19.707 GHz.
4. Select
Satellite identifier
: GSC.
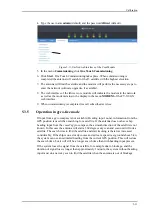
5. Click
Start
and wait typically 5 minutes for the azimuth calibration to finish. A
progress bar is shown during calibration and a message is displayed when the
calibration has completed. In case of failure, see the table in the following section for a
description of error codes during calibration.
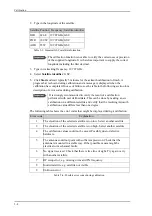
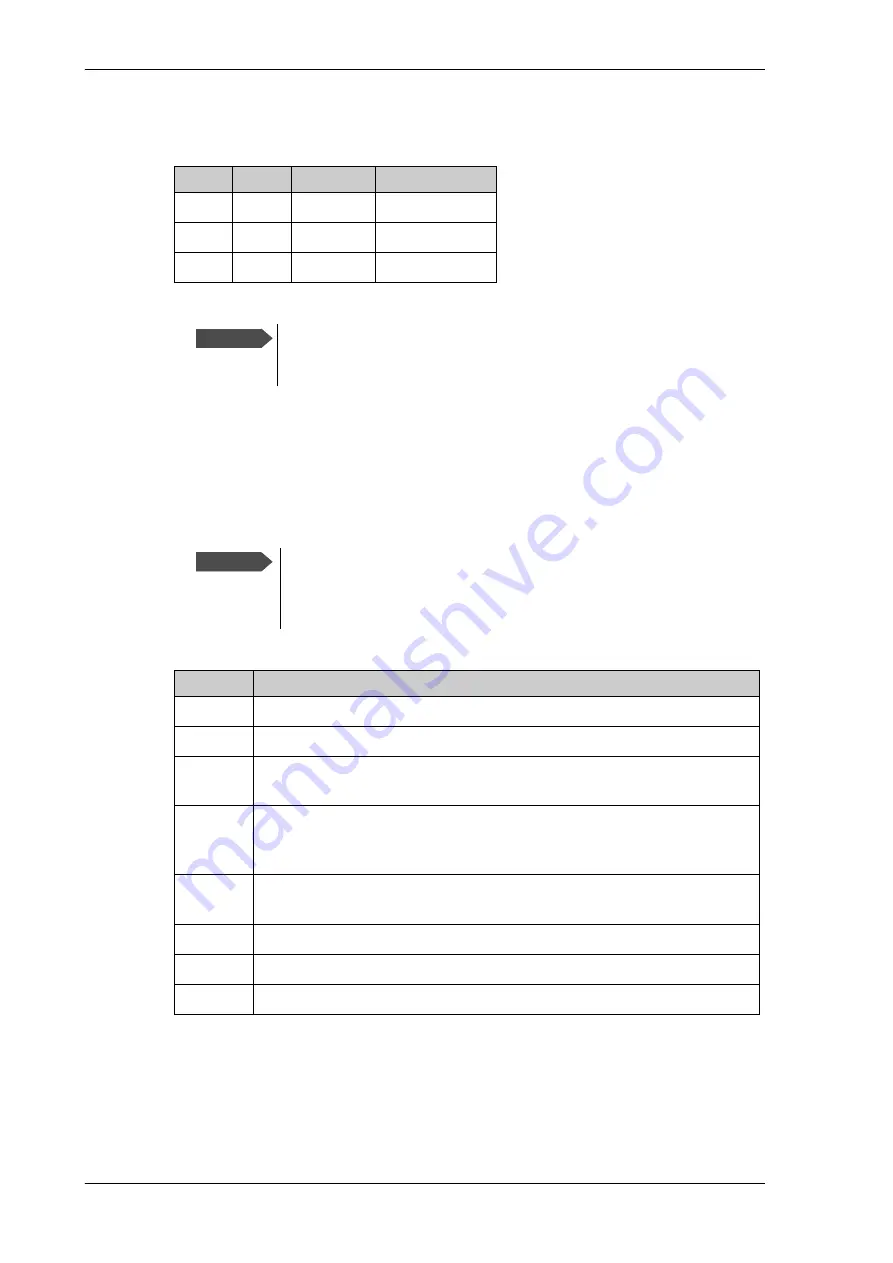
The following table shows the error codes that might be displayed during a calibration.
Satellite Position Frequency Satellite identifier
IOR
62.6 E 19.707 GHz GSC
POR
180 W 19.707 GHz GSC
AOR
55 W
19.707 GHz GSC
Table 5-3: Inmarsat GSC satellite information
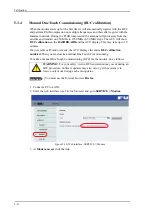
Important
The calibration function is not able to verify the correctness or precision
of the supplied longitude. It is therefore important to supply the correct
longitude including the first decimal.
Important
It is strongly recommended to verify the result of a calibration
performed with user defined data. This can be done by making a new
calibration on a different satellite and verify that the resulting Azimuth
calibration value differs less than one degree.
Error code
Explanation
1
The elevation of the selected satellite is too low. Select another satellite.
2
The elevation of the selected satellite is too high. Select another satellite.
4
The calibration values could not be saved. Possibly due to defective
hardware.
5
The antenna could not point with sufficient precision. Check that the
antenna is mounted in a stable way. Other possible causes might be
electrical or mechanical faults.
6
No signal received. Check that there is free line of sight. Try again or try
with another satellite.
7
RF setup error, e.g. missing or invalid TX frequency.
8
Invalid satellite, e.g. satellite not visible.
9
Unknown error
Table 5-4: Possible error codes during calibration
Summary of Contents for FV-110GX
Page 1: ...GX TERMINAL FV 110GX OPERATOR S MANUAL www furuno com Model ...
Page 16: ...xiv This page is intentionally left blank ...
Page 46: ...Installation of the ADU 2 22 N connector interface on the ADU ...
Page 54: ...To connect the ADU ACU and GMU 2 30 This page is intentionally left blank ...
Page 110: ...Installation check list Functional test in harbor 6 4 This page is intentionally left blank ...
Page 164: ...Supported commands C 10 This page is intentionally left blank ...
Page 165: ...D 1 Appendix D Approvals D This appendix lists the approvals for FV 110GX OEM declaration ...
Page 166: ...OEM declaration D 2 D 1 OEM declaration ...
Page 173: ...OD 1 30 Jul 2018 H MAKI ...
Page 174: ...OD 2 30 Jul 2018 H MAKI ...
Page 175: ...OD 3 2 Oct 2018 H MAKI ...
Page 176: ...OD 4 2 Oct 2018 H MAKI ...
Page 178: ......
Page 186: ......


