RX2540 M1
Upgrade and Maintenance Manual
205
Expansion cards and backup units
9.5.4.5
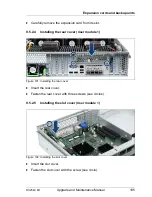
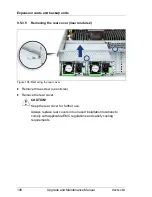
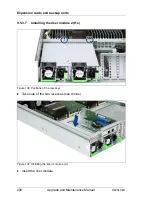
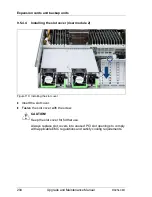
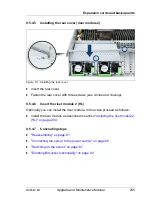
Installing the rear cover (riser module 2)
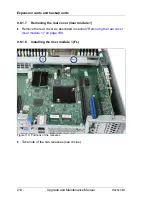
Figure 111: Installing the rear cover
Ê
Insert the rear cover.
Ê
Fasten the rear cover with three screws (see circles and closeup).
9.5.4.6
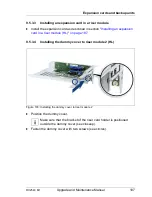
Insert the riser module 2 (HL)
Optionally you can install the riser module. In this case proceed as follows:
Ê
Install the riser module as described in section
"Installing the riser module 2
(HL)" on page 200
.
9.5.4.7
Concluding steps
Ê
"Reassembling" on page 61
Ê
"Connecting the server to the power source" on page 66
Ê
"Switching on the server" on page 67
Ê
"Enabling BitLocker functionality" on page 92
Summary of Contents for PRIMERGY RX2540 M1
Page 24: ...24 Upgrade and Maintenance Manual RX2540 M1 Contents ...
Page 38: ...38 Upgrade and Maintenance Manual RX2540 M1 Before you start ...
Page 68: ...68 Upgrade and Maintenance Manual RX2540 M1 Basic hardware procedures ...
Page 150: ...150 Upgrade and Maintenance Manual RX2540 M1 Hard disk drives solid state drives ...
Page 158: ...158 Upgrade and Maintenance Manual RX2540 M1 System fan ...
Page 316: ...316 Upgrade and Maintenance Manual RX2540 M1 Processors ...
Page 330: ...330 Upgrade and Maintenance Manual RX2540 M1 Accessible drives ...
Page 362: ...362 Upgrade and Maintenance Manual RX2540 M1 Front panel and external front connectors ...
Page 410: ...410 Upgrade and Maintenance Manual RX2540 M1 System board and components ...
Page 418: ...418 Upgrade and Maintenance Manual RX2540 M1 Cables ...
Page 438: ...438 Upgrade and Maintenance Manual RX2540 M1 Appendix ...

