


3.4 Importing Scanned Data to Computer
198
Scanning With
Mailbox
3
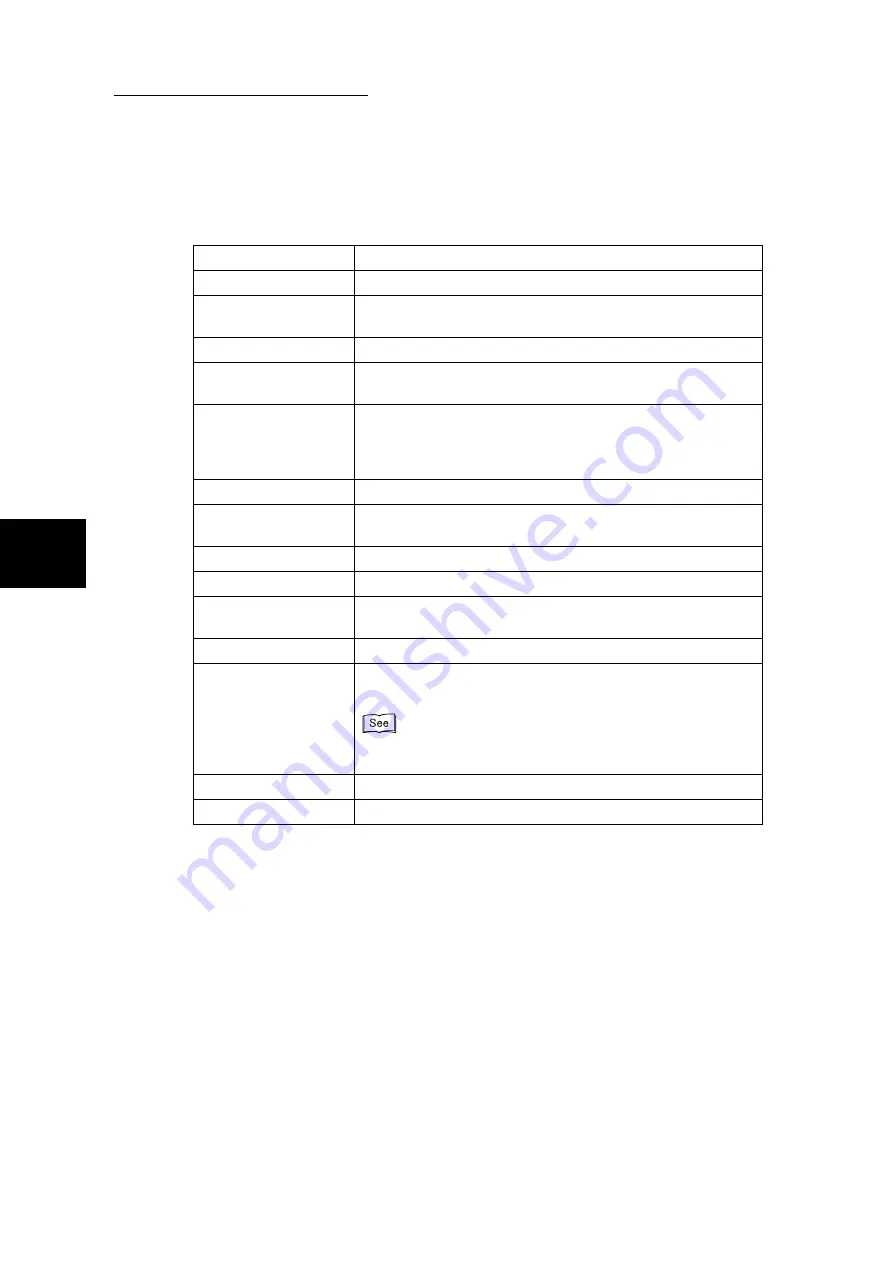
Each item is explained below:
Scanner Name
Displays the name of the scanner which is connected.
Mailbox No.
Displays the number of the mailbox which is selected.
File No.
Displays the number which is automatically assigned by the
machine.
File Type
Displays the type of document.
Date/Time
Displays the date and time of saving the document in the mail-
box.
No. (Pages)
Displays the total number of sheets of documents. When Setting
is clicked, if the Display mode under File List mode is set as
Page in the Setting dialog box, Page is displayed and the num-
ber of pages will be displayed.
Size
Displays the size of documents.
Type
Displays the file format of documents. Select from JPG, MH, or
MHR.
Import button
Imports the document.
Delete button
Deletes the document.
Change Scanner button
Changes the scanner to be connected. Returns to the screen of
step 5.
Update button
Updates the document list in the selected mailbox.
Setting button
Displays the Setting dialog box and the way of displaying docu-
ments and importing documents can be changed.
“3.6.1 Changing Network Scanner Driver Settings” (P. 208) for
details on the method of changing.
Cancel button
Closes the color network driver.
Help button
Displays the on-line help of the color network scanner driver.
Summary of Contents for DocumentCentre C240 Series
Page 16: ...Part 1 Printer ...
Page 116: ...4 10 File Upload Printing 103 4 Special Printing 5 Click Start to start printing ...
Page 127: ...Part 2 Scanner ...
Page 238: ...Part 3 Appendix ...


